
Redesigning Sleeves, Part 4: Thinking Outside the Box

For this post, I’ve gone rogue and abandoned the sleeve sloper we created earlier for this series. Don’t worry, the sloper will be back for the next installment of my Redesigning Sleeves, series.
Initially, this design was inspired by another designer, the beloved Zandra Rhodes. As is often the case, though, this idea has taken on a life of its own.
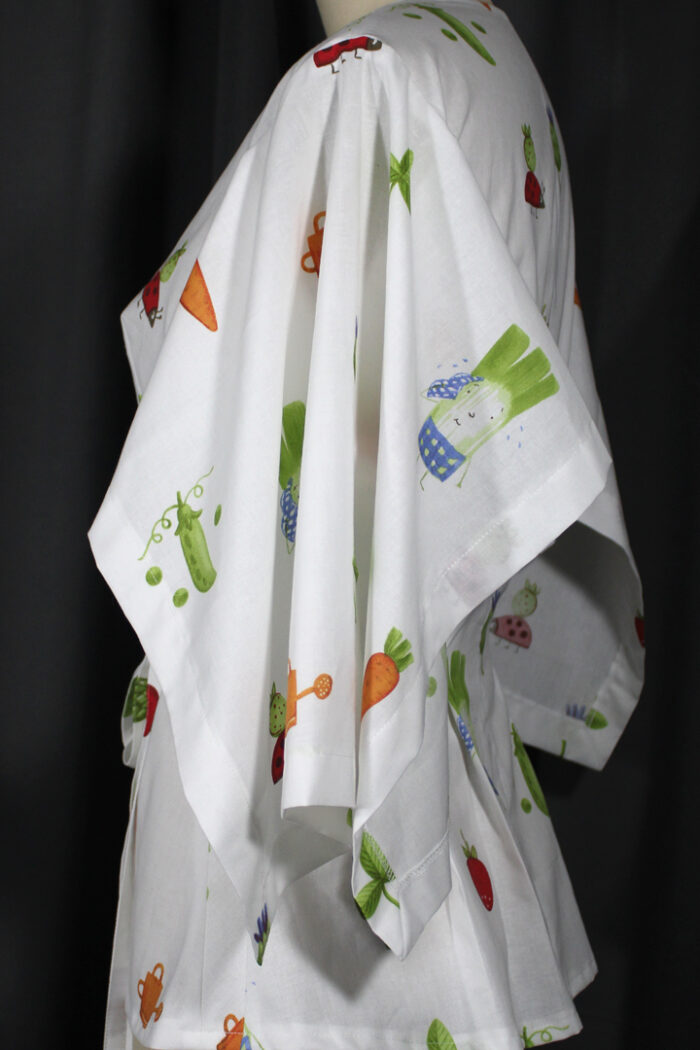
I love handkerchief points on practically anything wearable, but on sleeves they can be magically fun. This sleeve takes the idea of a simple handkerchief hem and creates a geometric sleeve that not only allows for maximum volume, but still shapes like a sleeve with an under-the-arm seam.

A side view of the handkerchief hem sleeve reveals fullness even with a set-in sleeve.
This pattern is purely drafting with a little math, but I promise it’s simple math; after all, I’m a patternmaker, not a rocket surgeon . . . or brain engineer . . . or someone who uses math a lot.
Note: For the sake of photography, the pattern I’m showing you is not drawn to scale. However, I will provide you with the real measurements I used to create my pattern so there is no confusion. As always, substitute the measurements you need based on the garment pattern you are using. I’m drawing with a marker so you can see the lines, but it’s best to use a mechanical pencil to draft your pattern.
Do the math
1. Begin by measuring your front and back armhole seamlines. Add the two measurements. When I add 9 5/8 inches (back armhole) and 9 7/8 inches (front armhole) I get 19 1/2 inches.
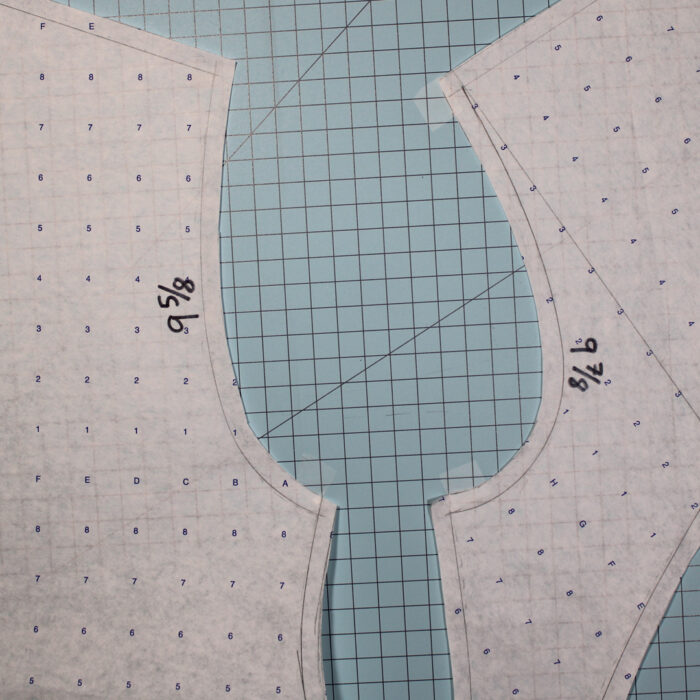
2. Divide this measurement by 3. My measurement is 6 1/2 inches.
3. To this measurement, add 1/4 inch. This will add 3/4 inch ease to the sleeve. You can add more if you plan…
Start your 14-day FREE trial to access this story.
Start your FREE trial today and get instant access to this article plus access to all Threads Insider content.
Start Your Free TrialAlready an Insider? Log in


This is super cool! It's a short sleeve with the coverage of a long sleeve. Just as a note: I would really like to see this on a human arm to see how it falls.