


As I approached the 2022 Digital Ambassadors’ Luxury Loungewear Challenge, I wondered what new techniques I could incorporate in my sewing practice for a style of garment that is typically easier for me to sew. After all, elastic waistbands are a defining feature of loungewear and are an easier alternative to buttons or zippers. In the end, after I had chosen my fabric and my pattern, I knew that I would be challenged by learning to sew with silk and adjusting my shirt patterns to better fit my body.
After doing research about sewing with and caring for silk, I felt better equipped to start sewing and less scared of this classic garment fabric.
Advice for sewing with silk
Here are my top tips for beginners who might be hesitant to try sewing with silk.
Prewash the fabric in the manner you plan to wash it once it is sewn up. I decided to wash the fabric on a delicate cycle and lay it on a clothing rack to air dry, which felt less risky as I was working with a slightly textured silk crêpe de Chine. Some people are firmly in the “hand wash only” camp when it comes to silk, but that is not practical for my lifestyle nor for this style of garment that is meant to have more use than a special occasion garment. I knew there was a risk of the colors running on the floral printed fabric, so I washed it separately with a couple of color catcher sheets in the washer.
Not all silks are created equal, so choose a silk that is easier to work with. Silk satin is slippery and might be frustrating for a first-timer. Silk crêpe de Chine was less fussy and easier to work with than some rayon fabrics I’ve sewn with.
Cut flat with your fabric in one layer. If you are a pins-and-scissors enthusiast, you may have to set that preference aside for silk, as the fabric can shift if you pin the paper to the fabric. I didn’t want to run the risk of putting too many holes into thinner fabric. I used pattern weights, two large cutting mats, and a fresh blade on my rotary cutter, while regularly checking to make sure the pattern grainlines were parallel to the selvage.
Start with a muslin. This may seem like an obvious tip, but there is nothing worse than spending lots of money on special fabric and sewing a garment only to find out that it does not fit you. I admit that I often throw caution to the wind and don’t make a practice version first, but I take my time with fabrics that are expensive or difficult to work with. For my tops, I made a cropped version of the bodice with only one sleeve set in. That made it easier for me to use scraps from previous projects made with rayon, which has a similar weight and texture to silk. If you don’t want to spend time on a practice garment that you won’t wear later, you can make a wearable muslin out of less expensive fabric.
Use a finer needle and silk pins. A Microtex needle has a narrower, more acute point than a universal needle and meant for densely woven or fine fabrics. Silk pins have a finer point than regular pins, which might leave larger holes in your fabric.
Use the seam ripper with care. You will certainly make mistakes—like attaching your bodice pieces backwards, like I did—so be careful when you are unpicking seams, to avoid accidentally tearing a hole in the delicate fabric.
Fitting silk loungewear tops
The second challenge I faced was fitting my tops. I admit that I can be a bit of a lazy sewist when it comes to fitting. I often choose loose, unstructured garments when I am deciding what to sew rather than face my fitting demons on a more structured garment. This challenge provided an opportunity for me to pay closer attention to areas that warrant adjustments when I have opted not to make them before.
Calculate bust cup size
I knew before starting to sew that the Gilbert pattern might pose fit problems as the smaller size range for Gilbert is drafted for a B cup, and I am an A cup. I calculated my cup size by subtracting my high bust measurement (35 inches/90 cm) from my full bust measurement (36 inches/92 cm) and locating the size that corresponded with the difference (1 inch/2 cm) on a cup size chart. Calculating my sewing cup size helped me better understand how to address fit issues such as tight shoulders or a misplaced dart.
Armed with my cup size, I began to weigh the pros and cons of various adjustments that I could try. I knew I wanted a slightly oversized look, so I decided to start by cutting a size bigger than my measurements to see if that would resolve my typical tight shoulder issues. After going up a size I knew that I would need to address the dart, which would certainly be in the wrong place for a person with a smaller cup size. I typically have to reposition the dart in most patterns, but I wanted to completely remove the dart on this top because bust shaping on a loose garment seemed pointless.
At this point, I debated whether I should do a small bust adjustment (SBA) or to simply remove the dart. Since an SBA often eliminates the dart in a bodice anyway, I decided to remove the dart from the pattern before sewing a muslin so I could find out if simply removing the dart would give me the look I was trying to achieve without distorting the proportions of the bodice, since I had already decided to go up a size.
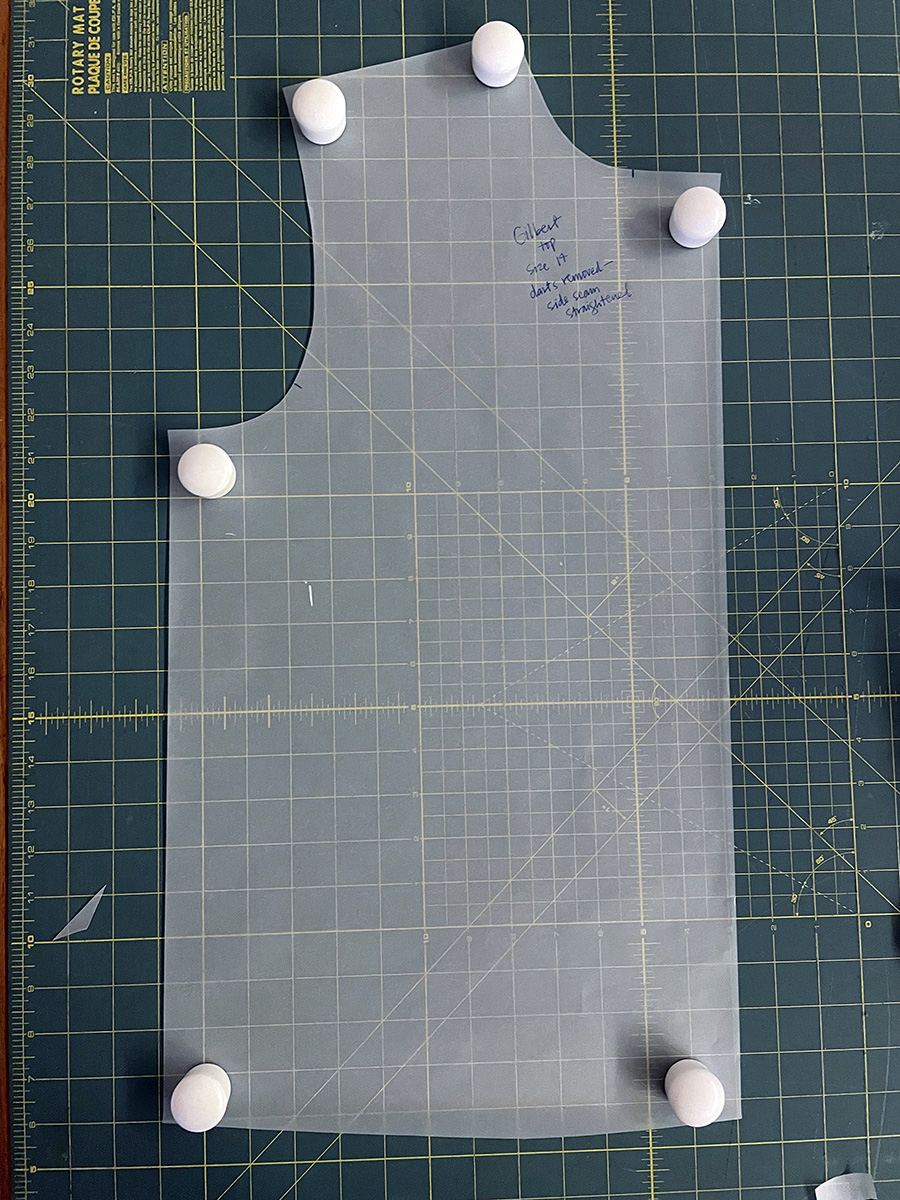
How to remove bodice darts
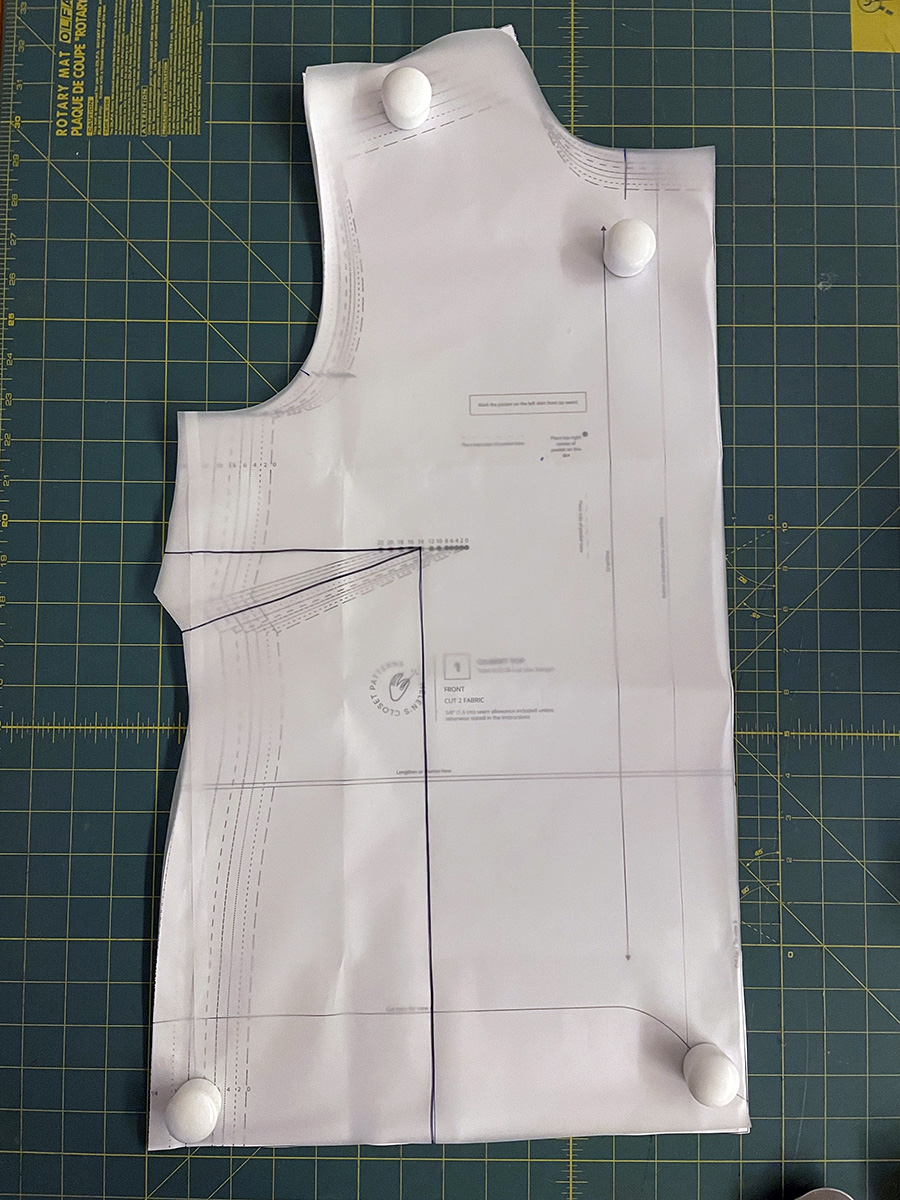
Here’s how I removed the dart from my pattern piece.
I started by tracing the pattern onto a new piece of paper. I drew a vertical line from the dart point to the hem, making sure that the line was parallel to the pattern edge.
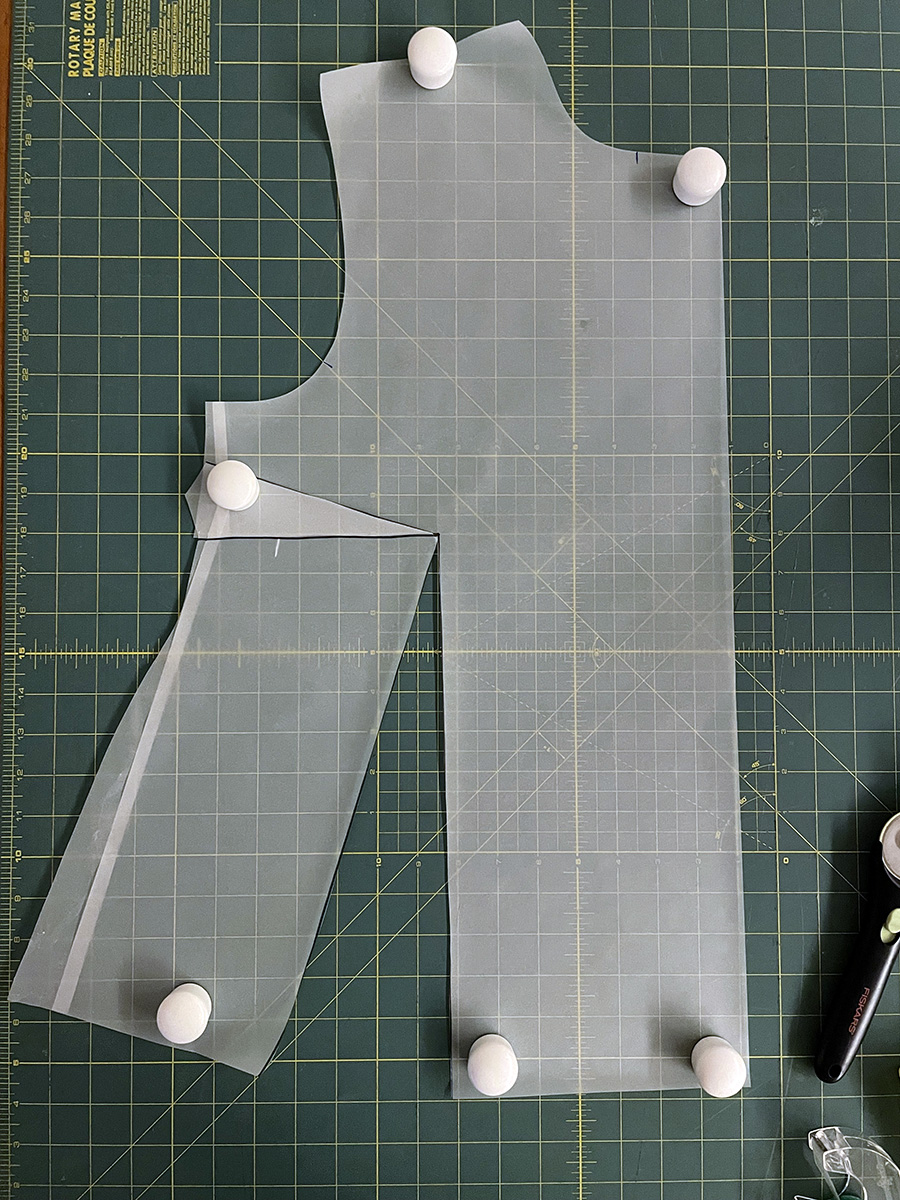
I cut the line I drew from the hem to just before the dart point. I also cut one dart leg. Then I rotated the detached piece toward the armscye to close the dart.
I slid a piece of paper underneath my pattern piece so I could continue to mark up my pattern. I marked a spot in the lower part of the armscye 5/8 inch (the width of the seam allowance) from the edge of the pattern. I drew two lines from that point, one to each corner of the wedge that my detached pattern piece had created, which made another dart.
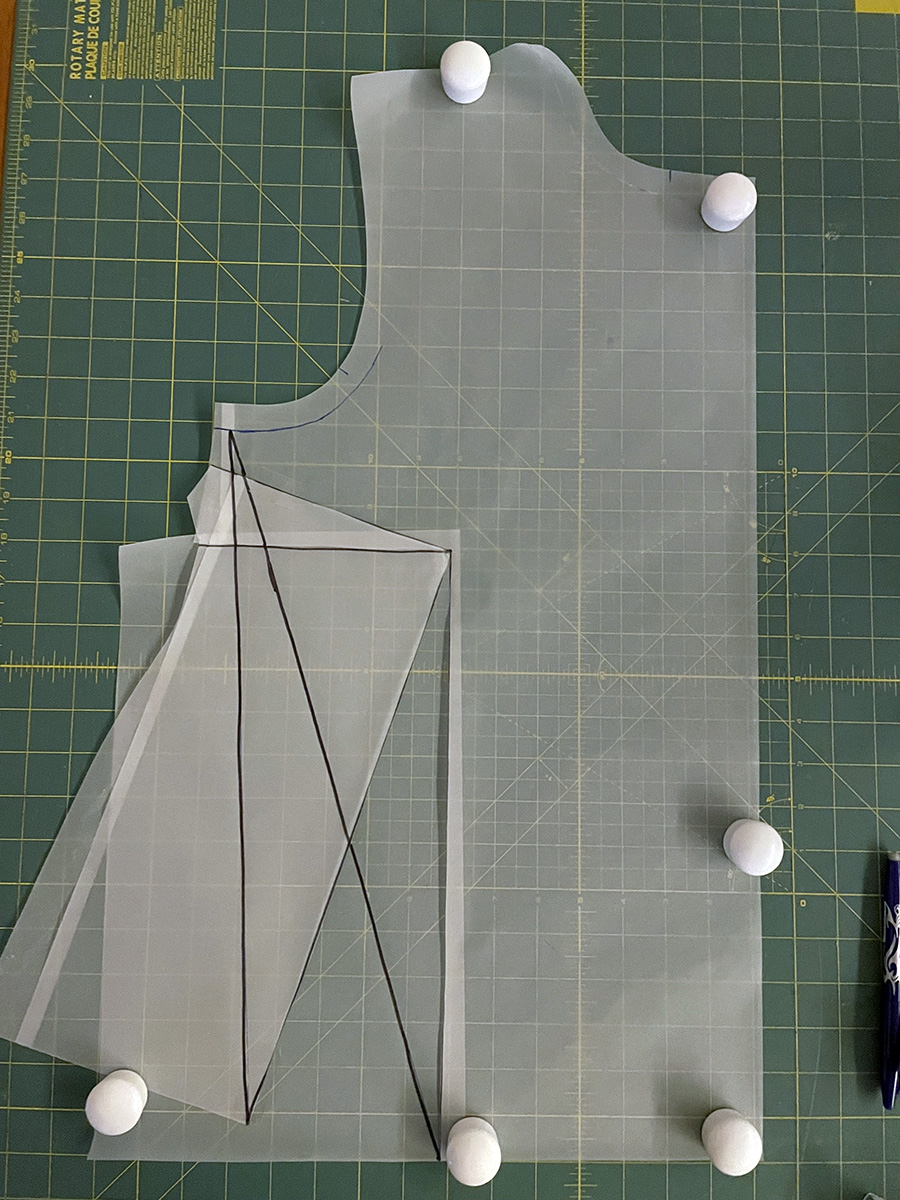
I cut the lines I just drew, leaving a small hinge at the seam line of the armscye, then closed the dart that I created.
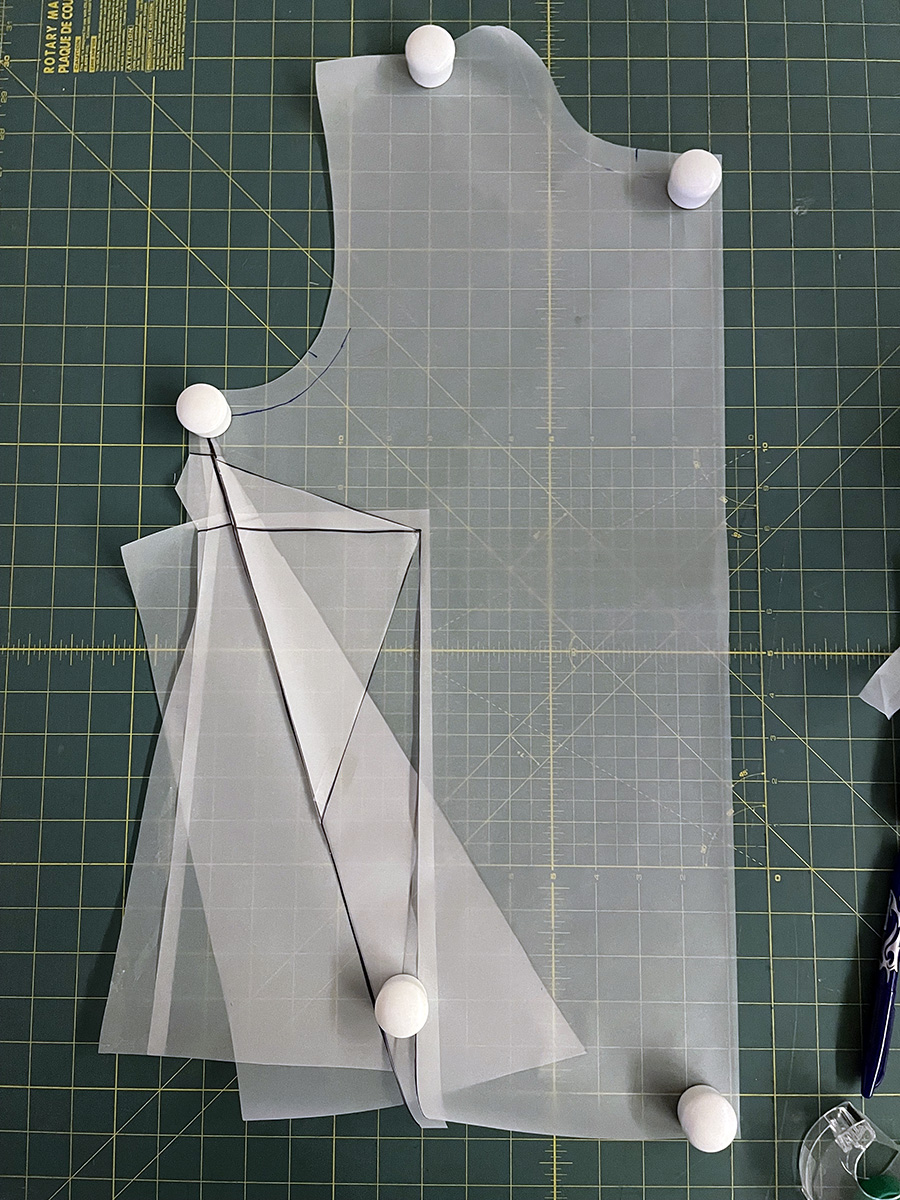
I trimmed the excess paper at the dart and re-drew a shorter hem to compensate for the length lost when the dart was removed.
I traced the pattern onto a new piece of paper, re-drawing the hem and shortening the length that was removed when the dart was eliminated. I also straightened out the side seam of the top front piece as I did not need the shaping of the pattern as drafted.
Two alterations yielded good results
Fortunately, these two small modifications resulted in a well-fitting top that was neither too tight in the shoulders, nor too loose in the bust. Taking the precautions of making a muslin in a practice fabric and modifying my patterns was certainly time-consuming, but paid off when my finished product was the look I was hoping for without compromising on fit and comfort.
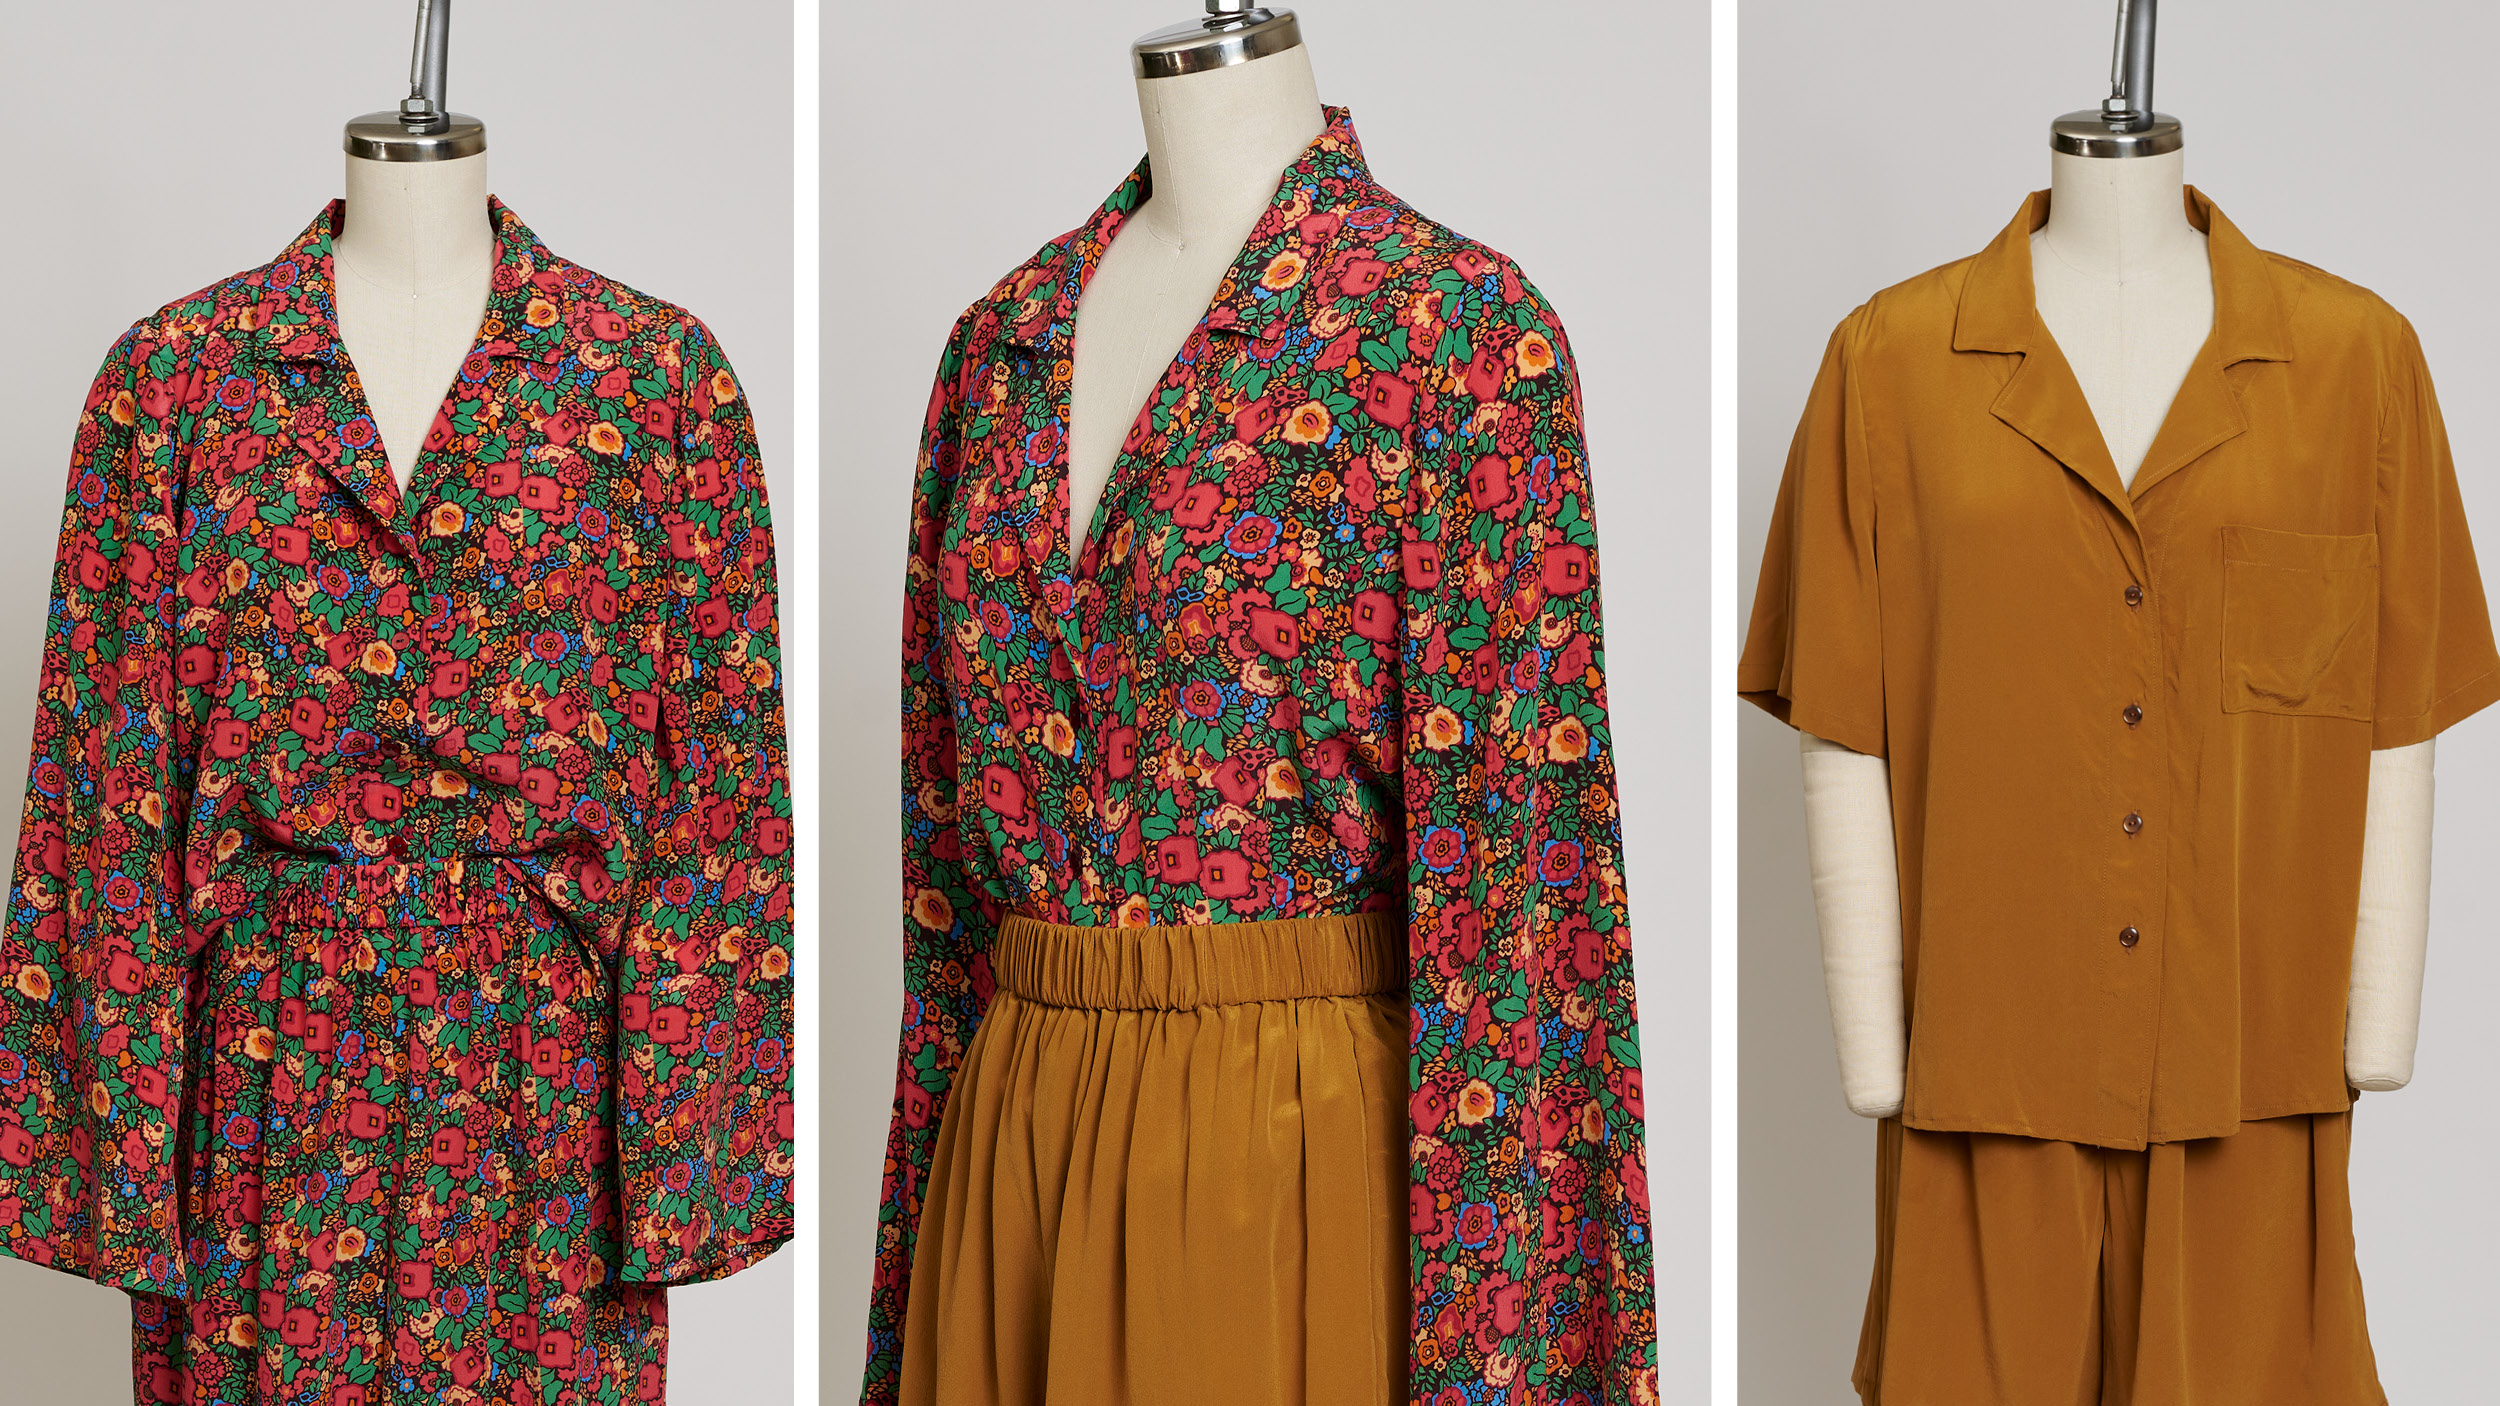
Editor’s note: To find out more about the ensemble Hannah created for the 2022 Digital Ambassadors’ Luxury Loungewear Challenge, read her first installment here. You can also see what her three challengers created and find out about the winning ensemble here.
Photos: courtesy of Hannah Hamill, except where noted.


I have been sewing with silk for ages. One of the best things is to get a straight stitch needle plate with one hole with a matching straight stitch foot. That way fine silk does not get sucked into the bigger zig-zag hole. Use either cotton or silk thread, because you want the thread to wear out before the fabric (which is weaker when it is wet). Seams can be re-sewn, it is harder to re-weave fabric.
If you have time: practice, practice, practice. A third of a yard of silk fabric will not break the bank, and it is enough to make a mobius scarf. First practice the tiny machine baby hems (baste, fold, stitch, trim, fold, stitch). Flat stitch the selvage on each end, but after turning one over. I have several silk mobius scarves in my closet.
Some silk weaves sew up like a dream. Others are evil and annoying. Liquid stabilizer helps, just soak the silk in one part liquid stabilizer to three parts water, hang to dry. Or work on your finger endurance by spraying it on the hung fabric (been there, done that... ouch).
"Some people are firmly in the “hand wash only” camp when it comes to silk, but that is not practical for my lifestyle nor for this style of garment..."
Very good advice. I just bought silk knit fabric and machine washed it (working on the cotton knit muslins now). Though I will argue that it is nice that silk is light enough to be hand washed while traveling. Six years ago I made a capsule tops wardrobe with inexpensive silk from a yard sale and dye*. I made five shirts and three jackets. They are easy to wash in a hotel sink, and I pleat twist the shirts to dry (they were too big because I added ease to a sloper, pleating was a design opportunity!), and just iron the jackets in the hotel room (see attachment). I am hoping my silk knit capsule wardrobe that I am working on will eliminate the twist tie and ironing bit (plus I am having an education blast with my cotton and bamboo muslins).
* Dye was another adventure. Something I was introduced to by many Threads articles decades ago, including trying onion dyeing in Issue #1 from a Threads Archive (it even had mushroom dyes in a later issue!). Unfortunately not so much anymore.