
Frame Your Face with a Butterfly-Shaped Statement Collar
Frame your face with a wing-shaped collar
Vintage clothing is a source of inspiration for many designers. Inspiration is not the same as copying, though. An exact copy of the circa 1940 dress on the back cover would look costumey. A small change to the original design can have a big impact, though. Now the look is modern and interesting.
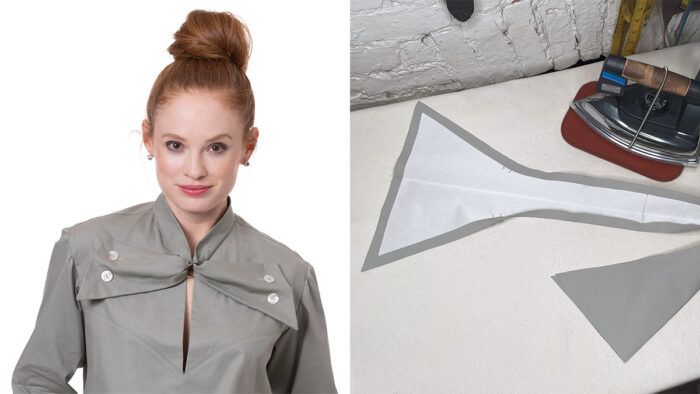
The inspiration dress’s most intriguing feature is a button-back collar that looks like a pair of outstretched wings. A small stand-up collar is extended and widened at the front, then passed through a ring, folded back, and buttoned to the yoke. This neckline treatment is a way to perk up a basic blouse pattern, and you can draft the yoke and collar by following the process detailed on these pages. When selecting fabrics, choose yoke and collar textiles with body to support the collar and the 1-1/4-inch ring. Anything from a substantial cotton shirting to lightweight denim would make a sharp day look. For a formal occasion, sew an updated tuxedo shirt in crisp white cotton piqué, embellished with jet or crystal buttons. You can create endless variations by changing the yoke and collar-extension shapes.
Yoke and Collar Stand
Start with a basic shirt pattern that has a jewel neckline or a traditional stand collar. Remove the seam allowances; you’ll add them back later.
1. Measure the back neckline

Measure from the shoulder seam to center back; record this length.
2. Draw the front yoke seamline
You can make this any shape you like, but to achieve the look of the original garment, draft the line from two-thirds of the way down the armhole to a point midway between the bust and waist levels. With a fashion curve as a guide, create a smooth curve. Add notch marks for matching.
3. Draft the collar stand

Mark a point 3 inches to 4 inches down from the center-front neckline. With a straight line, connect this point to the neckline/shoulder seam intersection. Extend the line beyond the shoulder seam by the back neckline measurement, minus 1/4 inch. Draw a perpendicular line, 1-1/4 inches long, from the line’s upper end to form the center back. From the center-back line, draft a line parallel to the V-neckline. This is the collar stand.
Collar Wing Extensions
You’ll determine the desired size and shape of the “wing” extensions then add them to the collar stand draft. These instructions are based on a 1-1/4-inch diameter O-ring.
1. Make space for the O-ring

To accommodate the ring’s diameter, you need to create a space at the garment’s center front. In this case, the O-ring has a diameter of 1-1/4 inches; the half pattern must be adjusted by half that amount. Measuring perpendicular to the center-front line, find and mark a point that’s 5/8 inch from the V-neckline.
2. Draft the front opening

Connect the point you just drew to the yoke’s bottom edge at center front. Square a line out from the point to meet the collar stand’s outer edge. Label that point A.
3. Establish the wing’s size and shape

Draw a line on the bodice representing the desired end length and position of the wing extension. Label the ends B and B1. Here, the line is 5-1/2 inches.
4. Draft the wing extension

Measure from A to B. Extend the collar stand’s outer line from A by this amount and label the end point C. Square a line out from C, toward the center front, making it the length of BB1. Label the new point D. (D may extend past center front into the bodice pattern.)
5. Trace the collar portion

First, gently curve the inner corner where the stand meets the extension. Then trace the shaded area onto fresh paper. Add two notches for matching, one at the front neckline join and the other 1/2 inch away, toward the extension’s end. Don’t cut the paper.
Kenneth D. King is a Threads contributing editor.
Illustrations: Steven Fleck


Log in or create an account to post a comment.
Sign up Log in