Timeless Shirtwaist Dress
Skill Level:
The sewing is moderate. The only difficulty our tester found is the skirt’s side-seam pocket construction, which may be a challenge to execute beautifully. There are many ways to make a pocket, so if this method does not feel right, apply an alternative technique.
Size Range and Fitting:
This layered pattern comes in two size ranges, sizes 6 to 20 and sizes 18 to 30 for busts 31 inches to 57 inches, waists 24 inches to 50 inches and hips 34 inches to 60 inches.
Fabrics:
Ideal for crisp, lightweight fabrics such as shirting and cotton lawn. This is a versatile everyday dress, so make it in whatever fabric makes you smile, such as a Liberty print or a fun chintz.
Style and Sewing Details:
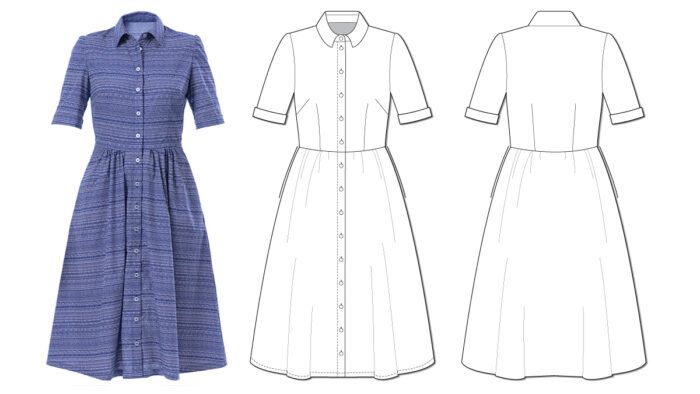
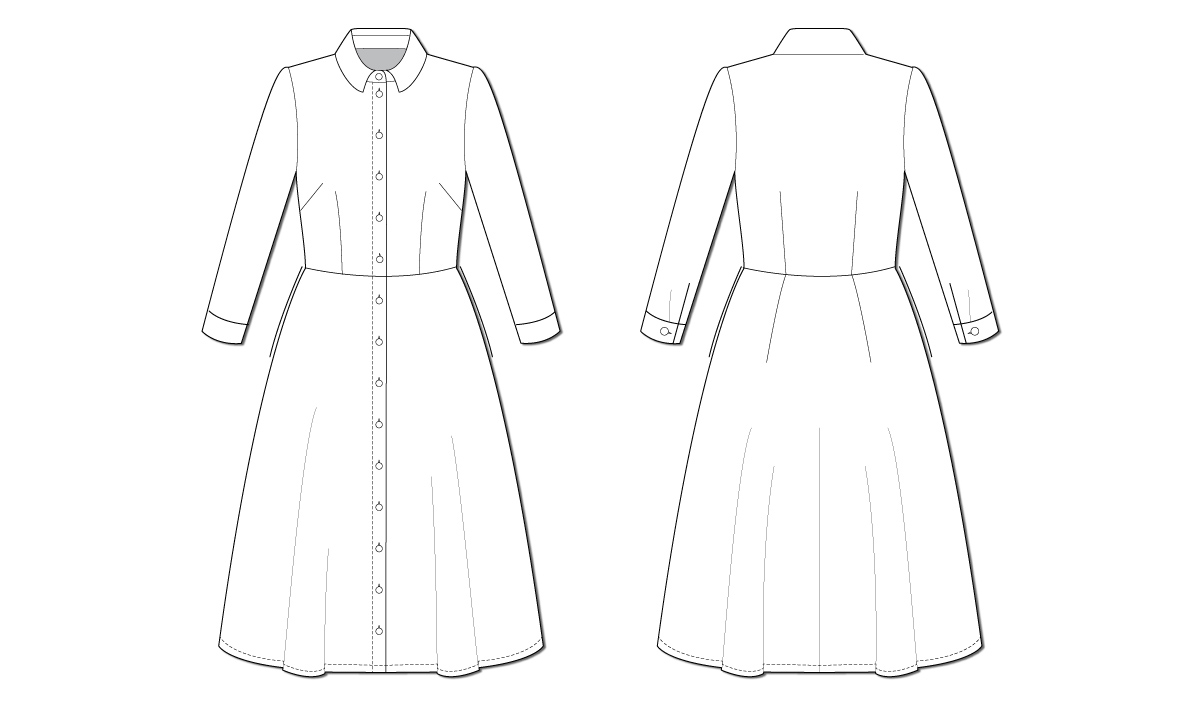
A ladylike look, it is a retro-style button-front shirtdress with a waistline seam. The bodice has a shirt collar with a stand, bust darts, and front and back waistline darts. The fabric at center front is folded over twice to form the button placket closure. Choose from two sleeve options, cuffed short sleeves or long sleeves with a continuous lap placket and 2-inch-wide cuffs. There are two A-line skirt choices: One version has a smooth waistline with back darts, while the other has gathering in front and back, which gives the dress a softer look. Both fall to about
4 inches below the knee.
- The illustrations are correct except for the layout plans on p. 7, for version 1, size 6 to 20, on 45-inch-wide fabric. The skirt back pattern piece is mislabeled. It should be shown as the letter I.
- The gathered skirt option affords flexibility when lining up the skirt and bodice pieces, whereas the skirt darts must be aligned to the bodice darts across the waistline seam.
- When pinning the back bodice to the skirt, our tester suggests starting at the center and working toward the side seams. In this way, you can balance the ease in the skirt’s back.
- This dress would be sweet with lace trim around the collar and along the button placket.
- When sewing the collar pieces together, do not pivot at the corners. Instead, sew off the edges on each side. This produces perfect points on your collar.
- Our tester said the pattern instructions are clear and concise, and the illustrations are helpful. Much detail is included, making the steps easy to follow.
This review was originally published in Threads #222, Summer 2023. Have you made this pattern? If so, be sure to share pictures in our Readers Closet gallery.
Photos: Jack Deutsch. Illustrations: Kelly Keenan.


Log in or create an account to post a comment.
Sign up Log in