

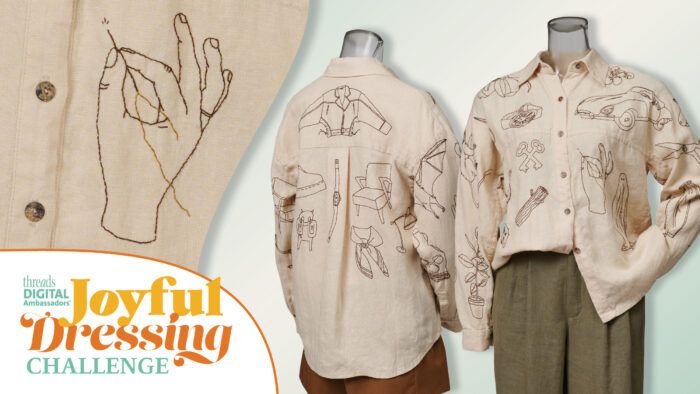
I’ve shared some details about the four-piece, mix-and-match collection I made for the Threads Digital Ambassadors’ Joyful Dressing Challenge. Now I’ll focus on the techniques I used to create the hero piece in the collection: the hand-embroidered and hand-finished Olya Shirt.
Hand stitching and slow sewing are some of my favorite sewing practices, so I looked forward to investing time in this piece to achieve truly special results.


The technique I used for finishing the seam allowances are the same as those I used for the beige Block Tee, shown below. I decided to sew the flat-felled seams by machine as another way to deal with the right angles.


The hand-embroidered motifs
The hand embroidery that covers most of the shirt was, by far, the most time-consuming part of this project. I ended up with 30 hand-embroidered motifs of my favorite objects, tools, animals, plants, and food.


Interfacing
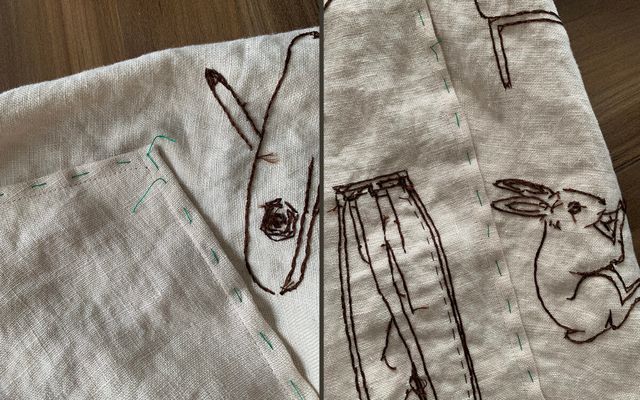
The one material that made this whole process super enjoyable and doable was self-adhesive, water-soluble stabilizer I found at my favorite online haberdashery. This material comes with a backing paper and a thin, nonwoven, self-adhesive stabilizer. I traced all the designs onto the stabilizer, roughly cut around all the shapes, and placed them on the shirt pattern pieces as I went. This way, I had clear guidelines to follow while embroidering, the fabric was stabilized, and I didn’t have to draw all my designs directly on the fabric. This also meant I could easily rearrange where the motifs would go on the shirt to find the perfect spot for each.
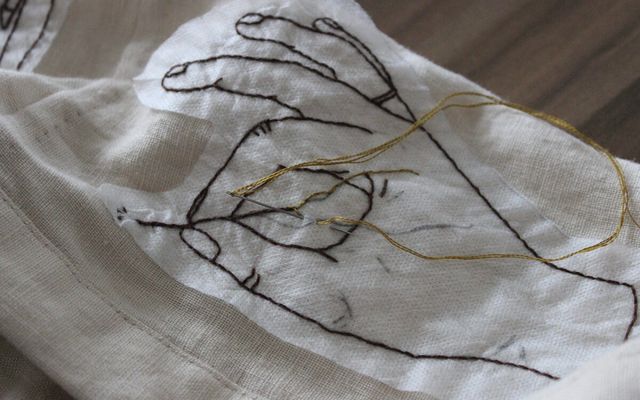
Motifs
I found or took photos of my favorite items, and used my iPad as a light box to trace their general shapes onto the stabilizer. From there, I filled in the details by hand and cut around the completed motif, leaving 1.0 cm to 2.0 cm around the outline.
Thread
For the thread, I went with DMC’s cotton embroidery floss in color #938. There was one exception: the embroidered thread in the motif featuring a hand holding a sewing needle. For that, I used my favorite color, which is a beautiful dark chartreuse/golden olive. I used two strands for the majority of the stitching, and switched to a single strand for some of the finer details. Almost the entire embroidery was done using small backstitches, as I wasn’t satisfied with how other outline stitches looked on this fabric with this thread combination.

Once all the embroidery was done and I finished sewing the shirt, I soaked it in warm water for about 10 minutes and slightly agitated the fabric to get rid of all the stabilizer. I rinsed and repeated this process, and finally threw it in the washing machine to be sure there was no residue on the fabric.
Hand-finishing the seams
If I’m not mistaken, this is my 11th Olya shirt, and all my previous versions have been finished using an overlocker. This pattern features two right angles at the back shoulders, which makes it tricky to use alternative seam finishes. I’ve received tons of messages over the past couple of years from other sewists asking for advice on how to sew the Olya without an overlocker. This was the perfect opportunity to come up with a way that doesn’t rely on special machinery or even advanced sewing techniques.
Preparing the pattern
The first step was to prepare my pattern pieces. The Olya shirt comes with 1.0 cm, or 3/8-inch-wide, seam allowances, and I knew I needed more space for the hand felling I planned for most of the seams. I added about 6.0 mm, or 1/4 inch, to the side seams, the sleeve inseams, and the armscyes. I kept the remaining seams as they were, since I didn’t need extra room for hemming, attaching the collar and the cuffs, or sewing the back yoke.
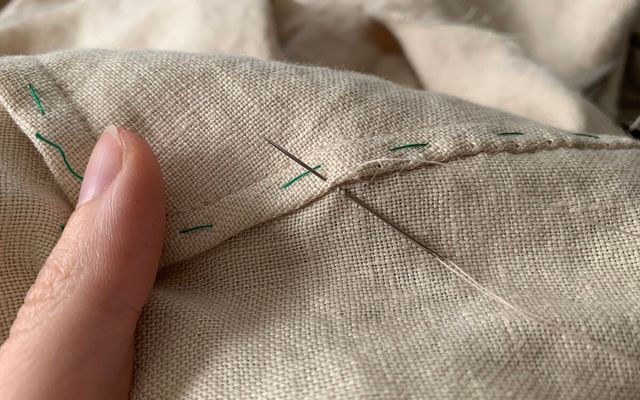
Hand-felling the seam allowances
I wanted a clean, uninterrupted look on the the garment’s exterior so I flat-felled all the seams by hand rather than by machine. I sewed on the pieces, right sides together, so that the felled, slightly bulkier finish would be hidden on the garment’s interior. Once the construction seam was done, I trimmed one side of the seam allowance to slightly less than half its original width. I wrapped the wider seam allowance around the narrower one and folded them toward the side with the narrower seam allowance. Some sewing pins temporarily hold the folded layers in place, which were then removed and replaced with hand basting. I was worried about melting the temporary stabilizer with my iron, so I thoroughly finger-pressed the seams and the flat-felled folds into place as I was basting and sewing. The linen I was working with cooperated, but I wouldn’t recommend doing this with more stubborn fabrics.

Using a matching color thread and a small, sharp needle, I sewed my permanent stitches to secure the seam allowance’s folded edge to the garment layer. I made sure I was picking up only one to two threads from the garment layer, and slightly larger bites out of the seam allowance’s folded edge. This created a secure, nearly invisible, finish. I repeated this process for the side seams, armscye/shoulder seams, and the seams running through the front yokes and the sleeves.

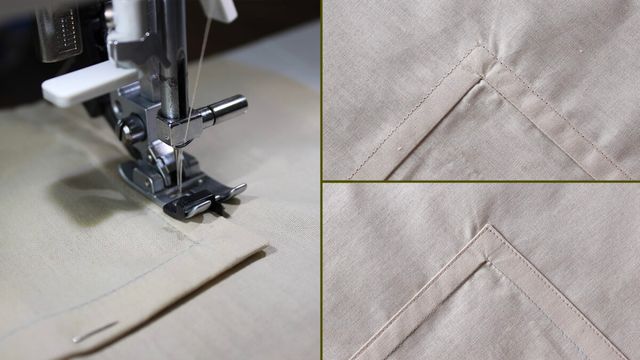
Flat-felling the right-angle corner, or inset square
As the insertion of the back yoke to the sleeve/yoke piece causes two right angles, that area requires extra help to look neat on the inside. I’ll take you through how I created a mitered corner in a flat-felled seam. This technique is helpful for sewing the Olya Shirt, as well as other projects with inset squares that require a neat finish. That could include curtains or other projects made from scrap fabric squares and rectangles.
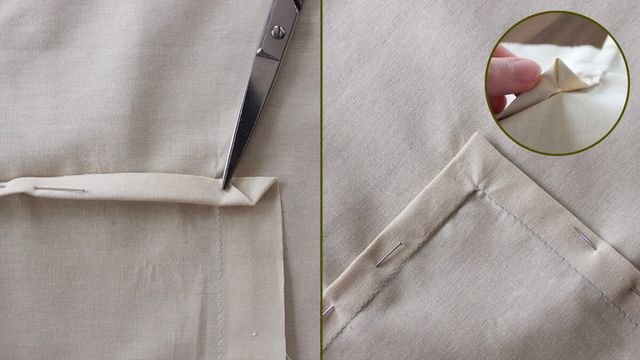
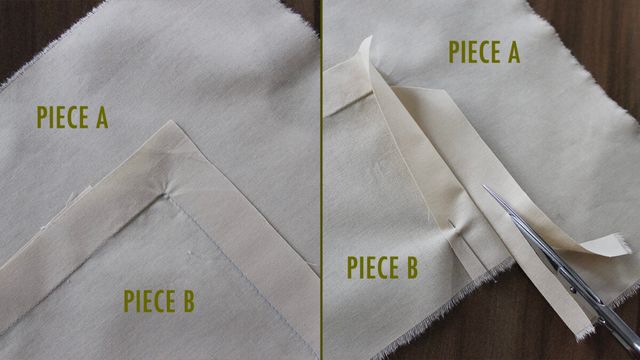
1. Sew the inset square to the corresponding piece as usual. When you reach the corner, raise the machine’s presser foot and snip up to the needle on the piece with the right angle opening. We’ll call this Piece A from now on, and the inset square the Piece B.
2. Trim the seam allowances to a little less than half their original width on Piece A.

3. On Piece B, fold the corner toward the wrong side so that the corner’s tip touches the corner of the stitching line. Finger-press a crease over this fold. There should be a line at a 45-degree angle now at the square’s corner.

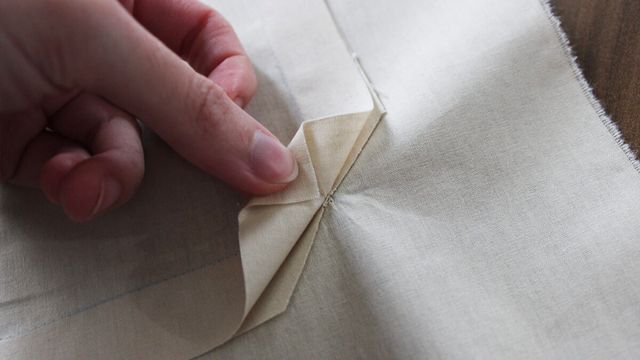
4. Wrap the wider seam allowances of Piece B over the narrower seam allowances of Piece A by folding them in half over the trimmed seam allowances. Keep the corner folded in as you’re folding and wrapping the remaining seam allowances. When you fold both sides, you’ll see a perfect right angle forming at the corner. Pin or baste into place.
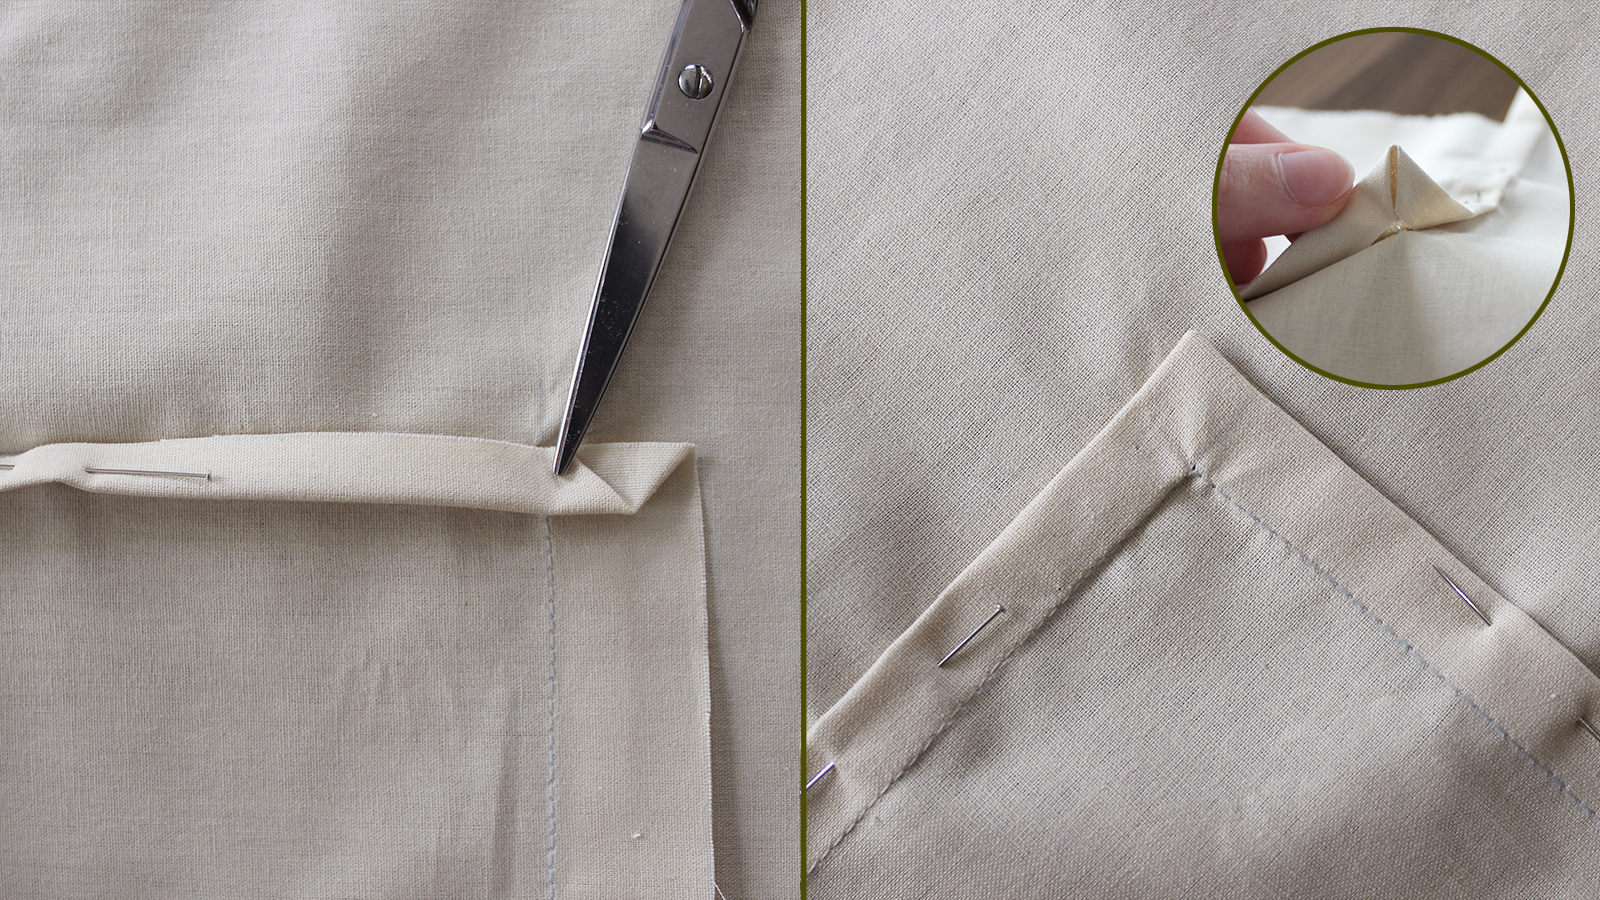
5. Machine-sew the flat-felled seams in place using an edgestitching foot, or make felling stitches by hand.

Editor’s note: Discover why Nisan chose to create her winning four-piece, mix-and-match collection and what fabrics and patterns she selected for her entry in the 2023 Threads Digital Ambassadors’ Joyful Dressing Challenge, in her first installment. You can also see what her three challengers created.
Photos: Nisan Aktürk, except where noted.


Log in or create an account to post a comment.
Sign up Log in