Question on pants back pattern crotch angle
Hello Helpful People,
I am trying to make the pants template (Refine Your Pants Fit with a Template) from the December issue. Help is needed as my pattern doesn’t match the Threads diagram.
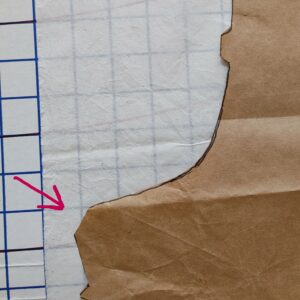
I’m an average sewer, getting back into it, and not great with geometry so I have several questions. (See attached photo for pattern back example)
1) Related to the Threads Pant’s Template does the angle get included in the 2.5″ extension, and if not where does the extension stop.
General construction Q.
2) How does this angle get match to the pattern front? (From a long time ago I remember easing is involved but I do not remember the details and my resources don’t include how to handle the angle.)
3) Why do some pants patterns have this angle at the crotch on the back pattern piece? (see photo) I notice all do not. This particular pant is a relaxed casual pant so I am thinking maybe this is where the extra fabric in the back leg comes from.
Thanks for the help.
KShavo


Replies
Hi, KShavo,
I've made my template (tho not from Threads) this way: the 2.5 inch extension is measured horizontally, there is no curve in that measurement. Make a vertical line from your CB (the original CB, not one that was moved in) down to the crotch level and draw a horizontal from the crotch point to the side. Where those two lines meet on the horizontal line is point A. The 2.5" extension goes from A out along the horizontal line, call that point B. The curve starts from B. I hope that makes sense!
I also have that funny shape for the seam allowance at B. The reason is that the seam allowances are different shapes at B in the front and in the back so if we were to match them when sewing the inseam, it wouldn't work. The pattern maker took the pattern and put them together as if they were being sewn and snipped off the part on the back so they will match up for sewing.
Wishing you much success on your project!