
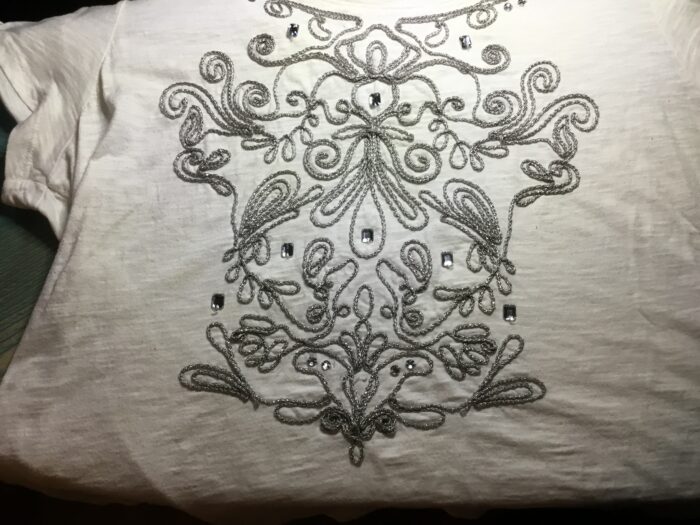
I’ve included a photo of a favorite tee shirt I’ve worn for over 20 years. The appliqué is in great condition, but the tee shirt is stretched out and dingy. I want to remove the appliqué and put it onto a new tee shirt. I’ve never worked with appliqués and have no idea how to proceed.. When I googled my question, all the hits were about attaching a new appliqué.??After an hour of searching, I’m hoping the Threads Community will help me! Thanks in advance!


Replies
You will need a little time to do this. First cut the whole front following the seam lines (Sides, armholes, shoulder) You can leave the neck facing attached to the front piece. Next, you need to over starch this piece. Put it on a piece of plastic (Table cloth/bag) and spray, spray, spray. It will be soaking wet. This is good. While wet square the applique piece then let it dry on a flat surface with the plastic under it. This usually takes 24 hours. After its dry it should be very stiff. You can now mark it to the size/shape your desire. Cut it with 1/4 to 1/8 of making for ease. Pin it to the surface you want to applique it to. Stitch with zigzag or other decorative stitch. You could also use a feather weight fusible web to press on garment.
The initial starch over spraying help stabilize the design and makes it easier to relocate.
Post a picture of your finished project.
Thanks so much. Your advice is detailed and. Wry helpful! I looked at the infused of the shirt, and it appears that the decorations are actually stitched directly to the tee shirt, by hand I think. Should I starch the design as you suggested, then remove the stitching? There aren’t a lot of stitches, which is why I think it was done by hand.
The basic design is done by 'couching'. You can do one of several things. One is to move the design as is entirety per my initial instructions. The other is to recreate to original design. Using a piece of parchment paper, wax paper, or regular paper big enough for the design. Lay chosen paper in your bed. Lay design on top of bed and paper. Secure with pins. Then using a pin to pernitrate the design and paper, mark the design. It's like creating your our connect the dots. Remove your 'dotted' paper and lay it on the new design area (Top or other fabric). Mark the dots to the garment through the paper with a sharp pencil. (best to have a hard surface under design i.e. kitchen counter) Now pencil lightly and connect the dots. You can use other markers of your choice. I prefer pencil since it easily erases with a white gum eraser. NOW you can couch your design.
Couching is basically a zig zag stitch over a heavier thread or yarn. You can see it in your original design. Lay the yarn by following the dots and zigzag over the yarn. Please prewash your yarn for couching. Just wet it and let it lay to dry. Your don't want it to shrink after all your work. You can find many examples of couching on line. This will help with your understanding.
Looking forward to your further comments. Pat
PS Don't take the design apart. Your will drive yourself crazy. Either reuse the original design per my first set on instructions or use these new directions and create a new design.
This is the method I use to cut an image from a tee shirt in order to place it on another t shirt, I call it “cut and paste.”
Cut out the original design leaving lots of allowance around the design. Iron on HeatNBond covering the entire back side of the appliqué. Make sure to keep the appliqué smooth and not make any folds or wrinkles when applying the HeatNBond. After cooling, precisely cut the final shape of the design. Determine exactly where you want to place the appliqué on the new fabric or garment and mark with a washable or disappearing marker. Remove the backing paper and iron on the appliqué to its new position. When cooled, either satin stitch the edges (experiment with a scrap to determine zigzag width and length), or do a hand decorative stitch for something truly original. Keep in mind a machine straight stitch will not stretch. (If you sewing onto a woven substrate, straight stitching is fine).
You can purchase HeatNBond, and similar adhesives in different weights.