

In “Tucks Made Simple,” Threads #171 (February/March 2014), Annie O’Connor shared some great techniques for sewing and pressing tucks. Tucks and pin tucks have multiple uses. These versatile folds can be sewn for decoration, used for fitting, and sometimes can substitute for darts. Watch this Threads Essential Techniques video and learn how to successfully fold, sew, and press tucks.
Have you ever sewn tucks? If so, how have you used them? If you have tips and tricks for sewing tucks, please share them below.
Don’t miss other fabulous techniques by subscribing to Threads or by purchasing the tablet edition today.
This site is protected by reCAPTCHA and the Google
Privacy Policy and
Terms of Service apply.
See all newsletters


A good video showing how to make tucks. I am lucky enough to have a Singer tucking attachment. I set the width of the tucks and the distant between tucks. I also use a small or short stitch length to blend the stitches into the material and always remember to press each new tuck before heading to the sewing machine.
Thank you....I could use this 'mark and baste' method for the smocking, too....I just would not stitch the tucks all down, but it would be a great way to line up the smocking..I have a 'left-handed' dyslexia, so this was very helpful, thanks again.
Most of the directions are clear. However the wonky stitching distracted me from the rest of the video: the machine stitches are not as even as they could be--This could be the operator/stitcher or the machine. I'd guess the machine needs to be adjusted--could be either the thread tension's a little loose, the presser foot pressure is a little loose, or the zigzag might not be completely off. A good straight stitch should be straighter and each stitch should be about the same size.
Also I wonder why the fabric was put under the machine as if the end of it would be sewn rather than the beginning. Would be confusing to a beginner.
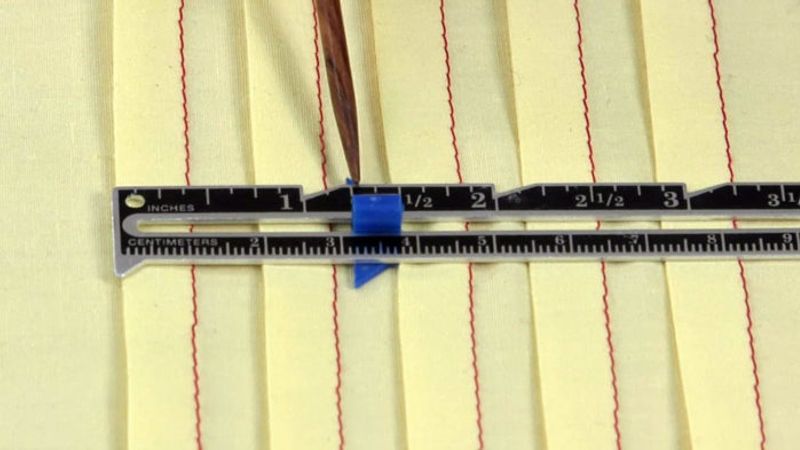
Just a warning. If the pattern you're working with includes the tucks before cutting, make very sure to sew the tucks exactly the width called for. Even the slightest increase or decrease of size adds up to what can be a big mistake when you're done sewing them all!
Have fun!!
I'm completely at sea about how to determine the distance between basting lines... one sentence (at 0:22 to 0:45) that doesn't make sense. What do you measure and how do you add them up?
KharminJ, I think I figured out the measuring instruction for each tuck: think of each tuck as a "Z". The first line of the Z is the top of the tuck (for example, 1/2"), the angled line of the Z is the underside of the tuck (another 1/2"), and the last line of the Z is the fabric under the tuck (another 1/2"). Then you add the desired measurement for spacing between tucks (maybe another 1/2"). So you would allow 2" for each tuck. It took me a minute to figure out, but I think this makes sense! Good luck.