

In Threads #177 (Feb/March 2015) author Jane Conlon shared a vintage technique for shaping and hand stitching bias tubes into an elegant embellishment called “fagoted rouleau“. Here are her tips for attaching fagoted rouleau to a garment in different ways:
Rouleau edge treatments
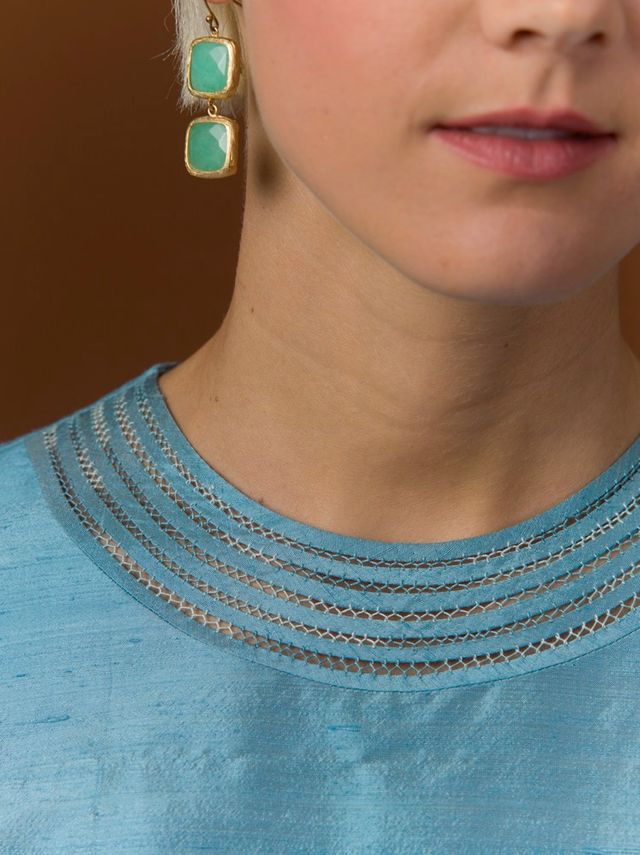
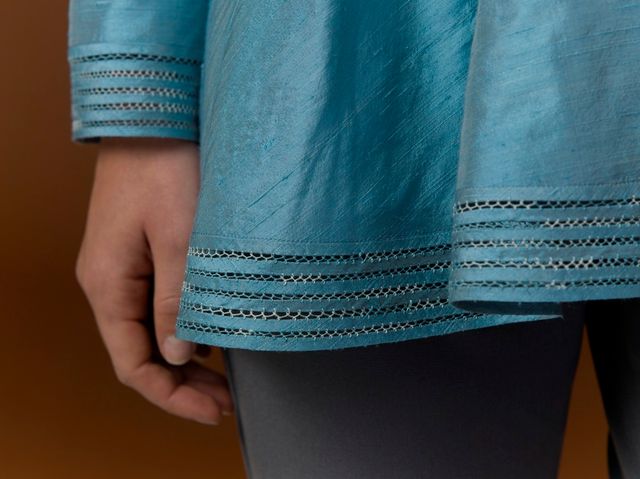
To apply a fagoted rouleau edge treatment to a garment, first finish the corresponding garment edge. Place the finished garment piece face down on the muslin base, adjacent to the rouleau (still basted in place). Baste the garment edge in place. Then, join the rouleau and garment piece with fagoting stitches. Remove the basting stitches.
Iron-on tear-away stabilizer may be applied to the rouleau piece’s wrong side to help maintain its shape when machine sewn to a seam. Iron-on interfacing or stay tape can also be applied within the garment’s seam allowance to preserve the spacing that the fagoting stitches create, and ensure a clean finish. This is especially helpful for collars
Cut-away rouleau appliqué
To apply a cut-away rouleau appliqué to a garment, stabilize the rouleau piece first: baste sew-on, non-fusible interfacing to its right side.
Position the stabilized rouleau appliqué right side up on the garment’s right side and secure it in place with temporary spray adhesive. Sew the appliqué to the garment by hand or by machine. Remove the basted stabilizer, trimming as necessary around the appliqué stitches. Carefully cut away the fashion fabric from the garment’s wrong side, leaving a 1/4-inch to 1/2-inch-wide seam allowance outside of the appliqué stitching. Turn this seam allowance under and whipstitch it to the garment body by hand to give a finished edge under the appliqué.
For appliqué and overlay designs, remove basting once faggotting is complete. Stabilize the garment piece with an iron-on tear-away stabilizer. Position the rouleau right side up on the right side of the garment. Secure the appliqué, and sew the outside edge to the garment section with invisible stitches, by machine or hand.
Rouleau collars and cuffs
Sew rouleau cuffs and collars into the garment in their usual sequence. They can be sewn as is, or backed with a sheer fabric for greater support. Silk chiffon, silk organza, or cotton voile in a similar or contrast color can be lovely. If the collar is not sewn into a garment facing or stand, finish it with a bias-cut fabric strip; likewise for cuffs.
Have you incorporated this embellishment into your sewing projects? If so, where do you prefer to add rouleau?


referring to # 177. I would very much appreciate it if you showed photos of and directions for how this trim was actually attached to the garment. Was it fagot stitched to the edge of the bias bound neck line? Is the trim seamed at the shoulder seam of the garment? Please explain. Thank You
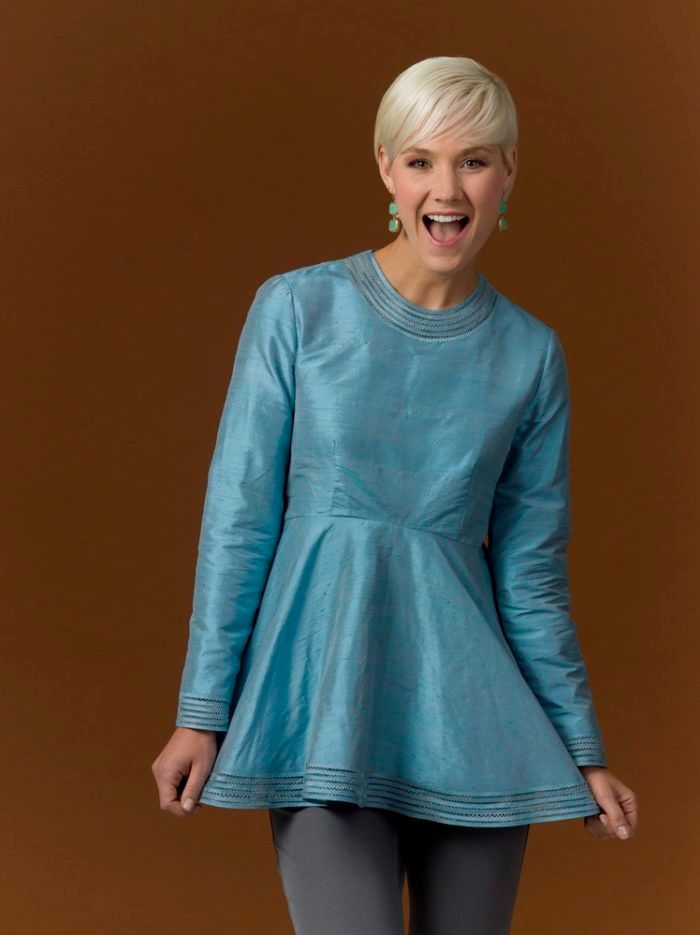
To answer your question about the rouleau shown on the garment in the photos:
Yes, it was fagot stitched to the bias-bound neckline. The trim is not seamed at the shoulder; it is continuous.