

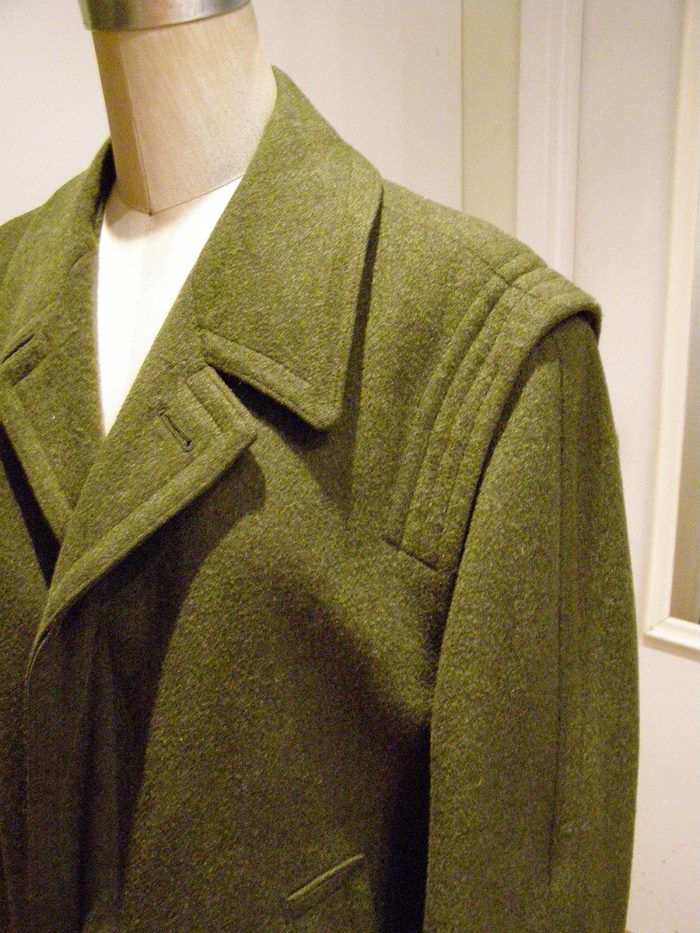
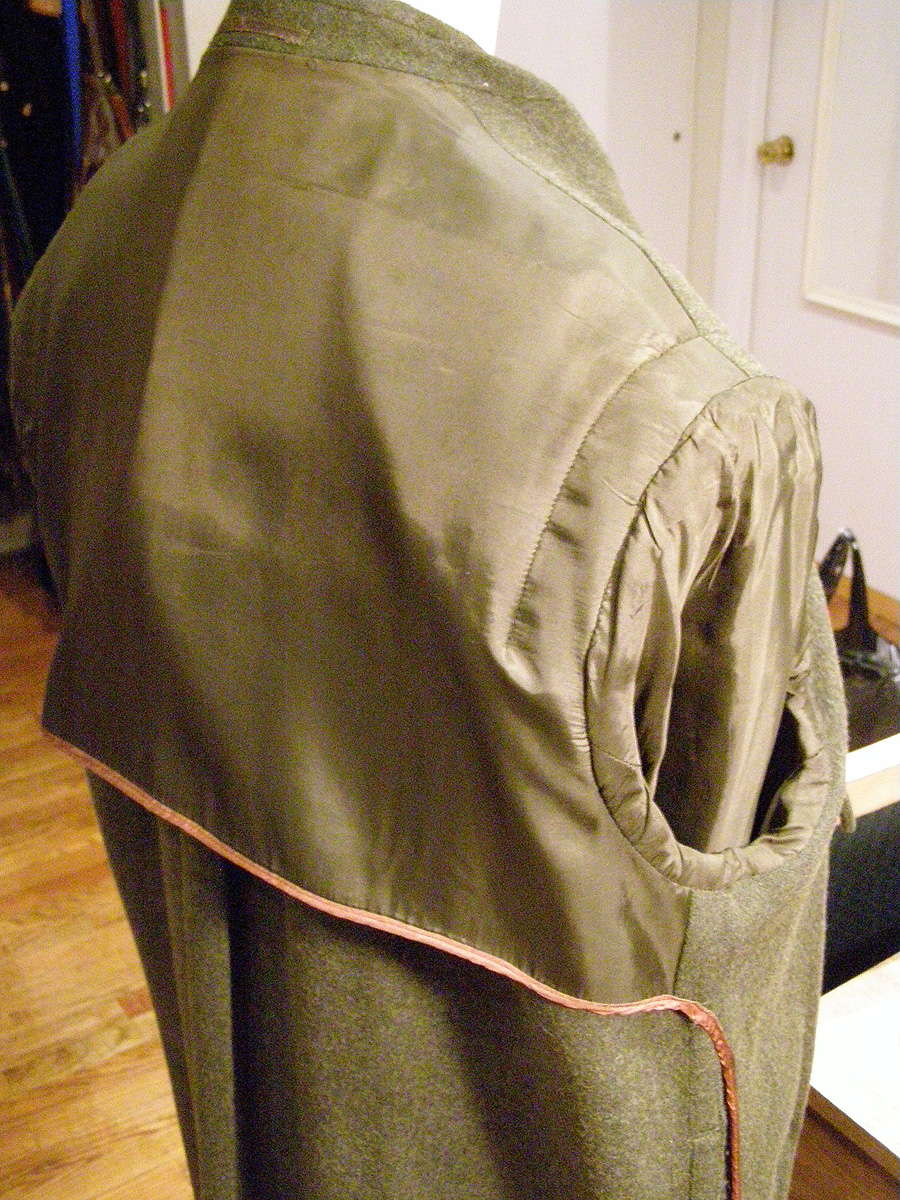
The shoulder detail on this loden coat is referred to as a flange.
This flange, however, is constructed differently from others I’ve encountered over the years.
This is an unlined coat, which presents a challenge to constructing a flange.
The solution is elegant and ingenious.
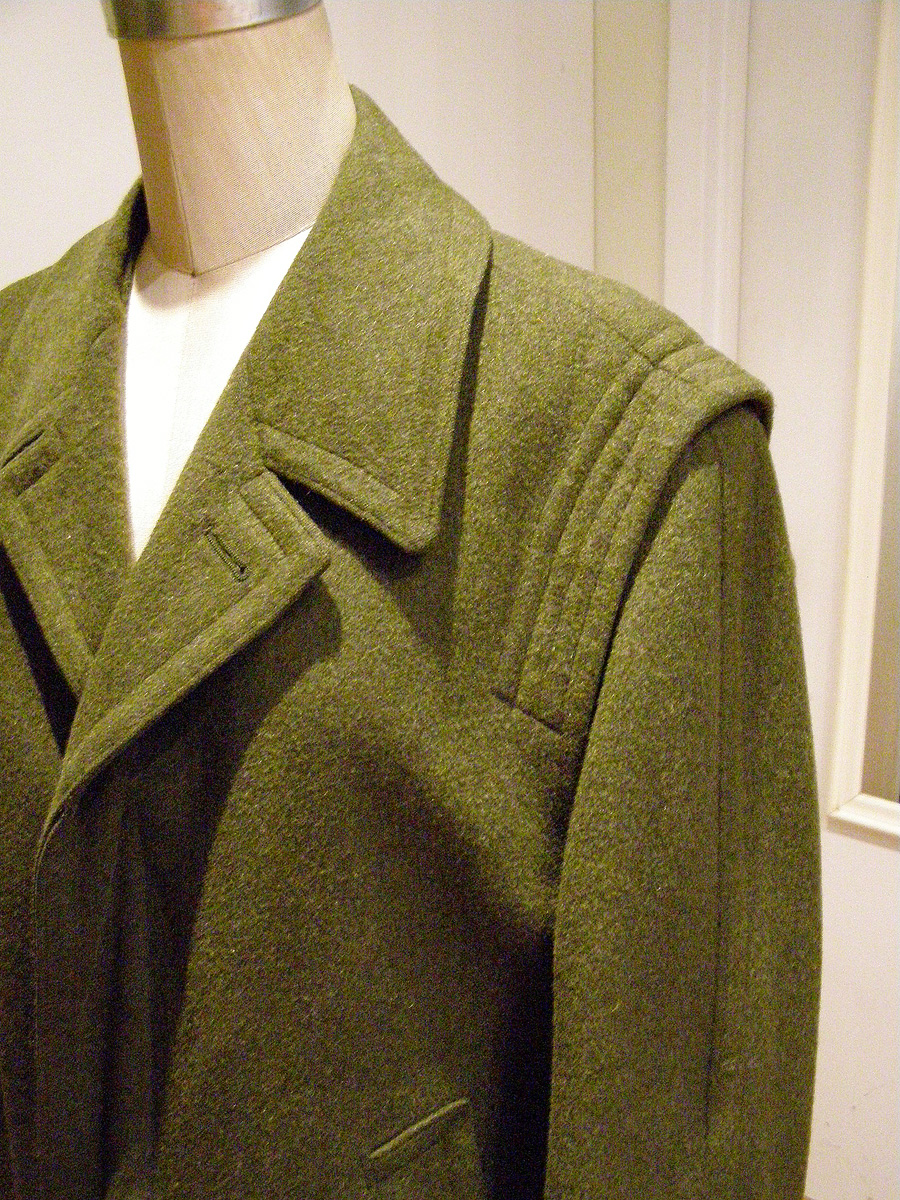
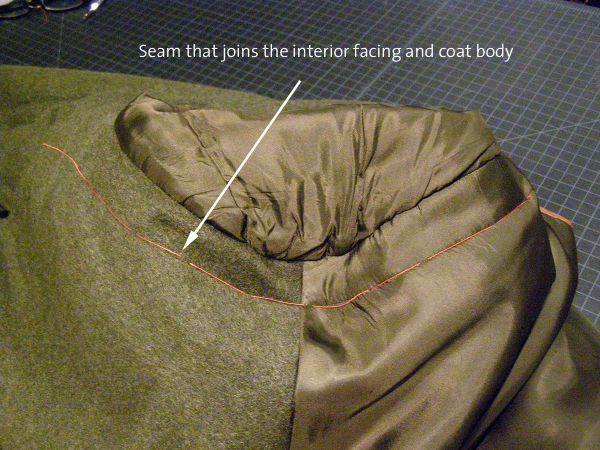
Since this is an unlined coat, it needs a deep front facing to finish the inside and to provide space for an interior pocket. The facing extends from the front opening to the front armhole.
There’s a half-lining across the back to which the sleeve lining is attached.
I’ll call this entire piece–the front facing plus half-lining–the interior facing.
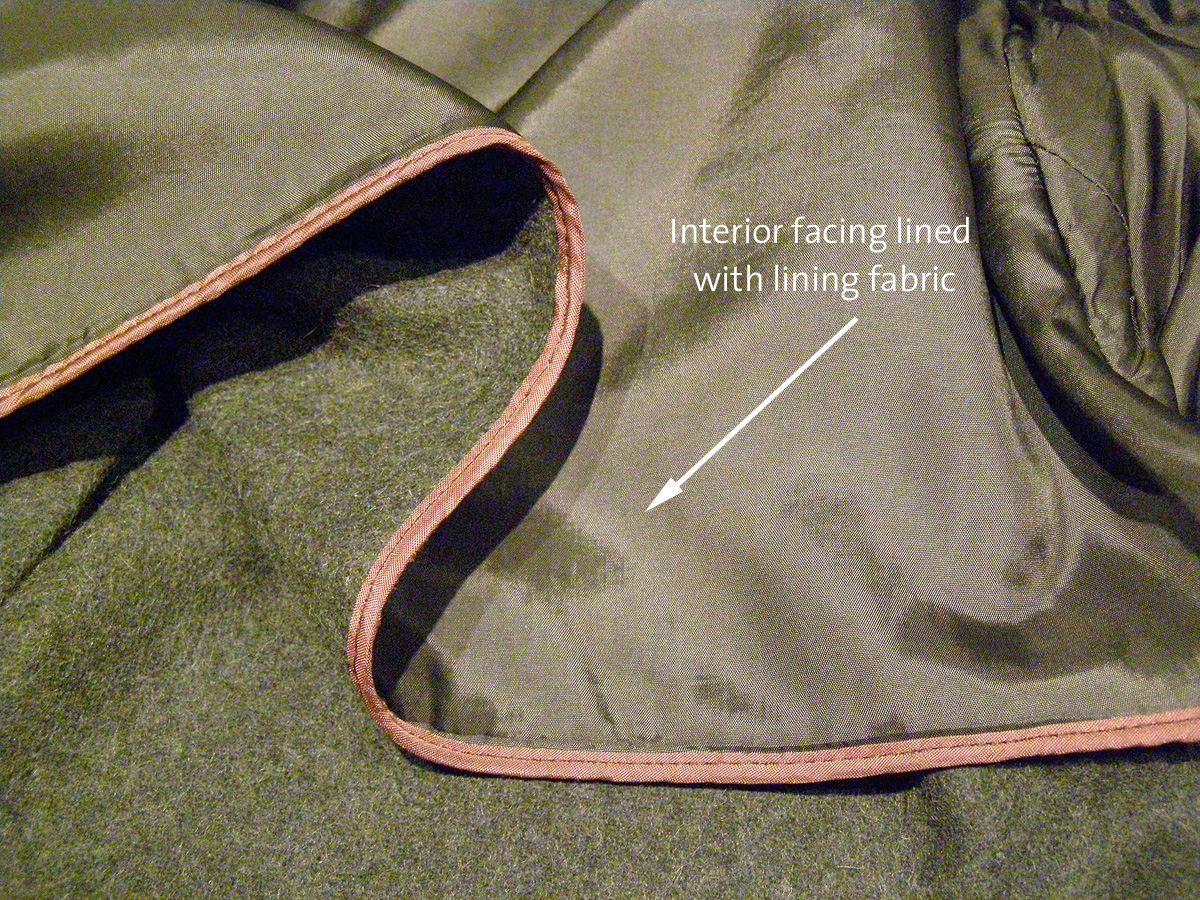
The half lining is backed with the wool fabric, and the edges of the facing and half-lining unit are bias-bound.
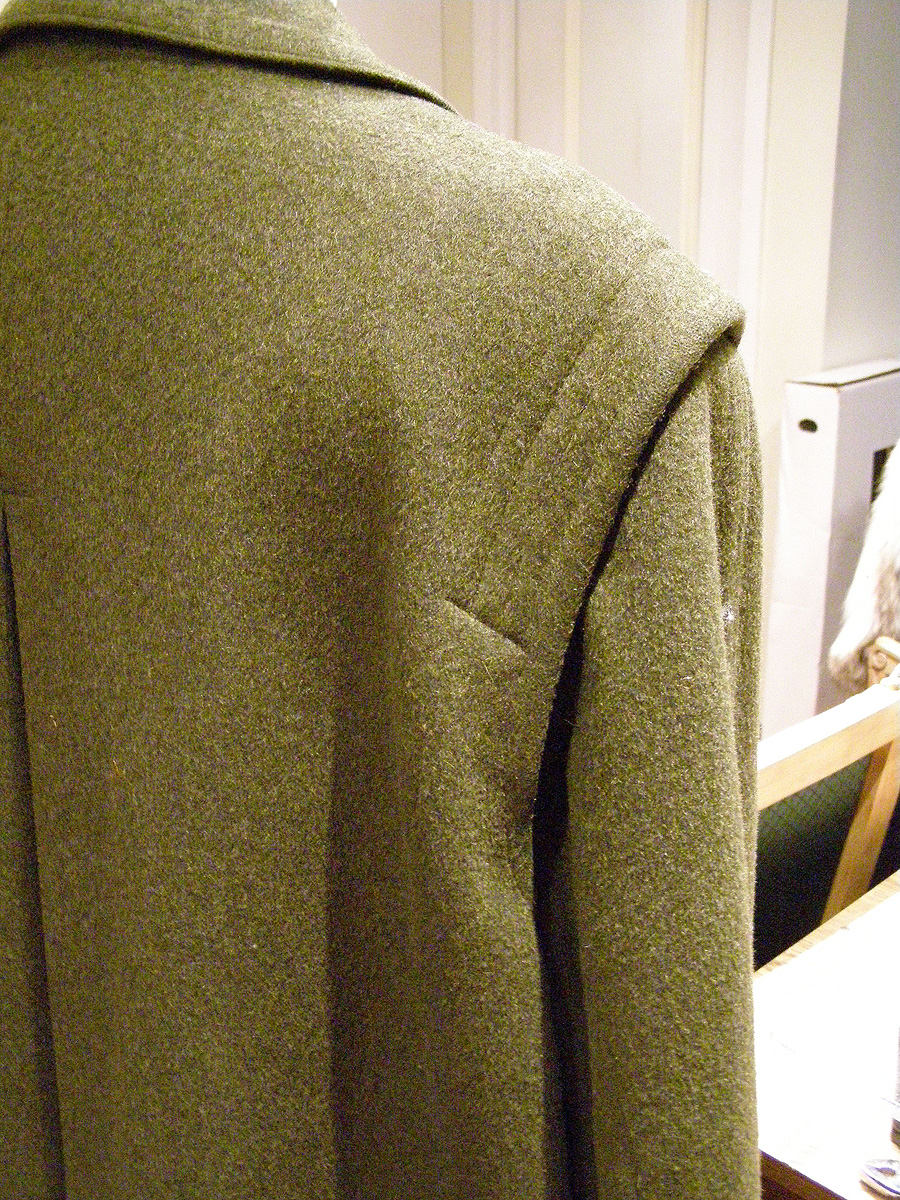
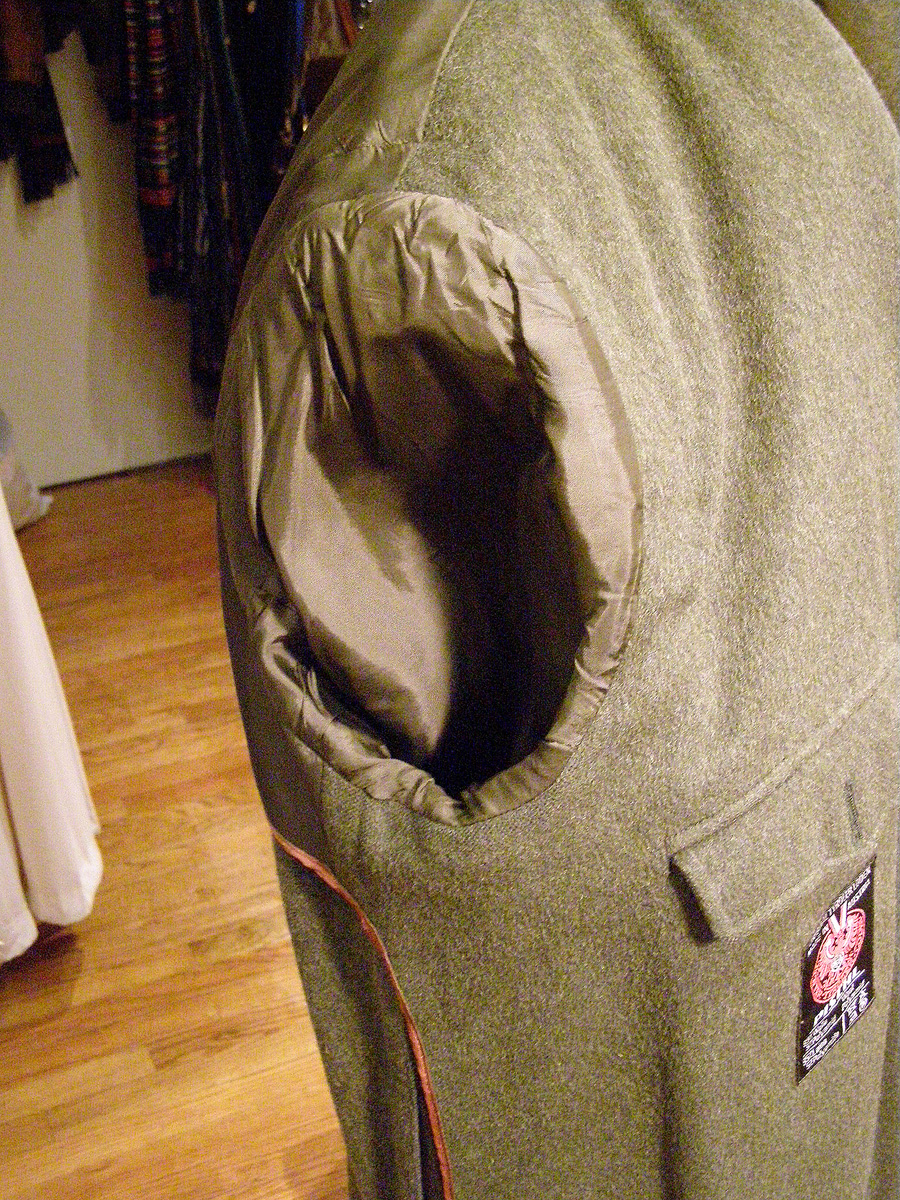
From the outside of the armscye, you can see straight through to the dress form: The sleeve isn’t sewn to the body under the arm.
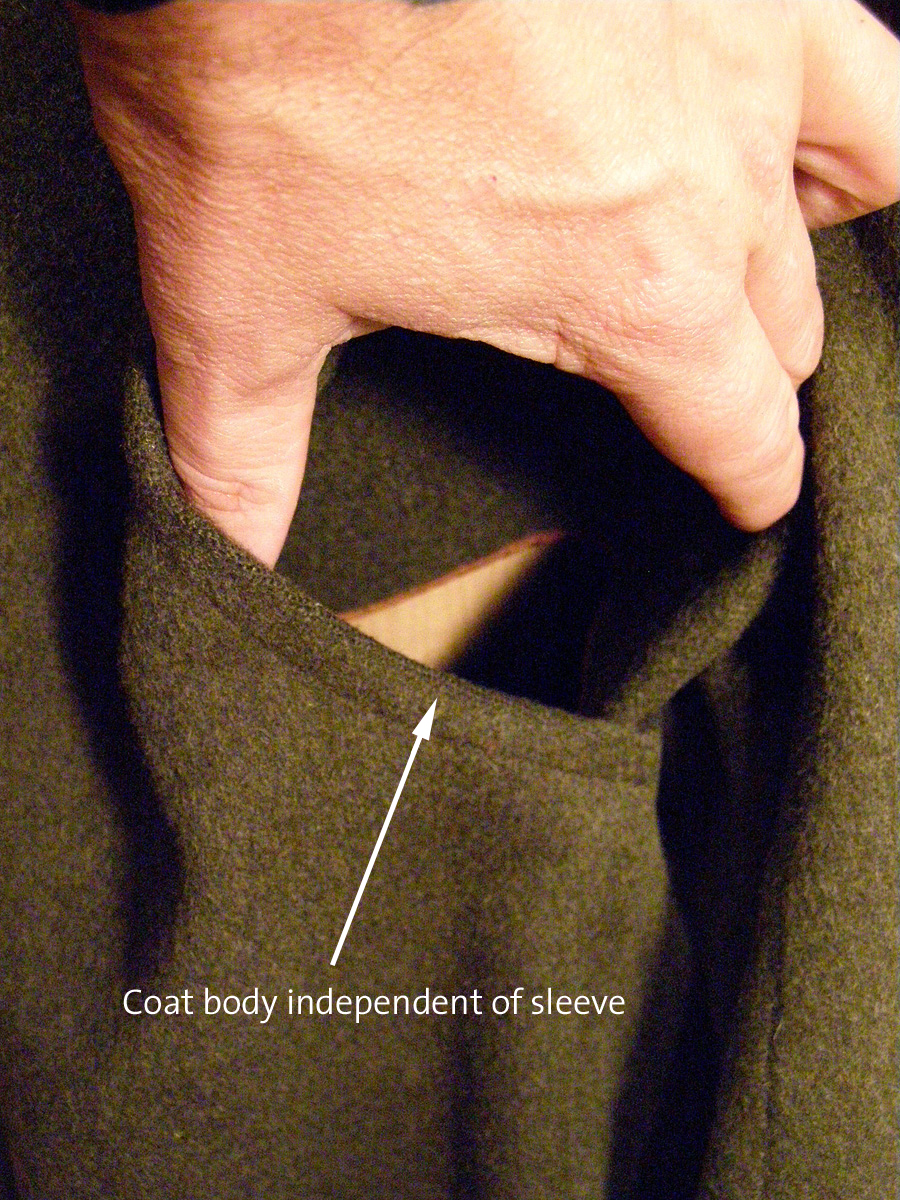
The sleeve is sewn to the facing, so, in a way, it floats inside the armhole of the outer coat.
There are four rows of topstitching along the shoulder area of the armhole.
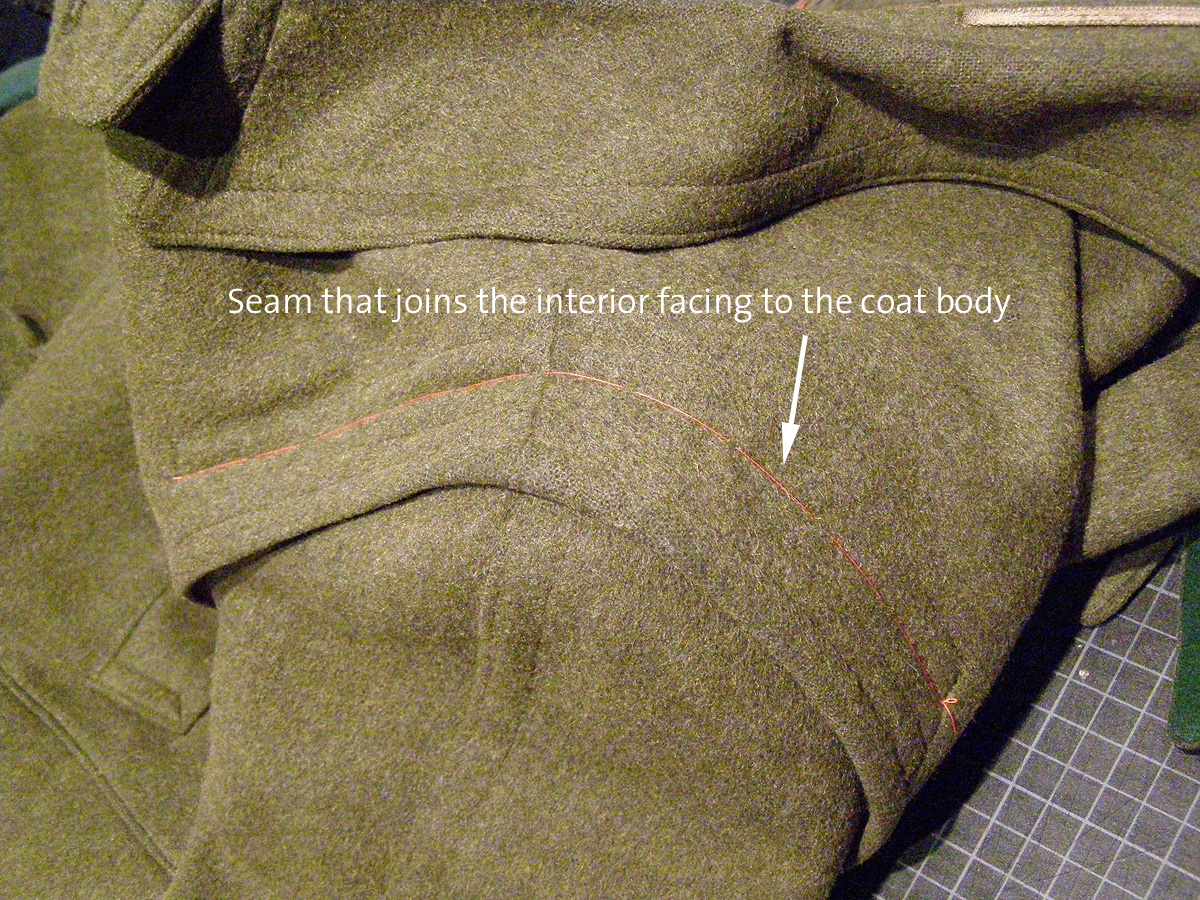
One row of topstitching joins the sleeve and interior facing to the shell of the coat; I’ve basted that row in red thread for visibility.
This is a view from inside the coat. The same row of stitching shown above is picked out in red thread tracing, as well.
In the first part of this two-part tutorial, we will cover the patternmaking for this sleeve. The second part will show the steps of construction.
We begin with a jacket pattern. I’m using a two-part body, and a two-part sleeve.
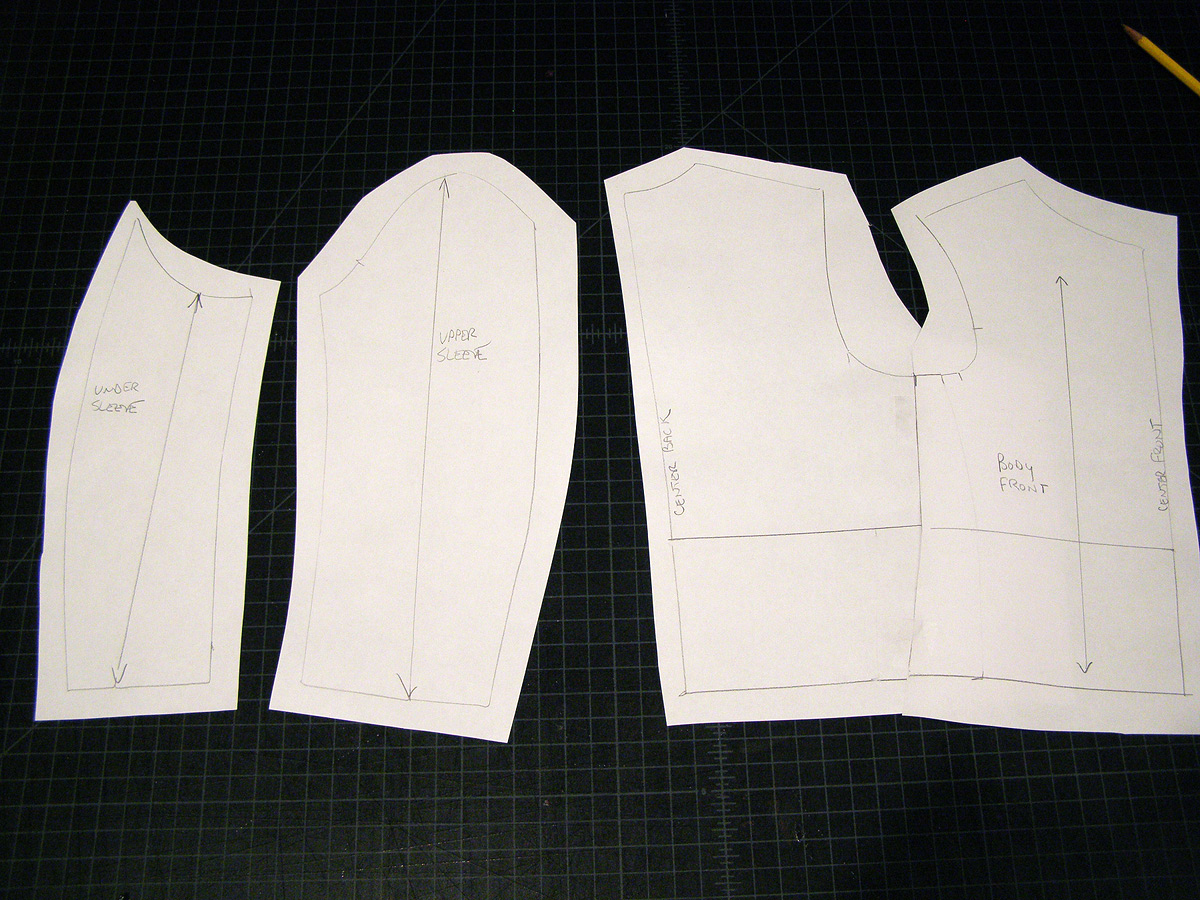
I’ve taped the side seams of the body together under the armhole for drafting the pieces.
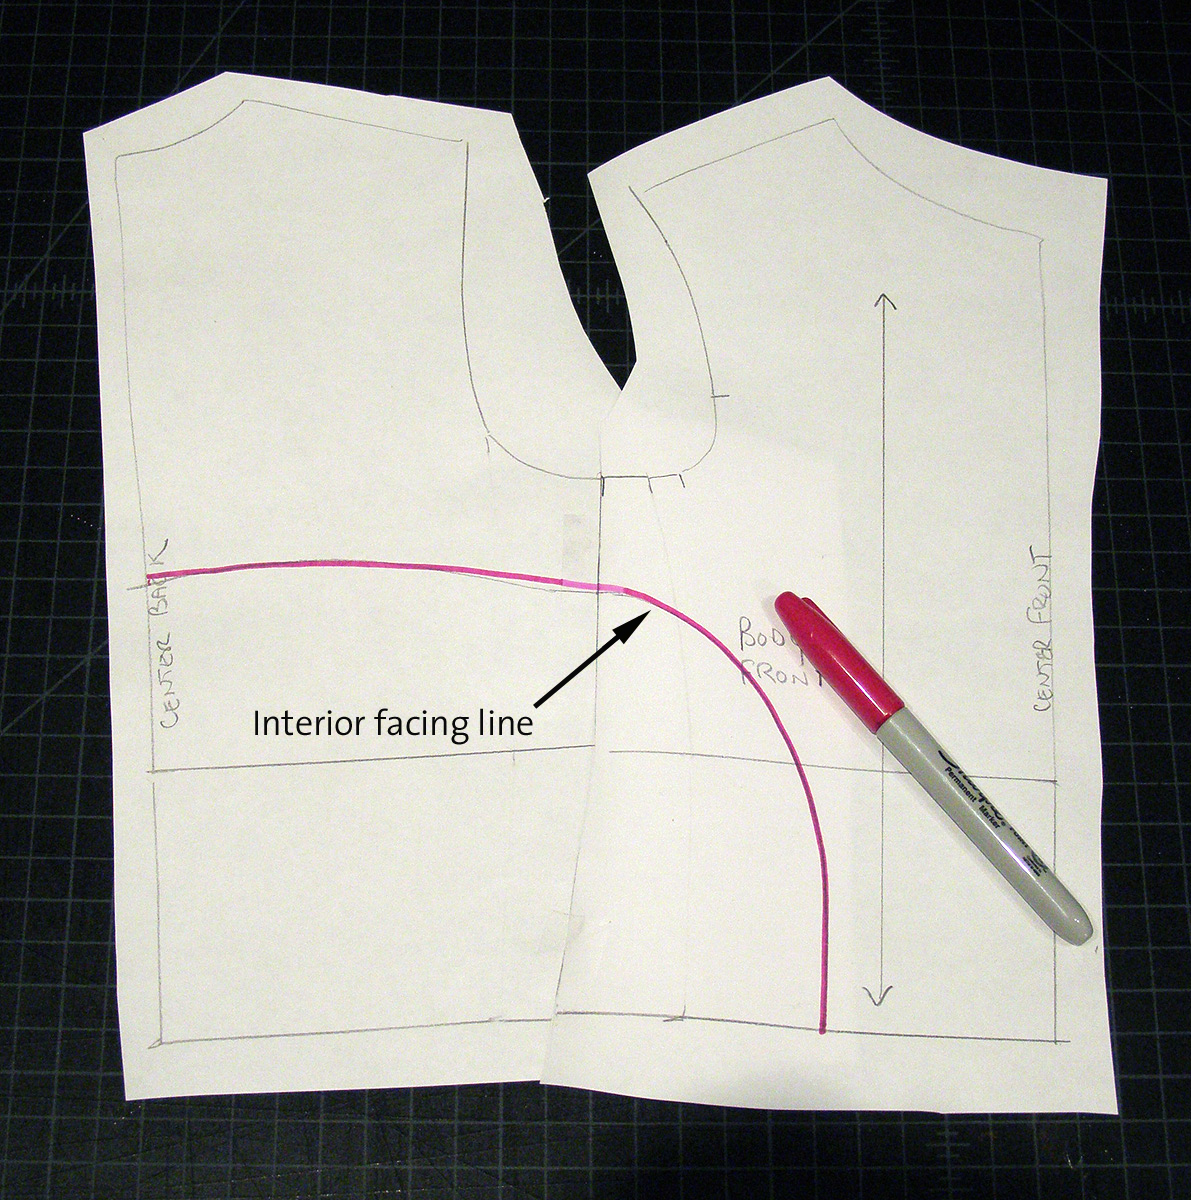
The pink line shows…
Start your 14-day FREE trial to access this story.
Start your FREE trial today and get instant access to this article plus access to all Threads Insider content.
Start Your Free TrialAlready an Insider? Log in


Glued to my screen - I'm now a reluctantly admitted "sewing voyeur" (and you're to blame, Senor King!).
There's nothing to be reluctant about being a sewing voyeur--it's a wholesome activity!
Would this be referred to as a half lining?
It is a variation of the half lining. The difference here, is that the sleeve hangs from this structure inside, instead of being set into the bodice. So, the fabric needs to be a little more robust than the traditional half lining.
This doesn't looks so hard to make, but the end result is a statement piece. Worth investing your time.
This is stunning. I personally prefer a full lining, especially with wools, and would probably go that route, but I love the overall piece. It's inspiring and makes me think I may have to pull out some of my wool stash from under my bed and make a new jacket.