

This costume was made in roughly 3 weeks.
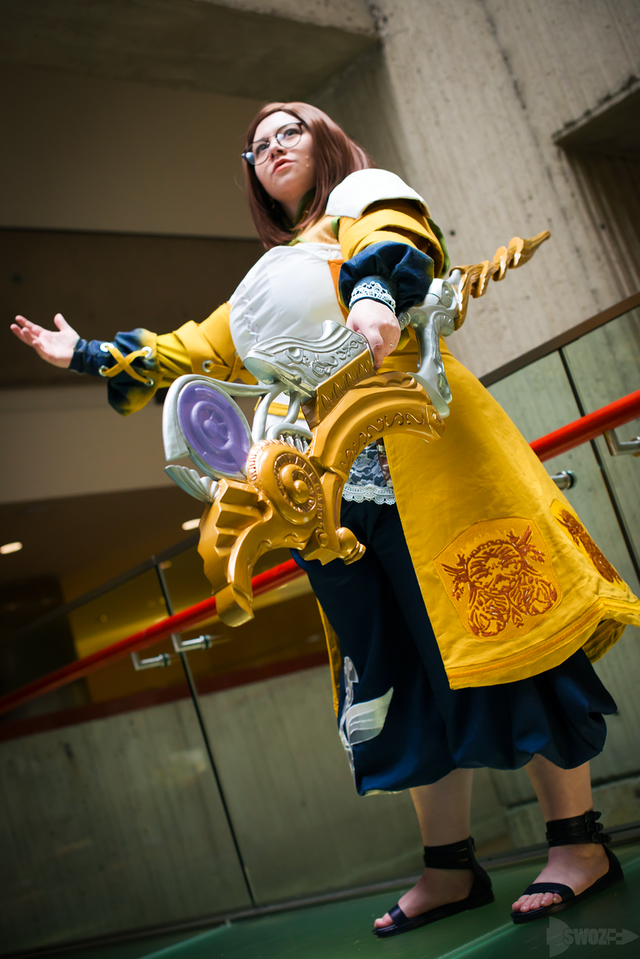
Corset jacket: The corset jacket was entirely hand drafted. It was made from the same linen look material as the floating sleeves. The corset has spiral steel boning and is gradient dyed using acid dyes. The lining is duck canvas. The white sateen panels in front are where it laces up. The little bows and straps hold faux bags (to minimize bulk from all the layers). The buckles on the straps are from Tandy, the bags are poplin with painted details.The long skirt part of the jacket corset has over 1,000,000 stitches of embroidery on it. I took the design from a photo of the costume and filtered it in photoshop until I got a design with three colors. Then I ran it through my 5D software and spent a week making patches (3 hours a piece). The curves took about an hour for four. There are 10 of each, total. I Heat n Bonded the patches to each panel and then satin stitched around each. There is Peltex 70 between the layers to maintain stiffness. The edges of the jacket came out very nicely. I am very proud of the scallops and the way the corset and jacket skirt panels line up perfectly.
Yoke: I purchased a gold home decorator’s fabric online that was a pattern that closely matched the design. I drafted the pattern based off of shoulders and a collar from an existing one already in my pattern collection. It took a lot of editing to get the proper “boob window” and “back window” but after some work they came together. I made the bias tape myself out of Calla green poly shantung, and it is stitched in the ditch. I mitered the corners on the front of the “boob window” and put in grommets for the lacing. The neck ruffle was a piece of white stretch sateen that I sewed pleats into. It snaps into place for easy removal and washing.
Armor: This was my first time working with Worbla. I made a form of my shoulders out of foil and packing tape and used that to shape and mold the shoulders. They are coated in 10 layers of Plastidip for smoothness. The inside was covered with the same felt as the patches on the jacket, and velcro to attach to the yoke.
Sleeves: I used a dijon colored modal lycra for the undersleeve. It was gradient dyed to orange using a deep, scarlet red acid dye. The “floating” pieces were done with a yellow linen look fabric and some Peltex 70. The bottoms of the sleeves were airbrushed with a dark blue ink, and the lace appliques were hand stitched on. I used large silver grommets and the lacing is done with long pieces I made from the same linen look fabric.
Shirt: I entirely drafted the pattern for the shirt myself. The white shirt has two layers. The bottom is a fitted white stretch sateen. The top is white costume sheer with an elastic to gather it around the waist. It also has a piece of white crafters lace around the bottom of the sheer layer that has three additional kinds of lace layered onto it. The first is a large floral lace, the second is a swag lace that goes around the edge, and the last piece is an applique on the center. All of the three additional laces were hand stitched. The shirt closes in back with a zipper and hook and eye. It is connected to the yoke and sleeves.
Pants: The pants were drafted from scratch as well. Due to the odd fit they have some darts. I used a poly shantung in a beautiful dark blue. The waist and ankles are encased elastic. The applique was drawn out on newsprint before being transferred backward onto the Heat n bond. I stitched the lines in it on the machine before painting it with three different colors of lumiere pants (Pewter, silver, and pearl). After it dried I bonded and satin stitched it to the pants.
Shoes: I purchase a pair of sandals from Amazon that were close enough. I used Angelus leather paints to make them dark blue.


Log in or create an account to post a comment.
Sign up Log in