
Home sewers can adapt various Armani techniques.
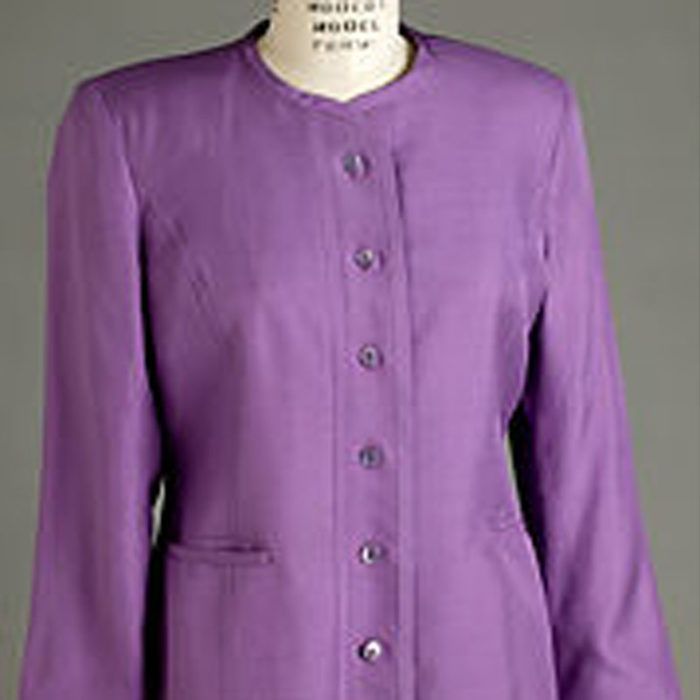
Just as contemporary chefs are lightening up classic recipes, modern couture’s most celebrated tailor, Giorgio Armani, is continually reinventing the traditional techniques of his craft. I’ve closely examined Armani jackets over the years, and I’ve discovered many techniques that we home sewers can adapt. In the April/May 1999 issue of Threads (#82), I explored a few current Armani styles that could be emulated with commercial patterns. But virtually all of my favorite Armani-inspired construction techniques can be applied to any jacket pattern you think worthy of a technical upgrade.

Armani’s results using home-sewing interfacings? Sure. There’s not much difference between what sewers can get and what’s used in the factories; the key is knowing how to apply it and where.
In this article, I’ll describe interfacing approaches for the entire jacket and then go layer by layer through an Armani shoulder and sleeve structure. Combined with your usual techniques in the rest of the jacket, these methods represent a good starting place for any modern tailoring project. Feel free to borrow, adapt, and rethink them in the best tradition of Armani and his countless imitators. And I encourage you to take any opportunity that presents itself to examine and appreciate a real Armani garment. In an upcoming article, I’ll focus on design details and finishing techniques I’ve gleaned from studying recent Armani creations.
Fusibles: what goes where
A typical Armani jacket incorporates several kinds of mostly fusible interfacing, along with cotton twill tape, bias and straight-grain strips of rayon lining fabric, and cotton broadcloth, that serve as reinforcements and stabilizers. Listed below are Armani’s usual placements for interfacings (see Interfacing Armani-style, below) with suggestions for widely available varieties:
Interfacing Armani-style

Here’s a typical jacket pattern, showing where an Armani Original jacket is generally interfaced. Details on suitable products for each area are provided in the article text.
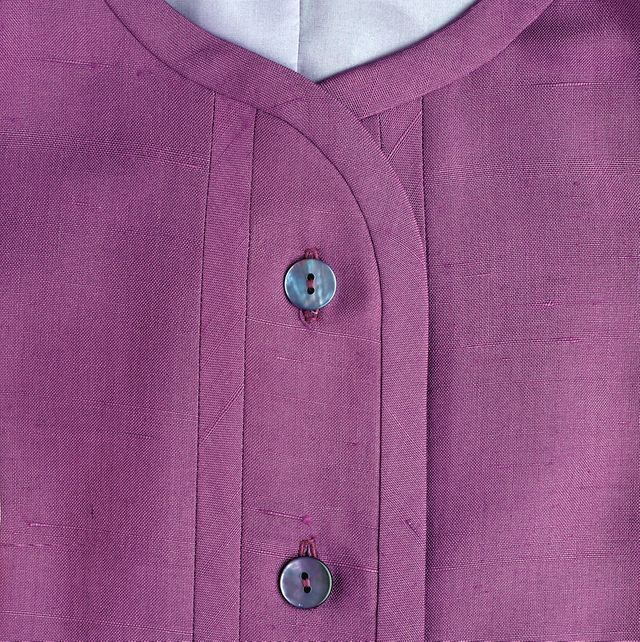
Jacket front– The entire jacket front is fused, whether or not it has a collar. The interfacing extends into the seam allowances. My interfacing choices for the jacket front include Satin Weave, Textured Weft, Flex Weave, and SofKnit, all distributed by HTC. Satin Weave, which looks like the interfacing used in Armani jackets, is designed for lightly structured tailored garments; it works well with crepes or spongy textures and adheres to gabardines without bubbling. Textured Weft is soft and spongy with drape and give. It adds substance with drape and will not flatten fabrics with texture. Flex Weave, which also resembles the interfacing used by Armani, is soft, drapey, and flexible. SofKnit is a lightweight, all-bias fusible tricot. I used it on the jacket shown at right. I’ll call this body-weight interfacing- whatever type you choose.
Lapels– As I’ll describe below, I use an interfacing method on notched and shawl lapels that’s not derived from an Armani technique, but it works well to add (and keep) a bit of soft shaping to the roll of a lapel. Called a lapel wedge, it gently forces the lapel to roll back smoothly and curve inward at the lapel point. I trace the shape from the pattern in the lapel area, between the roll line and the seam allowances, as you can see in the drawing above. Use a lighter interfacing than your body-weight choice, such as So Sheer, Flex Weave, or Fusi-Knit, and cut the lengthwise grain along the roll line to stabilize it.
Side panel– If the side panel extends only to the side seam, interface the entire piece as you did the front. If the side panel eliminates a side seam and extends to the back, interface 4 to 6 in. below the armscye with the same interfacing used for the front.
Facings and upper collar– The facings and upper collar are fused with the same interfacing, which can be body weight or lighter. For instance, use Satin Weave for the garment front and SofKnit for facings and upper collar.
Under collars– Armani uses a separate stand and collar for his under collars, as shown, and described in detail in the April/May 1999 issue of Threads (#82). Interface the under collar on the bias, with the stand on the straight grain. Use body-weight interfacing or heavier. For instance, if you interfaced the jacket front, facings, and upper collar with SofKnit, choose Satin Weave, Textured Weft or Flex Weave for the under collar and stand.
Back– On the back, Armani uses a lightweight pellon-like fusible to balance the weight of the front and camouflage the shoulder pad. To get similar results, use a lightweight interfacing that does not leave a ridge. Pellon’s Sof-Shape works well here; it’s soft and blends with the fabric, adding no bulk. Cut the interfacing on the same grain as the jacket.
Hems– Interface hems at front, back, side, back/side panel, and sleeves using a 2-in.-wide strip of light interfacing like Sof-Shape or SofKnit, cut on the crossgrain. Position the strips so 1/2 in. extends beyond the hem fold, forming a soft edge.
 |
 |
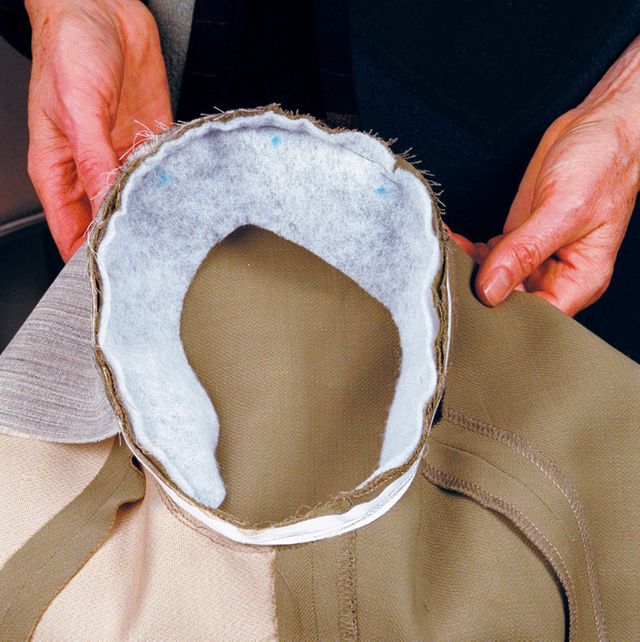
The sleeve header is made from ordinary polyester fleece. The pattern comes from tracing the cap of your sleeve pattern.
Sleeves: One of the inner secrets of the fabulous look of an Armani sleeve is his brilliant take on a sleeve header. This shaped piece of light quilting fleece fills in the seam allowance, supports the sleeve, and camouflages the shoulder pad. The header/support is cut 2-1/4 in. wide in the shape of the sleeve cap, following the ease points shown in the drawing on the facing page and explained below.
I’ll also describe the front shield piece in detail below; like the sleeve header, it’s a nonfusible. I use a supple woven hymo or hair canvas, which can be cut on the straight grain or on the bias if the hymo seems stiff, softening the effect and allowing the shield to meld with the drape of the fabric.
Fusing tips
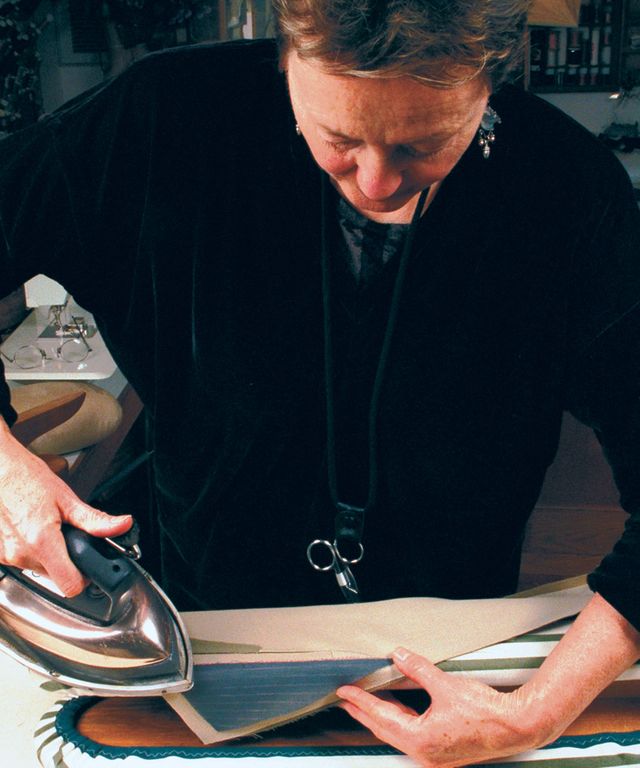
Preshrink the interfacing before fusing to prevent the front from shrinking by dipping it into hot tap water and hanging it to air-dry. You can also position the interfacing on the fashion fabric and steam it before fusing, holding the iron 1 to 2 in. above; the interfacing will visibly grow smaller.
Armani uses many different interfacings on his garments, so you’ll want to have a selection on hand to consider, too. After the jacket is cut, assemble your scraps to test which interfacing is best for your fabric. Using a press cloth, test each interfacing for temperature, steam, and timing. I also check the drape and whether the interfacing adds thickness or shows a ridge.
Fuse carefully and completely. I get the best results using a press. With an iron, fuse from the center, fanning outward, overlapping the iron. Keep the iron moving using a lifting movement.
Shape your lapels with a clever pressing technique: Let the lapel fall off the pressing surface, and fuse the interfacing to it in narrow sections as you move it back to the flat surface, forcing it to roll.

The lapel wedge
This technique originated with a Los Angeles tailor who specializes in making elegant custom suits for women, and it beautifully replicates the soft rolled lapel achieved by hours of hand pad stitching.
Mark rows 1/4 in. apart and parallel to the roll line on the lapel interfacing, using an air-erasable dressmaker’s pen or lightly with a soft lead pencil. Fuse one row at a time, starting at the roll line, pressing over the edge of a sleeve board to build in a curved shape.
When finished, set the lapel roll with a blast of steam and let it air-dry. The straight-grain edge on the lapel wedge stabilizes the roll line.
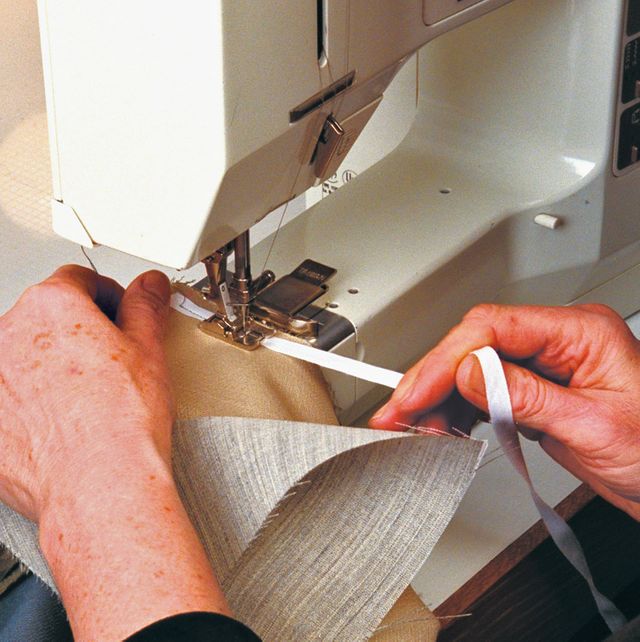
Stabilize the front edges
To help create a flat, stable front edge, Armani jacket fronts usually have a 1/2-in. strip of lightweight, firmly woven, straight-grain cotton fabric (not tape) caught in the seam as the front edge is sewn. Machine-baste the strip so it’s centered over the seamline, stitching just to the outside of the seam, without stretching. Catch the strip in the seam as the facing is attached. On notched-collar jackets, apply the strip along the front edge, ending 1 in. from the top corner (see the drawing on the facing page). Clip the strip at the roll line so that it can turn. On collarless jackets, staystitch the jacket neck edges first, and stabilize the back neck separately by basting 1/4-in. cotton twill tape in the seam. Tape the fronts from shoulder to hem, all before attaching the shield, but after fusing the lapel wedge, if there is one.
Of sleeves and shoulders
There are two trademarks of an Armani sleeve: first, no ease across the top of the sleeve for 2 in. either side of the shoulder seam (this is why I indicated specific ease points earlier on), and second, in this uneased area, the sleeve/body seam is pressed open. Together these innovations make a smooth, natural sleeve silhouette. Armani uses a 1/2-in. seam allowance on his sleeves, and I heartily recommend that you do the same. A narrower seam makes a big difference when easing, and 1/2 in. is wide enough to support the sleeve cap.
 |
 |
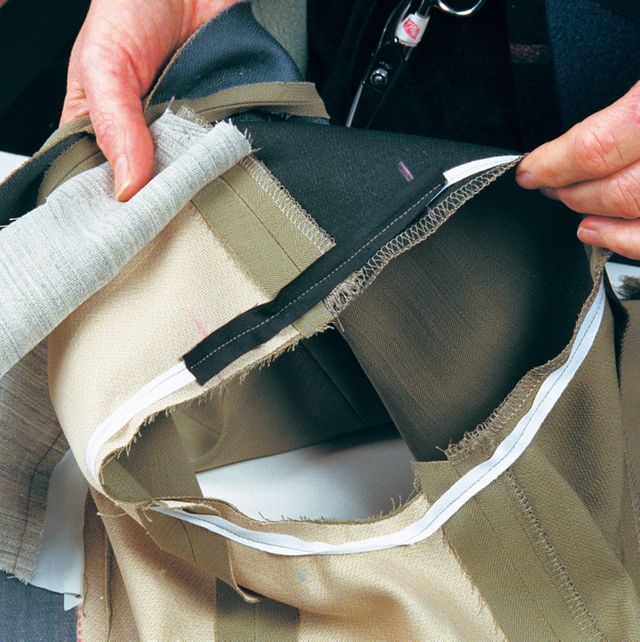
Support and shape the armhole with 1/4-in. tape, stretched slightly as it’s applied, as shown at left. Add a strip of 1/2-in. cotton at the cap (black strip at right) to pad the shoulder seam overlapping it on the 1/4-in. tape at the ease points.
The first step is to tape the armhole in the seam allowance. Use cotton or cotton/linen tailor’s tape, 1/4 in. wide. Press the tape in a curve to build in the shape of the armhole before stitching. Stitch the tape 1/4 in. from the edge, from the top ease point in front, under the armhole, to the top ease point in back. Pull slightly as you sew, using a light touch. The purpose is to draw up the body of the garment very slightly so it hugs the figure.
Stitch a 1/2-in. strip of cotton broadcloth across the top of the sleeve in the same line of stitching as the tape, just covering the tape ends. This creates a light padding at the cap of the sleeve.
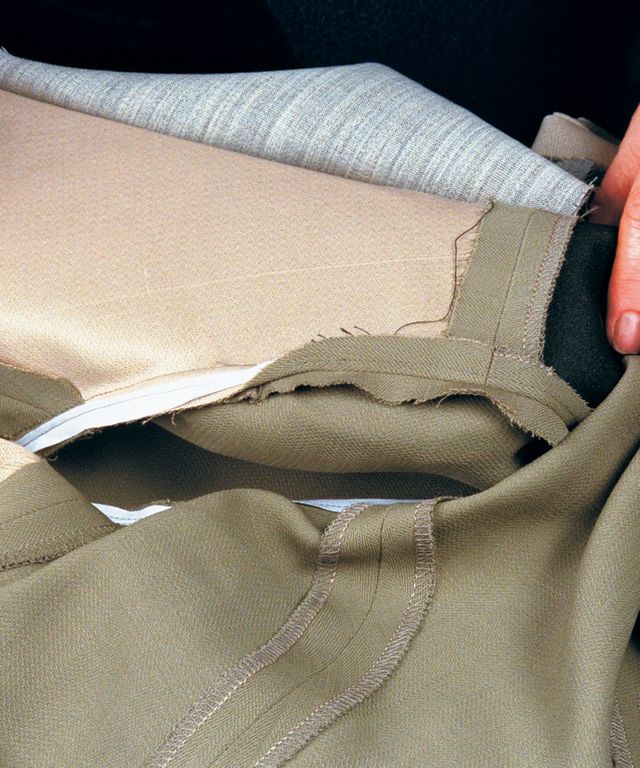
Next ease-stitch the sleeve cap using three rows of machine basting, two close together inside the seamline and a third row a fat 1/8 in. outside the seamline, between each pair of ease points. Pin in the sleeve, matching at the shoulder, ease points, and underarm. The outside basting line will give you much more control as you distribute the ease. Wrap threads around the pin at one ease point at the start, and at the other point to secure.

For the most natural shoulder/sleeve silhouette, press the armhole seam allowances open about 4 in. at the shoulder seam.
As you stitch the sleeve in place, be sure to stitch with the garment uppermost for approximately 4 in. across the top of the sleeve from front to back ease points. Then switch to stitching with the sleeve side up around the rest of the sleeve. This is an old tailor’s trick that helps ensure a perfectly straight stitch along the top of the armhole.
Press next. This is the secret to getting your sleeve to sing. I’m sure that in the factory, there are special pressing devices to yield a flawless sleeve cap quickly and easily. At home, a ham, sleeve board, clapper, iron, perseverance, and ingenuity are essential tools. Start by pressing flat around the seam allowances, as it was sewn. With some fabrics, this sets the ease and not much more pressing is necessary. Clip the armhole at the top ease points, and press open this 4 in. at the top of the sleeve. Fuss as needed to get the sleeve to look flawless.
Adding the shield and sleeve header
Once you’ve set in the sleeve, you’re ready to apply Armani’s signature shoulder shaper, the shield. Armani uses a generic woven hymo cut on the straight of grain. I prefer a super lightweight hair canvas cut on the bias. I insert the shield and the sleeve header- which fills in the sleeve cap- at the same time after the sleeve is sewn and pressed.

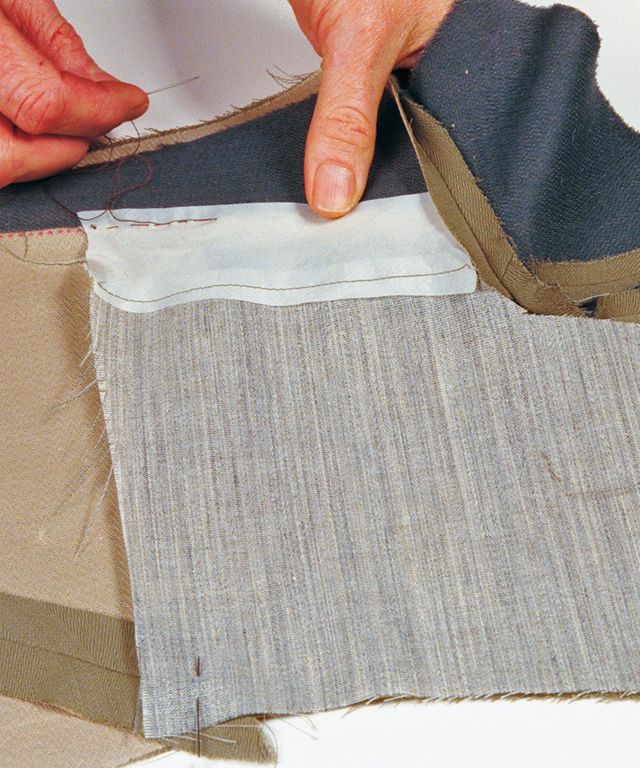
Shape the shoulder with a free-floating canvas panel called a shield, made from traditional, nonfusible hair canvas or hymo, and secured only at the roll line with hand stitches, as shown, and machine-stitched at the armhole seam allowance when the sleeve header is attached.
The shield is cut following the jacket front pattern in the shoulder area, including seam allowances at the armhole and shoulder edges. If your pattern has a dart in the upper front where the shield will go, make a duplicate pattern of the shield area, and pleat out the dart to make the shield pattern. Lay the shield pattern piece over the original front, and mark 1/2 in. from roll line or front edge. Transfer the grainline to a new piece, or adapt it to the bias if desired.
The shield’s outer edge is attached to the front at the armhole seam allowance at the same time that the sleeve header is joined to the seam allowances on the sleeve side. At the shield’s front/roll-line edge, lap a 1-1/4-in. strip of bias rayon lining and straight-stitch it to the shield at 7/8 in. Trim the hair canvas at 3/4 in., so only the lining layer is caught in the seam. Then stitch the other edge of the lining fabric to the roll line by hand, as shown in the photo at left. On collarless jackets, cut the lining strip the same grain and shape as the front, and stitch as you sew the facing. Neither the shoulder seam nor the lower edge on the shield is stitched; the shield floats, held in place only at the front edge and armhole.
On the Armani jacket I examined, the shield and header were machine sewn to the armhole seam allowances. I tried both hand-sewing and machine-stitching very carefully along the first stitching line, and I had better results with machine stitching. Stretch the fleece header and the shield slightly in the direction it will lay, so the armhole cups and keeps its shape. Press again; this is the final sleeve pressing.
Making your own shoulder pads
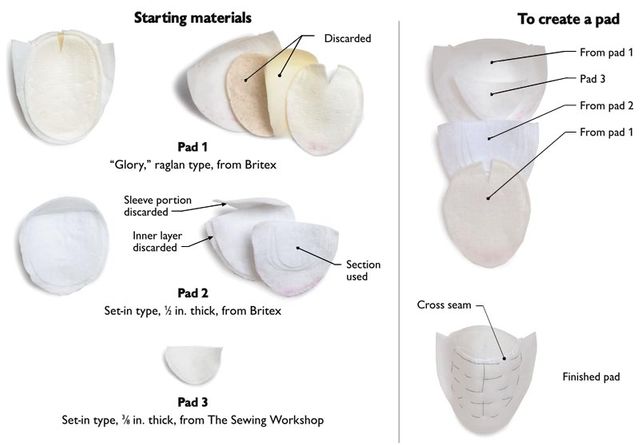
The Armani shoulder pad is as distinctive as the rest of his garments, and I’ve never seen anything exactly like it for sale to sewers. I combined several commercial shoulder pads to get the effect I wanted: an invisible support for the sleeve that adds height and fills in the sleeve cap (see Mimic an Armani shoulder pad…, below).
Mimic an Armani shoulder pad by making your own

I couldn’t find a commercial shoulder pad that mimicked the Armani original, so I made one. I used parts from commercially available pads, similar, I’m sure, to ones you can find at any good notions source. The resulting pad is softer and thinner than pad 1 and more substantial than pad 2.
Once it’s made, hand-stitch the crosswise seam of the pad to the armhole seam allowance for about 4 in. at the top of the sleeve. The back edge of the pad is also stitched with a few machine stitches to the seam allowance on the facing after the lining is sewn. At the neck edge, the pad is joined to the seam allowance of the shoulder seam with a 1/2-in. by 2-in. strip of lining and a few machine stitches. This provides a bit of play while holding it securely, without interfering with the movement of the shield. Like most of Armani’s construction ideas, it’s ingenious and quite copy-able.
Shoulder-pad sources
Britex
146 Geary St.
San Francisco, CA 94108
415-392-2910
www.britexfabrics.com
The Sewing Workshop
1250 Oakley
Topeka, KS 66604
800-466-1599
www.sewingworkshop.com
Marcy Tilton wrote about Armani’s patternmaking in Threads #82. For another in-depth look at an Armani jacket, see Louise Cutting’s “Peeking Inside an Armani” in the February/March 2003 issue of Threads (#105).
Photos: David Page Coffin and Sloan Howard; drawings: Karen Meyer


I would like the inside story on the Chanel jacket. I cannot find the Thread issue. I suggest you post it also.
I love the info given. I love good tailoring.
nice information about armani t shirts.
Thanks for that very informative article. It's a shame the accompanying photos are of such poor quality. The enlarged images are no better than those in the article. A video would be even more helpful.
Would you consider making videos of the steps outlined above? I don't understand the wedge---should the wedge along the roll line be cut on the straight of grain (versus following the grain for the jacket body)? I also didn't understand the "fusing" every 1/4" on the wedge.