
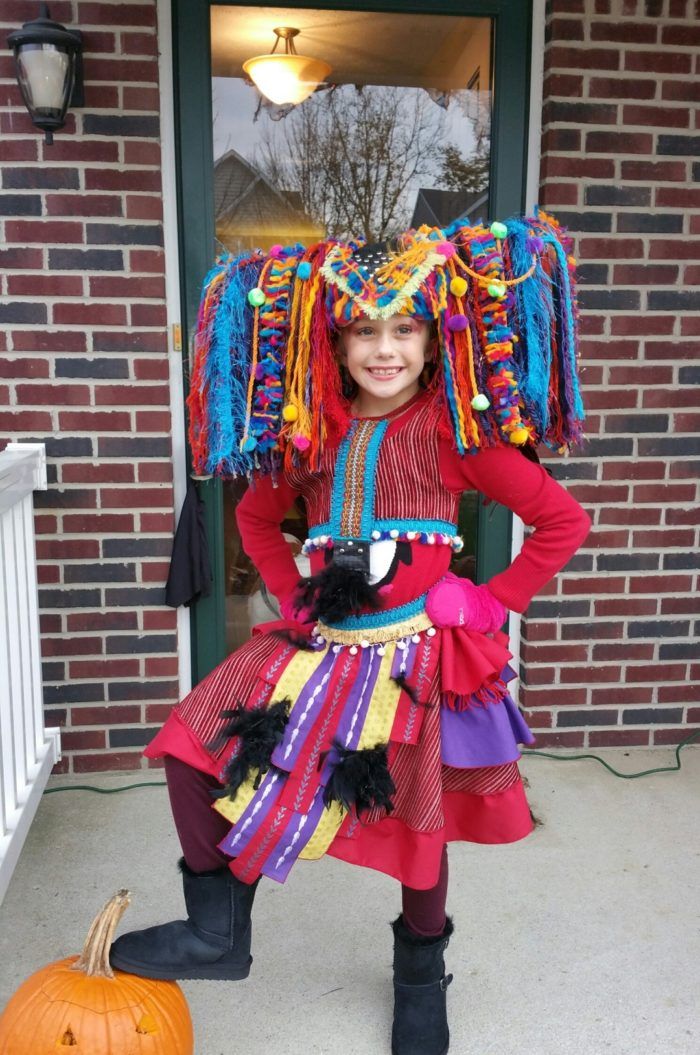
Tiger Lily
To make the headdress: I used card stock and cut 1.5 inch strips and wrapped a band around the circumference of my 8 yr old granddaughters head. Then I attached another one front to back and then 2 more on a diagonal. Once I had this secure and used paper mache to form a bowl that would sit on her head. After this dried I took a papertowel tube and cut an oval out of the middle and placed it on the bowl, followed by more paper mache. This provided the sides that would stick out where materials could be attached. ( lots of paper mache to make it strong to support materials!).
I shopped for materials at least 50% when possible. I cut long pieces of various materials- yarns, trim, ball fringe etc) and hot glued them to the sides close to where her face would be. Next I used a piece of vinyl and hot glued the top piece to the headress, This piece had colorful yarns under the front representing bangs. (More was better when attaching trim to this headpiece.) Metal studs were applied to the vinyl. To get the strands of multicolored yarns I purchased a skein of yarns and stitched wavy curves in a line followed by cutting strands an inch wide.
For the top and I used a tshirt pattern and some 90% off tapestry fabric I found. I made it sleeveless and put elastic in the back for a nice fitted look. To that I attached more trim, ball fringe, a piece of leather with studs to match the headdress and some black feathers.
For the skirt I started with McCalls M7009 with the tapestry fabric. I cut it one size larger than pattern since I was using a woven fabric. I added side ruffles in 2 colors and a bottom ruffle. Then I stiched together 3 layers of sewn together strips which I embroidered and attached these to the fron and back of the skirt. Feathers were attached by sewing by hand. Two colors of braided trim and ball fringed trim were added to the waist band.
In the picture you can see some back and white underneath the top- it was cool on Halloween and she was wearing an embroidered penquin sweater(!) that showed. The headress was not too heavy and well-balanced on her head. All in all a fun project and well worth the effort and she was thrilled!


one would hope that costume would fit her forever, as much time as it took! i know the feeling!
So sweet.