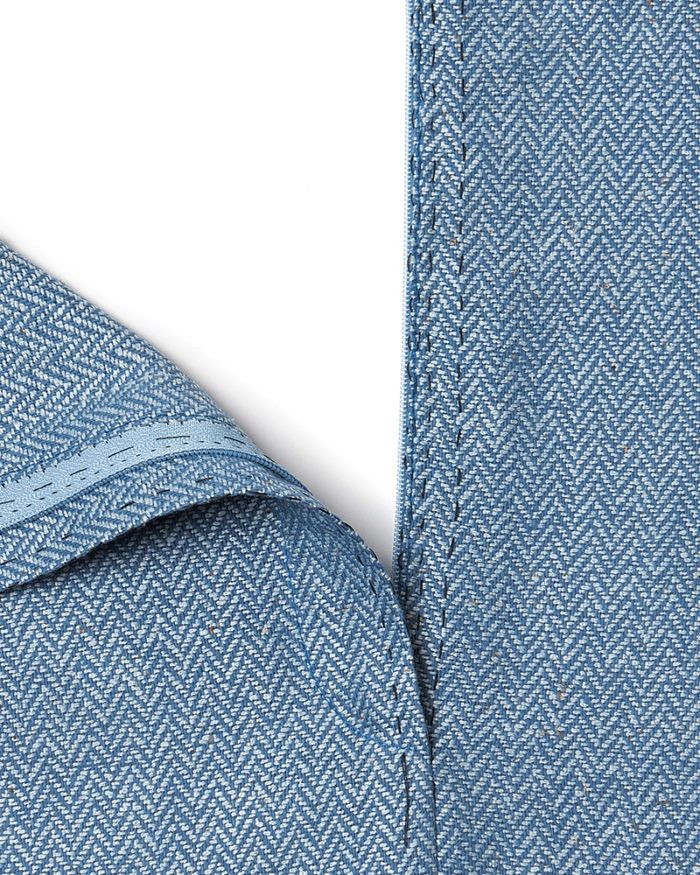
Couture Zipper Fly
A precise designer method
Many pant designs today, from jeans to traditional trousers, use fly zippers. Everyone who sews has a favorite method for setting one. I like the following technique best. I first saw it on a pair of Yves Saint Laurent couture pants, and I’ve seen it on many other couture designs by Dior, Chanel, and Valentino.
In this procedure, the fly opening is machine-topstitched without the zipper. Then the zipper is sewn into the opening by hand. This may seem silly, but it works well for most fabrics, especially very thick ones. On the overlap, it eliminates the problem of machine topstitching over the zipper teeth at the bottom and provides greater control and accuracy at all stages of the zipper insertion.
If your pattern doesn’t have an extended facing for the fly, you can add one by drawing a line parallel to and 1-1/2 inches from the center front. On women’s pants, fly zippers usually lap right over left and are particularly attractive when worn with blouses with button closures at the center front. Jeans flies for men and women typically lap left over right.
Prepare the opening
Mark and stabilize the garment sections for the zipper installation first. Follow this method for a smooth, flat fly.
1. Thread-trace the center front and waist edge on the pant fronts. Mark the foldline for the underlap extension on the left front at least 5⁄8 inch from the center front. It can be up to 1-1⁄4 inches away. With a deeper lap, the placket lies flatter and the zipper won’t peek out on tighter designs.
2. Prepare foldline stays. Use seam binding or a 3⁄4-inch-wide strip of lightweight silk. I prefer the selvage from lightweight silk such as organza, chiffon, or china silk. The selvage is easier to handle, but…
Start your 14-day FREE trial to access this story.
Start your FREE trial today and get instant access to this article plus access to all Threads Insider content.
Start Your Free TrialAlready an Insider? Log in


I hand stitch all my zippers with a pick stitch. The results are so much lovelier than machine stitched, and it works particularly well with wool and fabrics with a lot of body. Silly indeed! :-)
Maybe I misunderstood the directions, but it seemed that after the placement of the zipper, the wearer would use their left hand to use the zipper. I have never had any pant or skirt where I used my left hand to unzip or zip. The flap has always closed the exposure from the left for using the right hand to unzip/zip. Have I got this mixed up on the pattern instructions? Thanks!
Hi, user-7452025,
Yes, these directions yield a zipper that laps right over left (so you would unzip with the left hand). This is traditional for women's clothing--it's the same direction a woman's blouse overlaps.
These days, many women's ready-to-wear garments with fly zippers lap the other way (left over right), traditionally the "men's" way, as a style choice. Either way is correct. If you prefer that, simply reverse the directions given here.
Carol J. Fresia
Threads Senior Technical Editor
Why do the instructions say to sew to 2" from the inseam (step 4) but then top stitch all the way to the crotch seam (step 6)?
I wish these instructions indicated when to finish the raw edges of the zipper extensions and crotch seam. Also -- are zipper shields not included on couture garments? They seem... nice to have. When is the best step to add one if desired?
“Mark the foldline for the underlap extension on the left front at least 5⁄8 inch from the center front. It can be up to 1-1⁄4 inches away.”
Can you please explain how that works out graphically? What does it look like in the picture when the underlap extension is 1.25 inches away? Thank you, Audrey
Hi, Audrey. If you mark the foldline at 1 1/4 inches from the CF, the zipper ends up recessed farther under the overlap. On most patterns, and also on most purchased clothing, the zipper is just far enough under the overlap side to remain hidden. But when it's recessed a bit more, the overlap has a more space past the zipper, and can lie flatter along the CF line during wear. This is a nice refinement, but not essential. You might want to try putting that foldline at 3/4 inch or 7/8 inch to see if you get any improvemet in your garment.
Carol Fresia
Hi Carol, thank you for your swift answer. I enclose the drawing I made in order to make the right change on the pattern. So B is the new underlap foldline. Nr. 2 is the new most external line of the underlap. Is that correct?
Hi, Audrey. Yes, that looks correct. Claire doesn't specify to widen the overall underlap extension, but I don't see why you shouldn't do so. If it's too much, you can always trim it off!
Carol
Thank you Carol. This is very helpful.
Audrey
Is a fly shield sewn on later in the construction? Or is there another way to have something between the zipper and the wearers body.