

Chiffon and Pearls Embellishment
Incorporate this elegant chiffon and pearl trim into your garment

Combine a three-strand silk chiffon braid with lustrous glass pearls to create a ladylike embellishment. This elegant retro trim can be incorporated into a garment in the making or added to a store-bought design. It is perfect for straight edges and flexible enough to be manipulated easily around curves. The pearls can be sewn on with a specialized presser foot or by hand.
Keep in mind when applying pearls that they are heavy. The larger the pearls, the more sparingly to use them. For fabric choices, take advantage of fabrics with cross-dye weaves and texture, such as silk chiffons and colorful tweeds. These elements will give your braided strips added depth.
Make chiffon braids
Weave tubes of on-grain or bias-cut chiffon into three-strand braids to trace garment details or highlight seamlines. First cut and sew the chiffon into tubes, then braid them into lengths for garment application with an adjacent row of hand- or machine-stitched pearls.
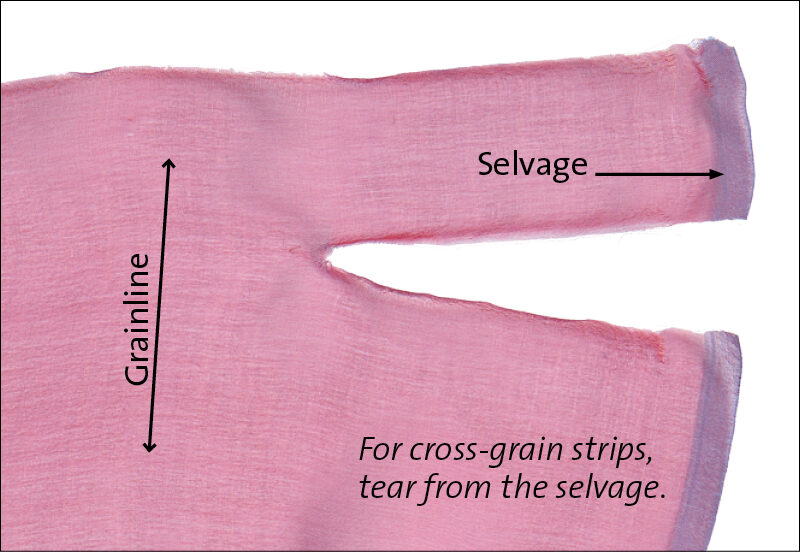
Rip on-grain
The fastest and easiest way to accurately create on-grain chiffon strips is to tear the fabric. Calculate the finished braid length and add 20 percent to the strip length to compensate for the braiding take-up. Piece if necessary. For each braid, tear three lengths. Tear in the direction that best optimizes the fabric’s surface and colorway. Tear strips 1-1⁄2 inches wide. Press the strips to “settle” the torn edges.
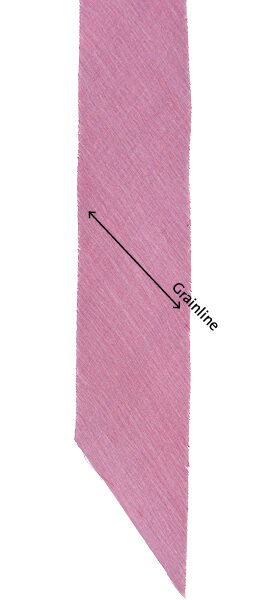
Cut on the bias
Cut the strips on the true bias, and consider the best direction to showcase the fabric’s qualities. For each strip, estimate the finished braid length, then add 20 percent to cover that taken up by braiding. Prepare three lengths of 1-1⁄2-inch-wide strips, piecing if necessary. Lightly steam the bias strips, being careful not to stretch or distort them.
Turn strips into tubes
1. Machine-sew the strips into narrow…
Start your 14-day FREE trial to access this story.
Start your FREE trial today and get instant access to this article plus access to all Threads Insider content.
Start Your Free TrialAlready an Insider? Log in


Log in or become a member to post a comment.
Sign up Log in