Embellishments: How to Create Simple Embroidery
Learn how to make the outline stitch, satin stitch, and raised knot stitch
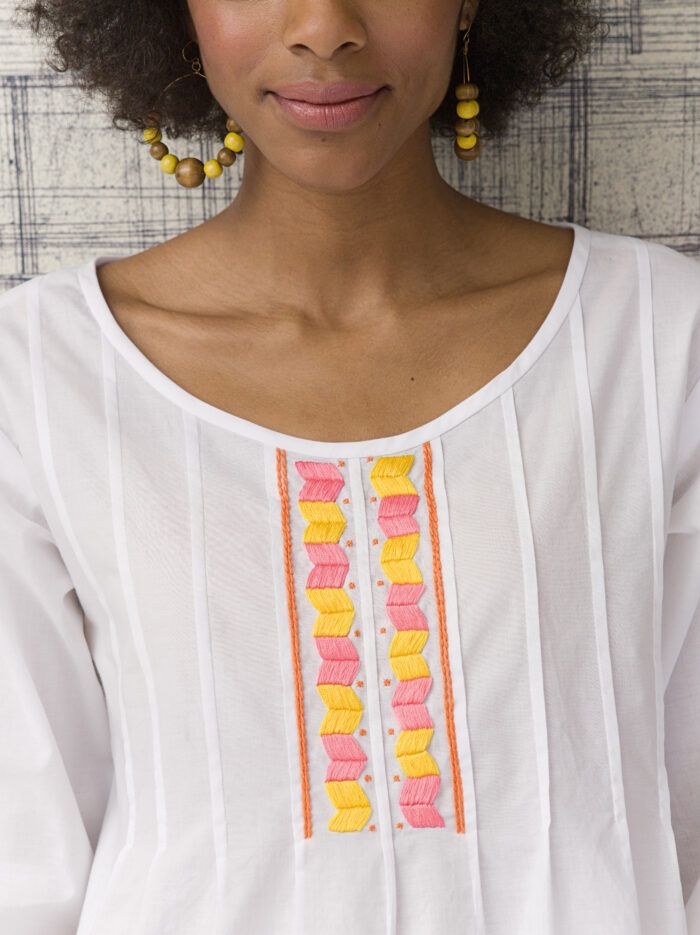
I have sewn garments for most of my life, beginning with clothes for my Barbie doll. Sewing has become my vocation, and hand embroidery is my favorite indulgence. Whether it is decorating a 17th-century-style wooden box or embellishing a garment, I find the process stimulating and the results satisfying. There are a multitude of embroidery stitches that can be used, but I will show you how to stitch three, and how to combine them in a more complex embroidered motif. In this article, we’ll go over embroidery materials and how to make the outline stitch, satin stitch, and raised knot stitch. Enjoy combining these simple embroidery stitches into your own designs.
Gather the materials
Hand embroidery requires just a few tools and materials, as well as some preparation, before you start stitching.

Fabric and hoop
Always stretch fabric in an embroidery hoop to keep it taut while stitching and to help maintain even thread tension and precise stitch lengths. To transfer an embroidery design to fabric, use a pencil to lightly mark the design’s outline.
It is usually best to sew the embroidery design before constructing a garment or home décor item. For easier hooping, trace the pattern pieces onto the fabric and rough-cut the pieces. Some garment designs may be easier to embroider after construction; for example, I embroidered the blouse shown on the facing page after sewing the tucks.

Floss
Two embroidery floss brands to source in a wide color variety are DMC and Anchor. You should prewash embroidery floss to remove excess dye, as most colors are not colorfast.
A typical length of embroidery floss is made up of six strands. Untwist and separate the strands, press them if desired, and then smooth them back together to ensure the best stitch coverage. You can use as many strands as you wish for the embroidered design; the more strands used, the better the coverage. When embroidering a design with very small or fine elements, use fewer strands. Test the embroidery design to determine the number of strands that render the desired effect.

Needles
Use sharp embroidery needles (sometimes called crewel needles); they are distinguished by a long eye. The needle should draw the thread through the fabric with minimal abrasion of the thread, but the eye or the needle should not be so large that it leaves a noticeable hole in the fabric. Embroidery or crewel needles come in sizes 1 through 12, 1 being the largest. Start somewhere in the middle with a size 7, and choose a larger or smaller size depending on how the threaded needle passes through the fabric.
Outline stitch
True to its name, the outline stitch is used to trace a shape to be filled or simply to work a straight or curved line, such as a flower stem, lettering, or edging. When working the outline stitch, always keep the thread to the right of the needle. Work the outline stitch from left to right; reverse these directions if you are left-handed. The stitch’s wrong side resembles a backstitch.

1 Bring the needle to the fabric’s right side at A. Leave a long floss tail on the wrong side. Take the needle a short distance to the right, and insert it to the wrong side at B. Bring the needle to the right side one half stitch behind B (between A and B) at C. Keep the thread to the needle’s right.

2 Take the needle one whole stitch length to the right of C. Insert the needle to the fabric’s wrong side at D. Bring it up one half stitch to the left at E; E is the same location as B. Continue stitching in the same sequence. Once the outline is complete, either tie off the thread on the wrong side or pass the thread tail through the previous stitches on the wrong side.
Satin stitch
The satin stitch is a filling stitch; it is used to fill in outlined shapes with solid, smooth stitches that show off the floss’s sheen and completely cover the background fabric. The satin stitch can be difficult to sew, because the stitched edges should be perfectly smooth, with no sharp transitions between thread lengths. Keep the stitches straight, parallel to one another, and spaced closely along the fabric surface.

1 Start at one end of the outlined shape or the design’s edge. Bring the needle to the fabric’s right side at A. Travel across the shape to the opposite design line. Insert the needle to the wrong side at B, on the opposite side of the outlined shape.

2 Bring the needle back to the work’s right side at C, next to the first thread. There should be no space between the first and second threads. Travel across the shape to the opposite edge and insert the needle to the work’s wrong side at D, opposite C.

3 Continue stitching densely packed, parallel stitches in this manner until the shape is filled. No fabric should be visible between the stitches. After filling the area, pass the thread tail under the stitches on the wrong side.
Raised knot stitch
The raised knot stitch is an isolated stitch you can use in various sizes to accent an embroidery design. Work a basic cross-stitch, then backstitch over each spoke to create a firm, raised knot.

1 Bring the thread to the fabric’s right side at A. This is the lower left corner of a square. Make a diagonal stitch to the upper right corner, inserting the needle to the wrong side at B. Bring the needle back to the right side at C, in the lower right corner. Then, sew another short, diagonal stitch to the upper left corner, crossing the first thread, and insert the needle to the wrong side at D.

2 Sew the backstitches. Bring the needle to the work’s right side between A and C, close to the center of the cross, at a. Carry the thread across the C spoke and insert the needle to the work’s wrong side at b.

3 Bring the needle back to the right side between A and D at c. Carry the thread across the A spoke and insert it to the work’s wrong side at a.

4 Bring the needle back to the right side between D and B at d. Carry the thread across the D spoke and insert it to the wrong side at c.

5 Bring the needle to the right side between the C and B spokes at b. Carry the thread across the B spoke and insert it to the wrong side between spokes B and D at d. After completing the raised knot, tie off the thread on the wrong side.
Norma Bucko is Threads’ staff seamstress and an expert in embroidery techniques.


Log in or create an account to post a comment.
Sign up Log in