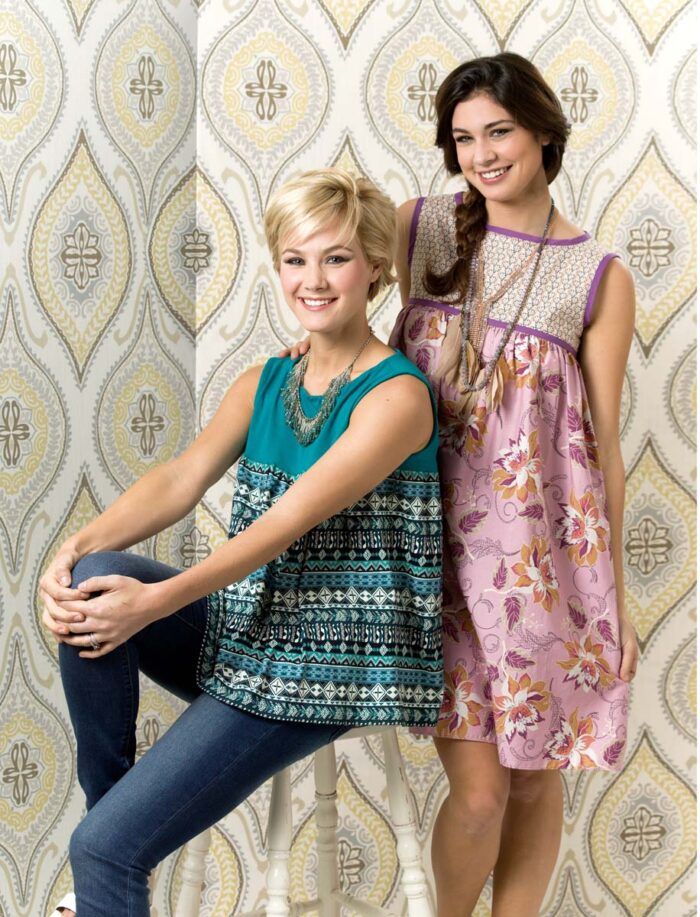
Baby-doll styles are easy to make, flattering on many body types, and offer much opportunity for self-expression with different design elements. All you have to do to create the silhouette is trace a bodice from an existing pattern or garment. Then, gather a fabric rectangle and attach it to the bodice to create the skirt section.
Wovens or knits work for this design. A woven fabric yields a more structured silhouette and should be finished with a 14-inch center-back zipper, while knits can be combined to sew a closure-free, pullover style. Depending on the garment type you choose to make, you’ll need approximately 1/2 yard of 45-inch-wide fabric for the bodice, and about 1 yard of 60-inch-wide contrast fabric for the shirt or dress option.
Next, choose a method to make the bodice pattern. You can use a bodice from an existing pattern, such as BurdaStyle 7051 or New Look 6000, and cut the length to the appropriate size, or follow along as I demonstrate how to trace a bodice section from a garment you already own. Once the bodice is sewn, add a binding around the armhole and neckline edges if making a woven version. For a knit bodice, face the raw edges with fabric strips.
Create the Baby-doll Patterns
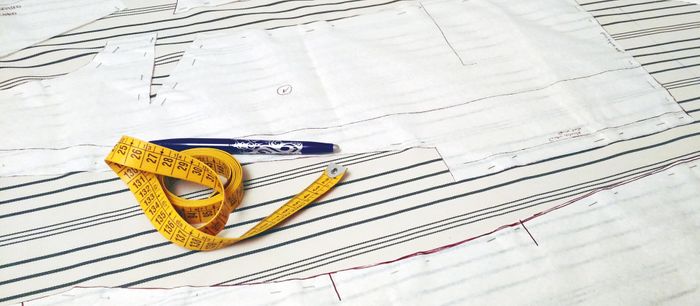
Begin with two pieces of pattern paper (each approximately 20 inches square), a slightly larger piece of cardboard, a ruler, a fashion ruler, a needle-point tracing wheel, pins, and a pencil. Then, choose a garment from which to trace the bodice front and back.
 Choose a garment
There are a few things to consider before choosing a garment to trace. While you might have a favorite sleeveless top or dress that fits perfectly, you should first make sure the fabric type is comparable to what you plan on using for this project. A flimsy knit tank top, for instance, wouldn’t make the best pattern for a cotton twill shirt. The knit tank top may fit like a glove, but the cotton shirt won’t stretch to mold to your body. If you plan to use knits, make sure to test the fabric’s and the garment’s vertical and horizontal stretch before choosing a top to trace. If they aren’t alike, the traced version could be too baggy or might not fit over your head.
Trace the edges
1. Prepare to trace. Position a piece of cardboard that is slightly larger than the pattern paper on your worksurface. Then, lay the pattern paper in the center of the cardboard.
2. Orient the garment. If necessary, press the garment to remove any wrinkles or creases. Then, fold the garment in half so the bodice front is facing you. Indicate the center-front line by pressing the fold with a crease or marking it with pins.
3. Lay the folded garment flat. Align the garment’s front fold with one paper edge. Place pins along the garment’s edges and corners to retain its shape.
4. Trace the bodice. Use a needle-point tracing wheel to outline half of the bodice. Starting at the neckline fold, trace the garment along the neckline, the shoulder seam, the armhole curve, and the side seam. You may need to rearrange the top every so often to make sure the traced sections remain flat. Trace as much of the side seam under the armhole as desired: The sample garments include 1 inch to 2 inches of side seam.
5. Check the tracing. Remove a few pins and lift up one part of the garment at a time to make sure the tracing transferred to the pattern paper. Retrace any edges as necessary.
6. Draw the outline. Use a fashion ruler, a ruler, and a pencil to connect the holes. Feel free to true (or smooth) any uneven sections. Then, to draw the bodice’s bottom edge, extend a line from the side seam’s lower end toward center front, so it intersects the center-front edge at a right angle.
7. Trace the bodice back. Repeat steps 1 through 6 for the bodice back. Be sure to fold the garment so the bodice back is facing you in step 2.
Complete the bodice pattern
1. Add a shoulder notch. Align the bodice front and back pieces at the shoulder seam by folding one pattern piece along this line. Make sure the shoulder widths match. If they don’t, adjust them as necessary. Then draw a notch across the seam.
2. Mark the side seam. Align the bodice front and back pieces at the side seam by folding one pattern piece along this line. Make sure the lengths match. If they don’t, adjust them as necessary. Then draw a notch across the seam.
3. Add the seam allowances. Add 1⁄2-inch-wide seam allowances to all of the bodice front and back edges, except for at the center front, if using a knit fabric. For wovens, add 1⁄2-inch-wide seam allowances at the shoulder, side seam, and bottom edge. Then, add a 3⁄4-inch-wide seam allowance at the center back to allow for a zipper. The remaining edges are finished with a binding, which is applied along the seamline.
4. Label the pieces and cut. Mark a grainline parallel to the center-front and center-back lines on each pattern piece. Give each piece a name as shown, and indicate that the bodice front is cut on the fold at the center front. Then, cut the patterns.
 Construct the Garment
Attach a gathered fabric rectangle to the sewn bodice to give the skirt section a slight A-line silhouette. If working with woven fabrics, finish the seam allowances as desired after sewing each seam, and insert a 14-inch center-back zipper to complete the garment. Sew all seams with 1⁄2-inch-wide seam allowances unless otherwise noted.
1. Prepare the bodice. Lay the bodice pattern pieces on the fabric. Pin and cut the pieces. Then, with right sides together, sew the front to the backs along the side seams and shoulder seams. Press the seam allowances open.
2. Finish the edges. For knits, cut a 2-inch-wide on-grain or bias self-fabric strip, slightly longer than the edges to finish. Fold the strip with wrong sides together, align the raw edges on the garment’s right side along the neckline and armhole edges, then sew. Trim the seam allowances to 1⁄4 inch, and clip the curves. Understitch the strip, press it to the garment’s wrong side, then hand-stitch the fold in place. For a woven bodice, bind the edges with double-fold bias tape following the manufacturer’s instructions.
3. Consider the width. Drape the skirt section fabric around your body at the level where the bodice ends to determine the desired width. Measure this circumference and multiply the measurement by approximately 1.5 to allow for gathering. Increase or decrease this dimension depending on your preferences. Next, add two 1⁄2-inch-wide seam allowances to the width if using a knit fabric. For a woven, add two 3⁄4-inch-wide seam allowances to make room for a center-back zipper.
4. Gather the skirt. Baste two rows of gathering stitches along the skirt section’s top edge, inside the seam allowance. To distribute the gathered fabric evenly, divide the bodice and skirt section into quarters and mark each quadrant, within the seam allowance, with a pencil. With right sides together and raw edges aligned, pin the corresponding sections together. Pull the stitches to gather the fabric until the skirt and bodice widths match.
5. Join the bodice to the skirt. Pin the rest of the bodice to the skirt section and try on the garment to make sure the bodice/skirt seam falls at the desired location over the bust. If necessary, mark the adjusted level on the bodice with chalk or pins and recut the seam allowance. Then, with right sides together, sew the bodice to the gathered skirt section.
6. Sew the center-back seam. Stitch the entire center-back seam, with right sides together, if working with knits. For wovens, sew the center-back seam from the zipper bottom point to the hem with a 3⁄4-inch-wide seam allowance. Then, insert the zipper.
7. Determine the length. Try on the garment, and choose a desired length. It may help to mark the hem with chalk or pins to make sure it is level. Next, add 1⁄2 inch to the hem if using a knit fabric. For a woven, add 1 inch to the hem. Then, cut the skirt length.
8. Hem the skirt. Turn up the hem 1⁄2 inch on a knit fabric. Press the hem and use a double needle to topstitch it in place. For a woven fabric, press and sew a 1⁄2-inch-wide double-folded hem, or edgestitch a narrow hem as shown below.


Log in or create an account to post a comment.
Sign up Log in