

Make Three Different Shirts Inspired by the Runway
Create three runway-ready shirts inspired by Anna Sui, Fendi, and Marc Jacobs

Create three runway-inspired shirts based on designs by Anna Sui, Fendi, and Marc Jacobs. The shirts featured here were made from Simplicity SewStylish patterns 2568 and 2570, but you can use patterns with similar silhouettes to get the same effect.
Each top reflects a designer spin on a pattern. First, layers of trim were combined on pattern 2568 to create a print motif inspired by Anna Sui. Next, the neckline of 2570 was adjusted to create a dressy, Fendi-inspired bow-back top. And finally, a billowy neckline and sleeves were added to 2568 for casual, cool style in the manner of Marc Jacobs.
Mix and match techniques to suit your style. You could even apply them to ready-to-wear garments to jazz up items already in your closet.
Mix Master
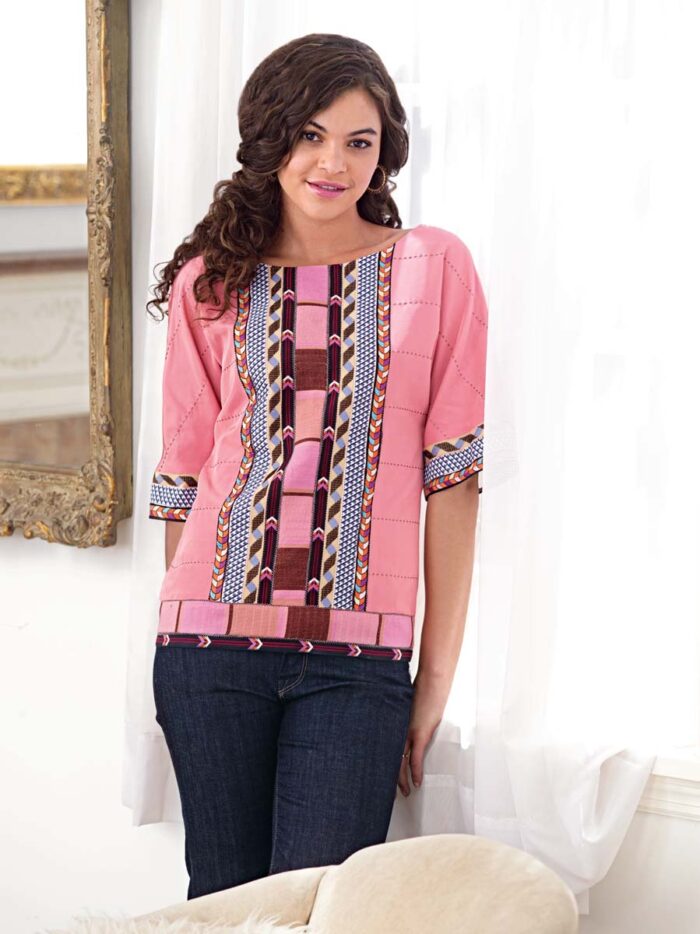
Piece together contrasting trim to design your own fabric. Be sure to choose strong trim with tight weaves to guarantee they won’t shred after sewing. Here, fabric trim was sewn into the center front, sleeves, and hem of Simplicity SewStylish pattern 2568.
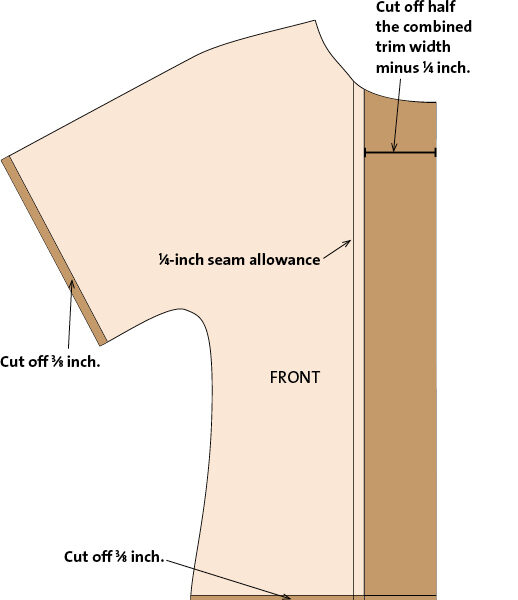 1. Draw the top patterns. Trace view B of the pattern with the neckline from view A. Lay out the trim the way you want them positioned. Measure their combined widths. Remove half that measurement from the center front on the top pattern minus a 1⁄4-inch seam allowance, as shown at left. Cut 3⁄8 inch off the sleeve and hem of the shirt front and back.
2. Cut out the shirt pieces. Cut two fronts and two backs from the fabric.
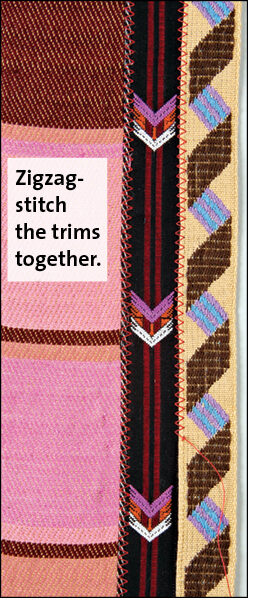
3. Combine the trim. Measure the length of trim needed for the center front, and cut all of the trim to this length plus 3 inches. Abut the trim in the desired order. To secure it, zigzag over the edges, as shown at right.
4. Attach the trim. Turn under the center-front edge of each shirt front 1⁄4…
Start your 14-day FREE trial to access this story.
Start your FREE trial today and get instant access to this article plus access to all Threads Insider content.
Start Your Free TrialAlready an Insider? Log in


It's unfortunate that there aren't any photos of the backs of the garments--particularly the style featuring "a top that’s as stunning from the back as it is from the front. "
Ask and ye shall receive! Updated!