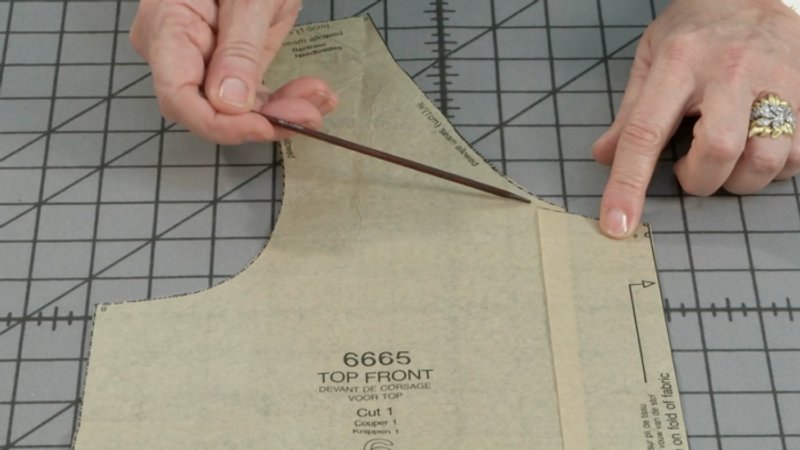
A common fit problem in garments with a round or scooped neckline is gaping along the neck edge. Threads Contributing Editor Louise Cutting offers two methods for reducing the excess neckline circumference in a pattern.
Remove from the center front
One approach calls for cutting a line from the pattern’s neck edge to the hem, about 2 inches from center front and parallel to the grainline. Leave a hinge at the hemline. Overlap the strip’s neckline end by half the total amount of excess you wish to remove. This eliminates a gap that’s near center front or the lower curve of the neckline.
Remove near the shoulder
The other approach removes excess a little higher up the neckline, closer to the shoulder seam. Make a cut across the shoulder portion of the pattern, from the neckline to the about halfway up the armscye, leaving a hinge at the armscye edge. Overlap the shoulder portion by half the needed reduction.
In both cases, redraw the neckline edge for a smooth curve. Adjust any facing or binding patterns to match the new neckline shape.


Keep in mind that if you remove the excess from near the center front line (method 1), you will also be reducing the bust measurement. So the second method may be a better option if you are full busted.
I agree with blbirdsong.. The gaping happens because of the inadequate bust fitting dart. A better solution would be adding this excess to the bust dart or creating a dart to eliminate neckline gap. This also works with armhole gaping with sleeveless designs.
So...with this technique, when I start to lay pattern piece down on the fold, I do lay it straight on the fold? And will this not distort the shoulder and sides? OR, although the alteration that was done makes the pattern appear off, is it part of the reshaping to more closely fit to the body?
How do you how much excess has to be removed. Is there a way of figuring it out without stitching the garment
A test garment is the best way to verify exactly how much you need to take out, but you can wing it a bit with a tissue fitting. Put on a close-fitting T-shirt, and pin the front pattern to it. Align the shoulder seamlines and center fronts, then pin along the side seam as much as possible, anchoring the pattern under the arm. This should reveal if there is gaping at the neckline. Fold out a dart to make the neckline lie smoothly against the body. This is approximately the amount you'll want to take out of the pattern. Try folding a somewhat vertical dart near center front to see if that solves the problem. If you don't like that effect, fold a more horizontal dart from the neckline across to the armscye. This will also tell you which method might do a better job of eliminating any gaping.
Carol Fresia, Threads Senior Technical Editor
Hi Carol Freesia, SewItFits had a question that really gets to a serious issue about fabric grain- if a pattern piece is supposed to be laid on the fold, how should the adjustment be made? And to speak for a certain population of readers, I need this adjustment because I am 5’2” and narrow from left to right but have a 32DD chest. I always have to remove some neckline or redraw it. Please address this and the grainline question for those of us who have this problem 🙏🏻
Thank you for being such a valued resource of sewing information!
Stacy
Hi, Stacy,
Louise says the center-front fold is retained: It's the side-seam portion of the pattern that is slightly tweaked. Therefore, on a striped fabric, the stripes will hang perfect vertical at center front, as usual. The grain shift toward the side seams is very slight and inconsequential in the finished garment.
Carol Fresia
The grainline remains intact. In the video, she moved the narrow right piece over the larger left one. Try imagining that this pattern adjustment is done by having the narrow strip (on the right) remain where it is and the larger part of the front (on the left) is moved over to slightly overlap it. The result is the same as what is shown in the video, but it is easier to see that the grainline and the fold line remains unaffected.