

To Get the Right Armhole, Fit the Bodice
Fitting the bust dart, shoulders, and side seams
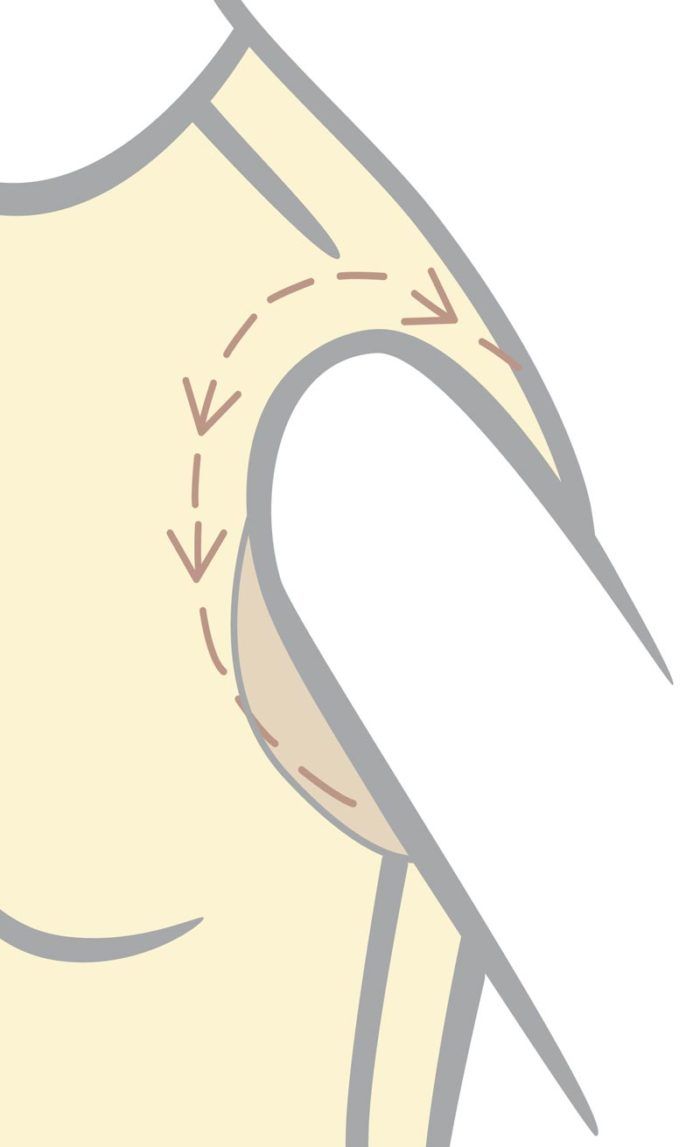
Fitting an armhole requires fitting the bust dart, shoulders, and side seams.
There’s more to fitting an armhole, also known as an armscye, than you may think. It requires fitting the bust dart, shoulders, and side seams. And the only way I know to successfully fit an armhole is to use a muslin. For more information on armhole fittings be sure to pick up Threads #117, and don’t miss other techniques like this one by ordering a subscription.
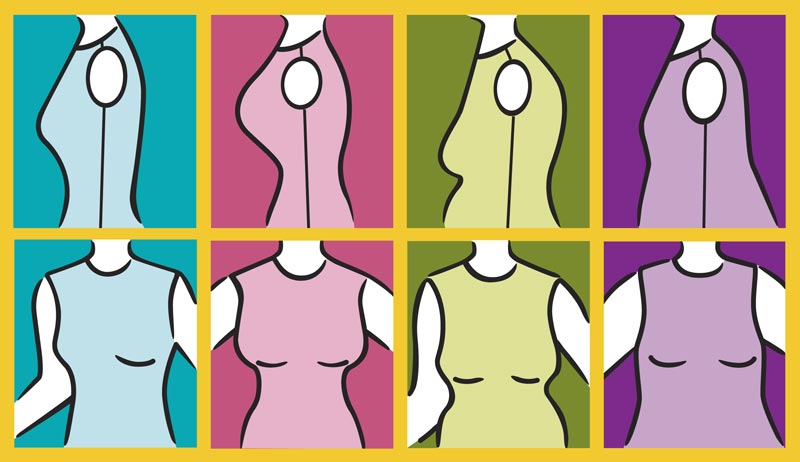
People with identical bust and over-bust measurements often fit into the same size and style pattern differently. The shape of your body depends on where you carry your flesh and dictates the shape of an armhole. A muslin is the testing ground—it’s the perfect place to sort out fit issues.
Same measurements, very different figures
A muslin is a test garment in inexpensive fabric, initially sewn without facings or edge finishes. You pin-fit the muslin right on the body. The object is to make the fabric skim the body with no signs of wrinkles or strain lines. Although becoming a fitting expert can take years of practice, I’m going to give you a straightforward method of how to fit an armhole and develop a well-fitting bodice muslin that accurately reflects the shape of the body.
Follow this order when fitting: bust, back, underarm, shoulder seam placement and slope, shoulder point to underarm, and side seams. Then adjust the pattern tissue using the fitted muslin as your guide. Such a completed pattern can be used as a reference to position darts and establish the armhole shape in future patterns. You’ll end up with a perfect pattern for a closely-fitting bodice with or without set-in fitted sleeves. Just because fitting can be complicated, don’t let it scare you away.
Glossary of terms
Start your 14-day FREE trial to access this story.
Start your FREE trial today and get instant access to this article plus access to all Threads Insider content.
Start Your Free TrialAlready an Insider? Log in


I know this is the way to fit the "standard" armhole. Has anyone designed an armhole pattern for the Bunka model? It is more "lifelike" in my opinion. http://www.fashion-incubator.com/archive/japanese_dress_forms/
Perhaps this (the Bunka form) could be a future Threads article???
RoseM
I know that his works for the armhole, but my problem is with a jacket that fits too tightly to raise my arm and write on the blackboard. Any suggestions? Adding to the center back does not help and makes the jacket look sloppy.
Try adding a gusset in the underarm. I saw this on threads.
hi rose
i am working on the bunka sloper.would you like to discuss it ?
"The correct bust dart also keeps the armhole from gaping."
" pinching out a dart in the armscye to eliminate the gape and then moving the dart to a better location later is a good approach."
My shirt gapes above the full bust. Pinching out an extra dart there at the armscythe would close the gap, but I imagine it would like strange. Is that "done"? Advice?
Thanks in advance!
nice.... solo me gustaria en español
Armholes are my nemesis. Thanks for a great article! I'll keep trying!
I am a confused and oncerned about this advice: "Don't try to fit a too-small pattern. A strain between bust points means you need a larger pattern."
The way I read this, I disagree. You may NOT need a "larger pattern" as in a size up, but you could use an Full Bust Adjustment.
If the shoulders fit well, and everything fits except the bust strains, then you need only increase the bust area. Which does take some finessing and trial and error, also truing of the armscye afterwards.
I have finally learned this, having been frustrated with fit for years using larger patterns instead of making larger only where I needed it.
Now, if by "larger pattern" you mean making a pattern larger where needed (not another size), well then I agree.
Still lots of great info here, though. Thanks.
Where is the rest of the article?
user-3925252: You can click individual page numbers, the "next" button, or the "view all" option.
Evamarie Gomez
Web Producer
Threads
love this post....I keep trying to perfect my shirts. I finally got one just right and it does have a very high underarm seam and the sleeves fit correctly to the bodice to allow easy movement yet it is not too loose.....I worked so hard to achieve this and it is actually very comfortable. A well fitted 100% cotton shirt of a finer fabric---this was about 8 dollars a yard but it is a very nice cotton shirting fabric and more and more difficult to find---it is actually more comfortable and cooler than a tee-shirt or knit shirt or a man-made blend. I also try to make it from the center out because if you think about it, unless you have unusually shaped shoulders or neck and the front is straight the only place you are going to get fabric is from the sides if you do not have a princess seam. I try to get the armhole high and correct as to move my arm forward without pinching and then just keep bringing in fabric from the side as needed......in fact, it is not necessary to finish the side seams (flat fell, or whatever) until it has been washed a few times. Then the front will hang straight and not gap open and and necessary adjustment can come from the sides....actually I just read this in a shirt book and I think it was from Threads. Well, just saying this technique has worked well for me but it has taken some time......what do you think......cl
If the armscye is altered, then does the sleeve also need to be altered, and how does one know what changes to make in the sleeve?
Louise Cutting has some very good information on altering the sleeve. I haven't tried it yet but it is the easiest and best way I Have found.