

A Guide to Indispensable Elastics for Garment Sewing
Get the right stretch for any project

Walking down an aisle full of elastics can be overwhelming. With so many widths, compositions, and applications, where do you begin? These flexible fibers offer “grip” at waistbands and cuffs, provide a convenient way to finish edges, and can be used to manipulate fabric for decorative effects, such as shirring and ruching. Here is an introduction to the wide variety of conventional and decorative elastics available to home sewers, as well as some basic application methods.
Types and applications
Elastic is available in a variety of forms from thread to bands. The structure is commonly knit, woven, or braided. Woven and knit elastics maintain their width when stretched and usually can be sewn directly to fabric, whereas braided elastic narrows when stretched, and should be used in a casing. The chart below enables you to compare a variety of elastic types at a glance.

Uses in waistbands and cuffs
There are two main ways to use elastics in waistbands and cuffs. Sew them directly to the fabric, or insert them into a casing. A casing is particularly desirable because it enables you to replace the elastic easily if necessary.
Apply directly to the fabric
1. For this application, use a woven or knitted elastic, and extend the garment’s edge by adding twice the elastic width plus 1/2 inch for seam allowance. Sew with a straight, zigzag, or knit stitch, and a ballpoint, universal, or stretch needle to avoid piercing the elastic’s fibers.
2. On the garment’s wrong side, mark a placement line for the elastic. Divide the garment into four equal sections and mark.

3. Overlap the elastic’s ends 1/2 inch and sew along all four overlapped edges. Quarter and mark the elastic, as done in step 2. Working from the wrong side, match markings and align the elastic on the placement line.
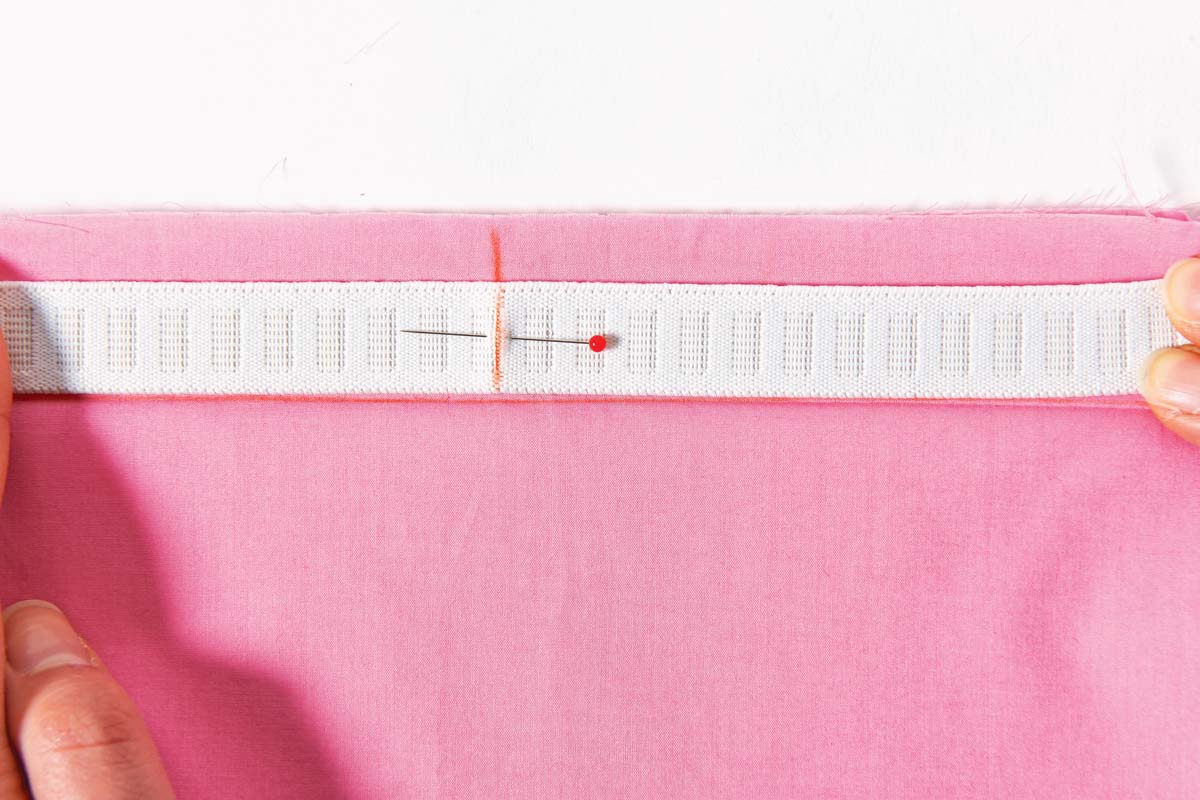
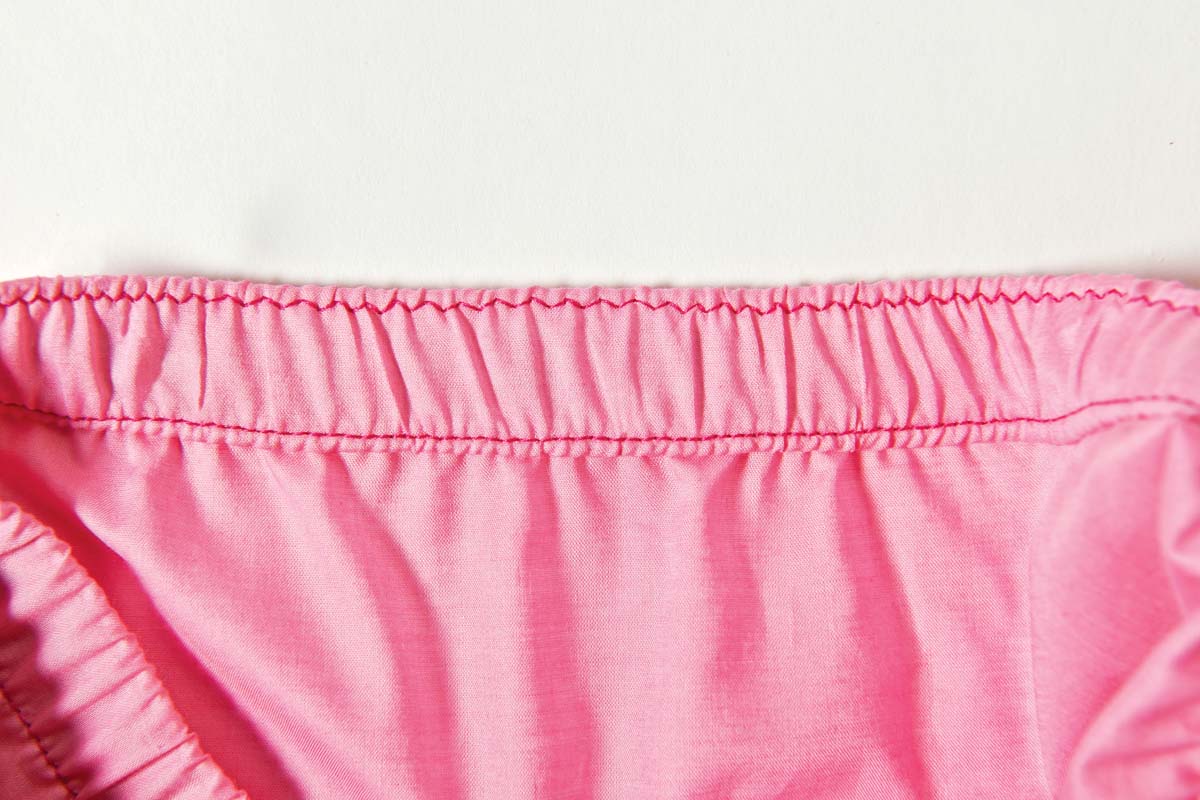
4. Turn the raw edge over the elastic with wrong sides together. Fold the garment along the placement line. Stitch along the elastic’s upper and lower edges; stretch the elastic as it is sewn. If you need to stop and adjust, be sure the machine needle is down so the stitches don’t jump.

Insert into a casing
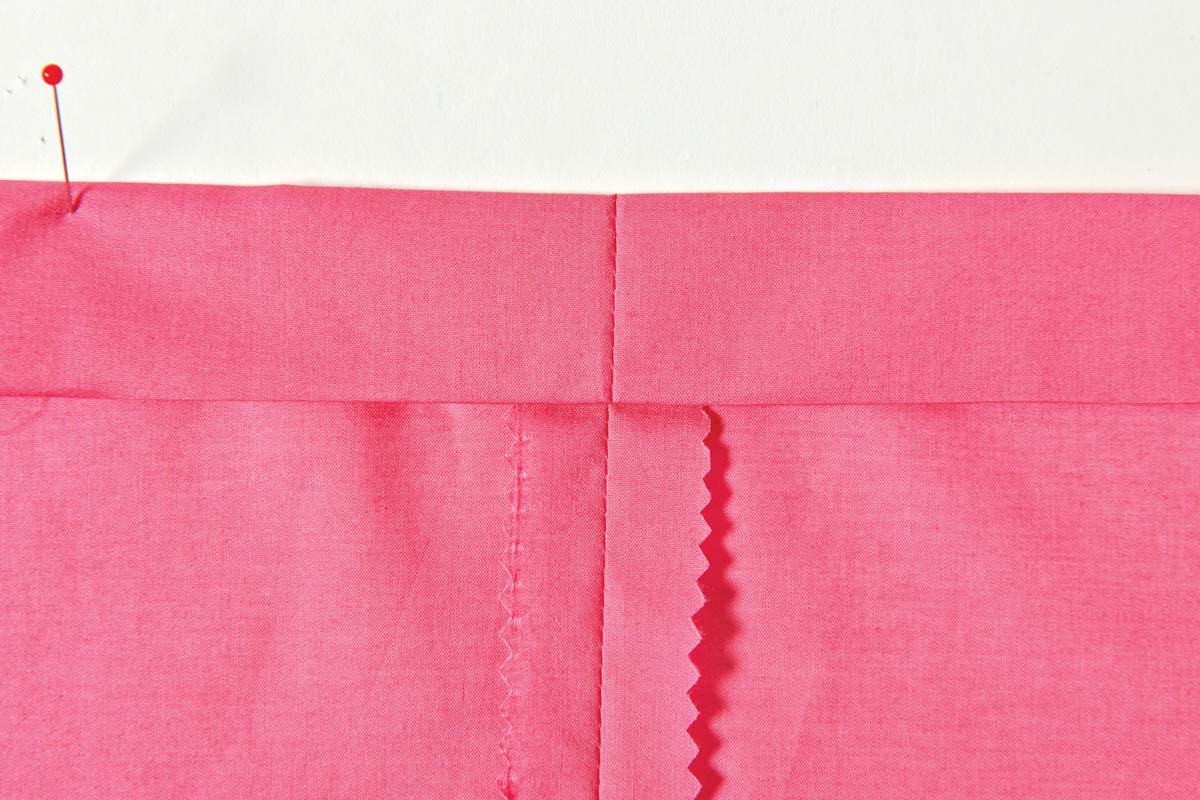
1. Create a casing for the elastic by adding twice the elastic width plus 1/2 inch to the garment’s edge or adding a separate piece. To add a separate piece, cut a fabric strip to fit the garment’s edge. To the length, add two 1/2-inch seam allowances. Cut the strip twice the elastic width, plus 1 inch for seam allowances and ease. Fold and press the strip lengthwise. Sew the two short ends together. Sew one strip length to the garment’s top edge, right sides together.

2. With wrong sides together, fold the garment along the placement line. Finish the raw edge by turning it under 1/4 inch and pressing, or serge the edge to prevent fraying. Note: The edge can be left raw on knit fabrics that won’t ravel.
3. Pin the casing in place; stitch around the inner folded or serged edge. Remove about 1 inch of stitching at the casing’s back seam. Use a safety pin and bodkin to insert the elastic. Once pulled through, secure the ends and hand-sew the seam closed.

Couched application
Here’s how to insert elastic into a garment to create a gathered effect. Use beading elastic for the best results.
1. Set the machine for a zigzag stitch, and set the stitch width and length to about 2.0 mm or 3.0 mm. Use a cording foot or a foot with a groove on the bottom to allow room for the cord to pass through.

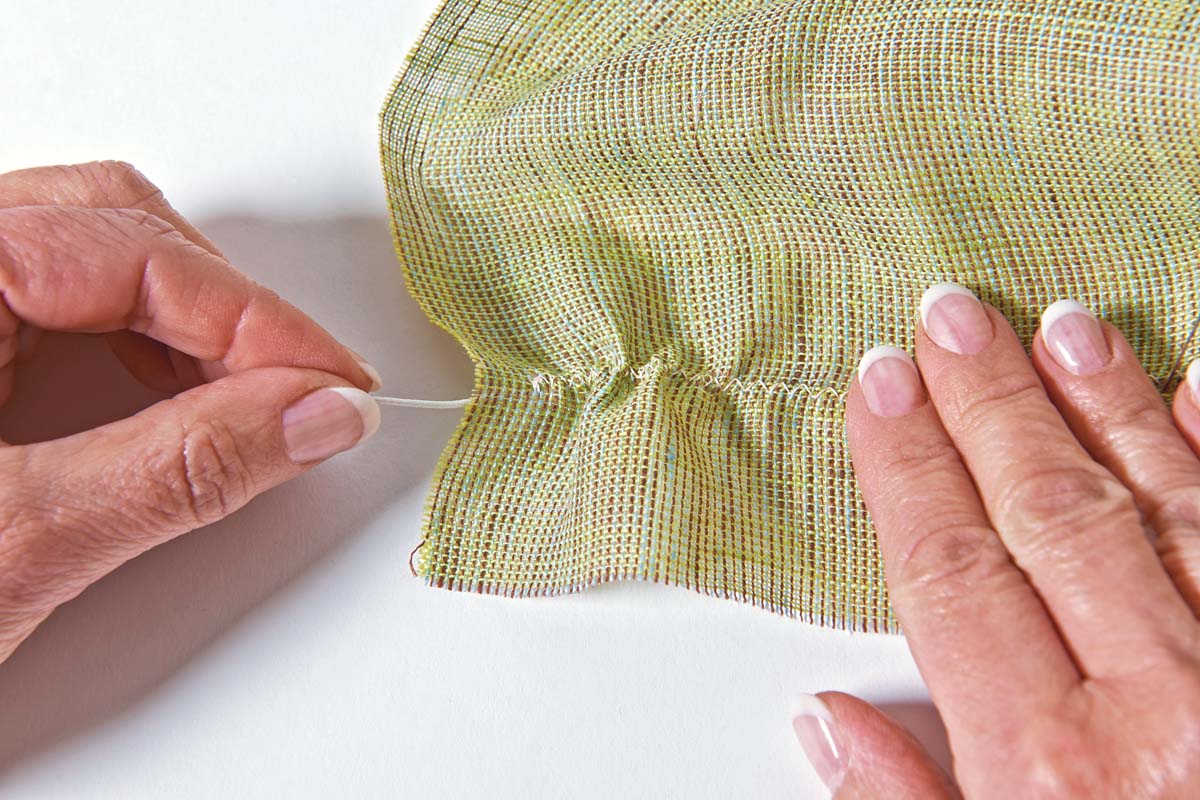
2. Couch the beading elastic. From the garment’s wrong side, center the cord under the presser foot, leaving a tail of elastic at the beginning and end. Zigzag-stitch over the cord carefully so the needle doesn’t penetrate it. As you sew, do not stretch the elastic.
3. Pull the elastic to gather. The zigzag stitching forms a casing around the elastic. Pull the elastic from either end to achieve the desired amount of gathering. For a shirred result, add one or more rows of stitching parallel to the first. Pull the elastic in the same way.


What length should I cut my elastic?
Since elastics have different degrees of stretch, the length you choose depends on the type of elastic and how it is being used. To determine this measurement, wrap the elastic comfortably around your waist. Add a 1/2-inch-wide seam allowance to each end, or 1 inch total. If you find the elastic is cut too long when you insert it in the casing, trim it before closing the casing. If it’s too short, cut a new piece.


Log in or create an account to post a comment.
Sign up Log in