

Elastic For Every Project
How to use the top elastic products to best advantage
How would we survive without elastic in our lives? It makes our clothes easy to pull on and off, keeps our waistbands and cuffs adjustable and comfortable, creates shirred effects, stabilizes seams on knits, and can even add a decorative edge. Let me say, straight off, elastic products have come a long way since I first learned to sew. There is a dizzying array of elastics available to the home sewer, and many are the exact products used in high-end ready-to-wear garments.
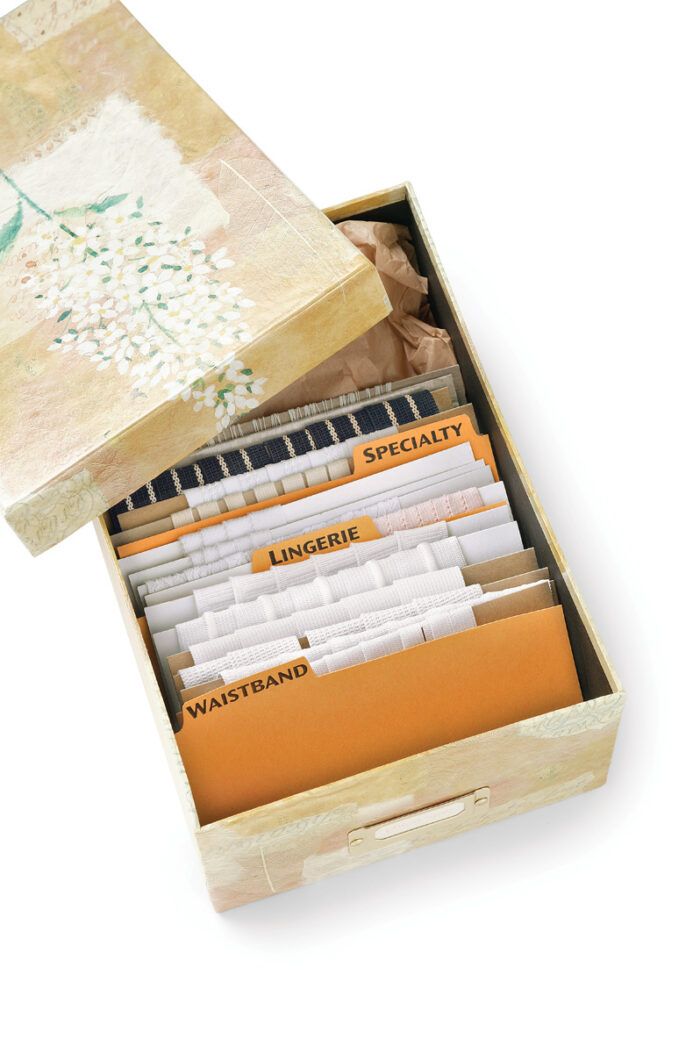
I culled the many elastic choices into a list of those I’ve found to be the most noteworthy and useful products, and I grouped my final selections into three categories: waistband, specialty, and lingerie. I think you’ll be surprised by the variety and specificity of the offerings, and you’re sure to pick up some sewing and serging tips to help you use them with professional flair.
Sew-through or not
There is one main difference between the types of elastic: Some can be sewn through and some cannot. About half should only be threaded through a casing; if you sew through them, the needle breaks the rubber and the elastic stretches out of shape.
Sew-through elastics are sometimes harder to find (see www.threadsmagazine.com for sources), but are worth a search as they can be sewn or serged directly to your fabric without damaging their stretch recovery. For sew-through elastics, I recommend using a ballpoint or stretch needle, which puts the least amount of stress on the elastic, and a strong polyester thread like Mettler Metrosene for your sewing machine, or YLI Elite Premium for your serger. Sew-through elastic stretches when it is sewn, but returns to size when it is steamed.
Details vary by manufacturer
Depending on the manufacturer, elastic is sold in precut packages, by the yard, or in the case of elastic thread, by the spool. I’ve listed common widths for each type, but they differ slightly by manufacturer, as do colors. White is usually a given, followed in availability by black and beige; decorative lingerie varieties are offered in a rainbow of hues.
Don’t forget a little TLC
Remember, these are up-to-date products, so banish memories of an inferior elastic that stretched out of shape the first time it was worn. Each elastic here was engineered with a specific purpose in mind, and all are a successful blend of stretch fibers (rubber or spandex) and natural or man-made nonstretch fibers such as cotton or polyester. The fiber content dictates how elastic should be laundered, so study the label and follow the cleaning recommendations. Treat each elastic with appropriate care and you’ll have garments with lasting style and comfort.
Waistband elastics
The following elastics are specially designed for use in stretch waistbands. The guidelines that follow allow approximately 1 inch overlap for joining the elastic ends.
No-roll
 This stiff, fairly thick elastic is available in a variety of widths. Evenly spaced ridges prevent it from rolling or bending in a waist, cuff, or ankle casing.
Cut-to-fit guidelines
For a firm fit in a waist casing, cut no-roll elastic 1 inch smaller than the body measurement. For a wrist or ankle casing, cut it 1 inch to 2 inches larger; this prevents the garment from bunching up as you move.
Sewing/serging tips
Create a cut-on casing as described at lower left. Serge (or zigzag) the cut edge, then fold the casing back to the garment’s wrong side. Topstitch 1⁄8 inch away from the fold, then slide the elastic up against the stitching; pin every 3 inches. Using a zipper foot, topstitch next to the elastic’s bottom edge.
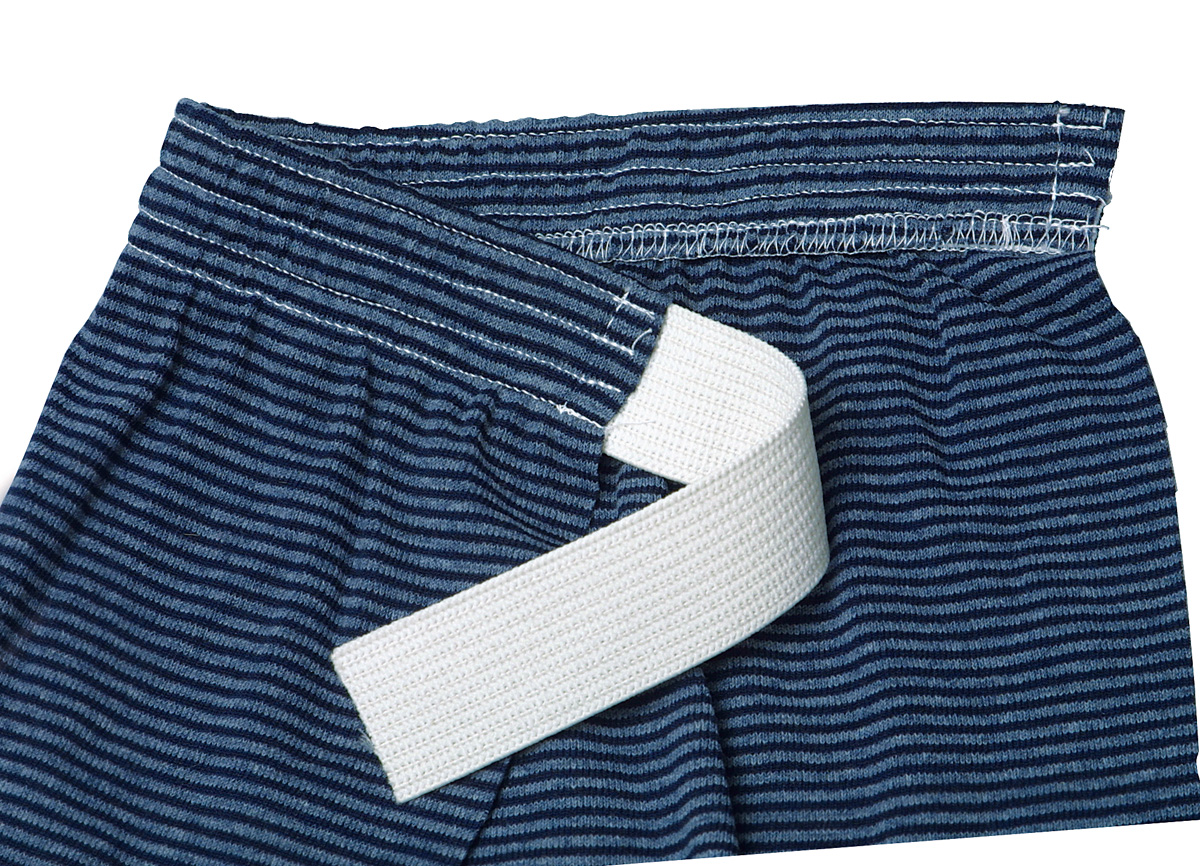
Sport
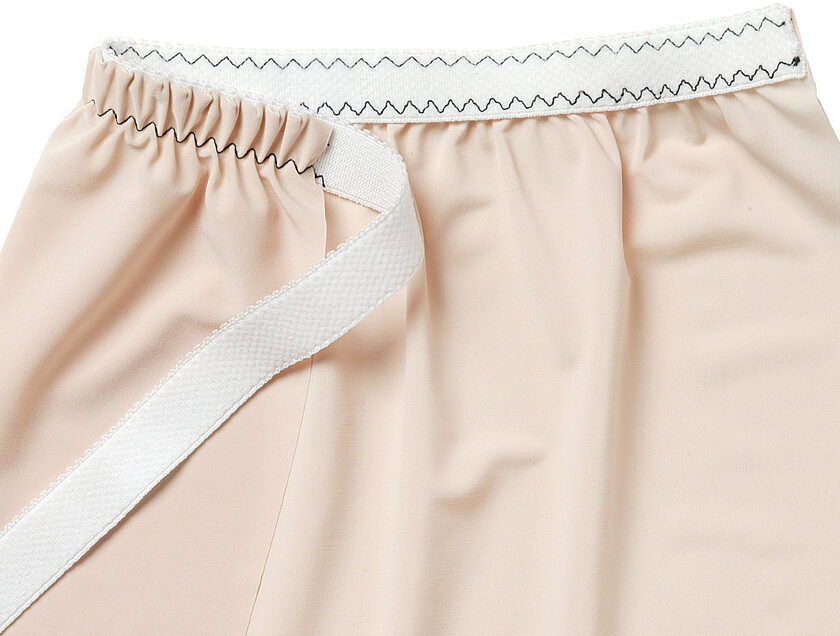
 This soft, flexible elastic is a good waistband choice for boxer shorts, pajamas, and athletic pants, and comes in 1-1/4-inch and 1-1/2-inch widths. Rubber is removed from four visible rows; stitching in these rows allows you to secure the elastic directly to the fabric, without damaging its inherent stretch recovery.
Cut-to-sew guidelines
Sport elastic stretches out of shape a bit as you sew; cut it 3 inches to 5 inches smaller than the body measurement.
Sewing/serging tips
Join the elastic ends with a traditional seam. Because sport elastic is sewn directly to the fabric, you don’t need a casing back. Just cut a front casing allowance above the waistline the width of the elastic, plus 1/2 inch. Fold 1/2 inch to the garment’s wrong side, then align the top edge of the elastic 1/8 inch below the fold. Topstitch in the elastic’s top and bottom rows using a 3-mm to 4-mm stitch length; topstitch in the two middle rows if desired.
Buttonhole
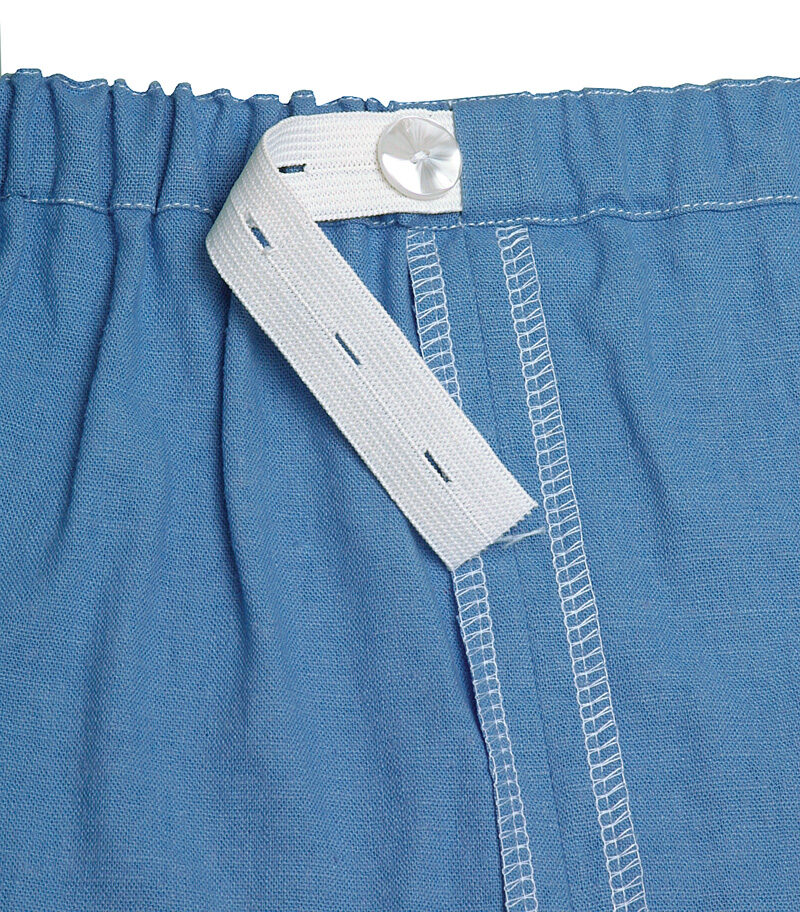 This unique, adjust-to-fit, 3/4-inch-wide polyester elastic has buttonholes spaced 1 inch apart along the center. It’s an ideal choice for maternity and children’s clothing, and for anyone with a changing waistline.
Cut-to-sew guidelines
Cut buttonhole elastic a few holes longer than the body measurement; for maternity garments, cut it even longer.
Sewing/serging tips
Create a cut-on casing and serge (or zigzag) the cut edge. Construct the garment, but on one side seam, only sew up to the casing foldline. Leave a 3/4-inch opening, then sew the remaining 1/2 inch of the seam. Sew a small button on one side of the casing opening, then fold the casing back to the garment’s wrong side; topstitch along the waistline. Thread the elastic through the opening and secure one end to the seam allowance under the button.
Cut-through
 Used by many garment manufacturers, this high-quality, sturdy elastic is available in 1-inch, 1-1/4-inch, and
1-1/2-inch widths. Although it’s more expensive than other elastics, your money is well spent because it can be cut lengthwise (for custom widths as small as 1/4 inch) without raveling.
Cut-to-sew guidelines
Cut the elastic 3 inches smaller than the body measurement.
Sewing/serging tips
Create a cut-on casing . Place the elastic on the wrong side of the casing, 1/8 inch from the cut edge. Serge, cutting off the excess 1/8 inch of fabric. Fold the casing back/elastic to the garment’s wrong side and topstitch along the elastic’s bottom edge.
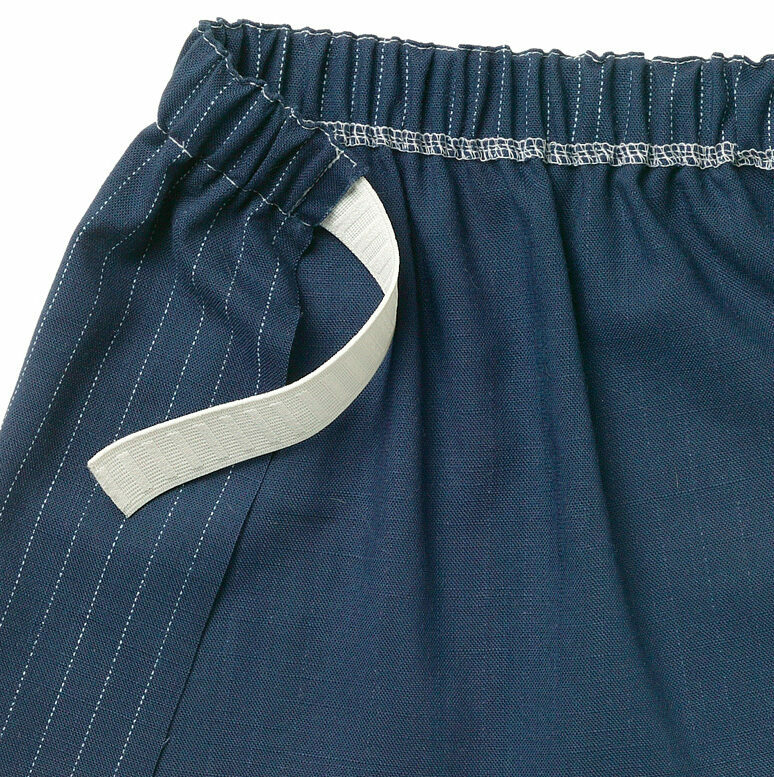
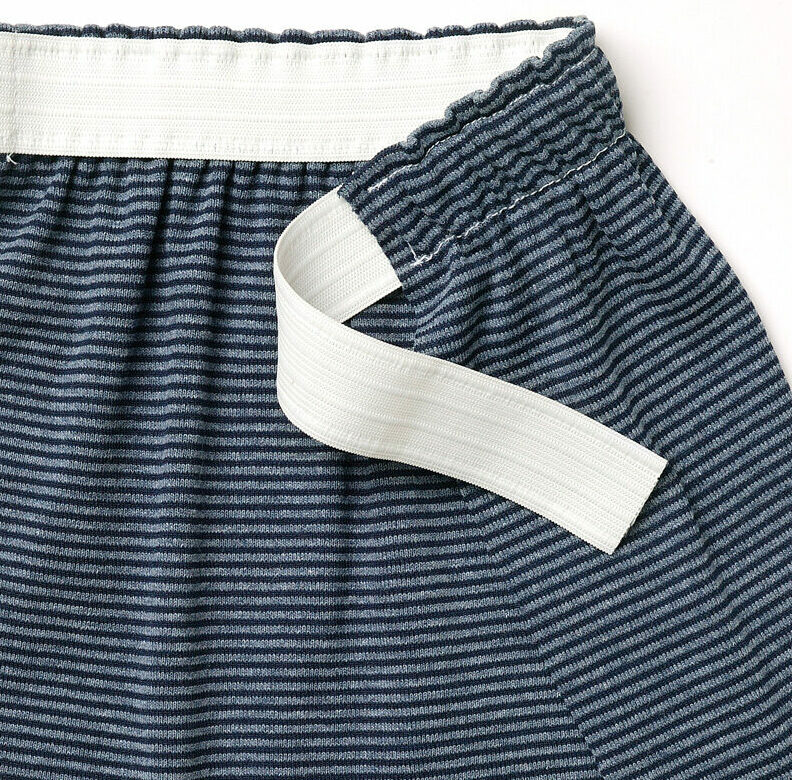
Drawcord
 A seemingly magical elastic: 1-1/4 inches wide, with an encased cord that, when pulled out, expands to twice the elastic length. This comfy, adjustable elastic is popular in sportswear and athletic garments.
Cut-to-sew guidelines
Cut drawcord elastic about 2 inches shorter than the body measurement, but don’t worry about being exact—the tied cord will cinch the waist for a perfect fit.
Sewing/serging tips
Create a cut-on casing as described . Center, mark, and then sew a 1-1/4-inch-wide buttonhole in the casing back or front (your choice), stabilizing it with fusible-knit interfacing. Slice it open, leaving 1/4 inch uncut in the middle. Join the elastic ends with a traditional seam. Placing the elastic seam at the center back, align the elastic on the wrong side of the casing, 1/8 inch from the cut edge. Serge, cutting off the excess 1/8 inch of fabric. Fold the casing back/elastic to the garment’s wrong side and topstitch along the elastic’s bottom edge. With a seam ripper or tweezers, reach through one buttonhole, pull the cord up through the hole, cut, then pull the other cord end through the other buttonhole.
Action
 Available in 1-1/4-inch and 2-inch widths, this rugged elastic behaves and looks best with multiple rows of topstitching.
Cut-to-sew guidelines
Cut the 2-inch version the same length as the body measurement, and the 1-1/4-inch version 3 inches smaller.
Sewing/serging tips
Create a cut-on casing. Place the elastic on the wrong side of the casing, 1/8 inch from the cut edge. Serge, cutting off the excess 1/8 inch of fabric (make sure the blade does not nick action elastic at all, as this will weaken it). Fold the casing back/elastic to the garment’s wrong side, topstitch along the elastic’s bottom edge, then topstitch along the top edge; add more rows if desired.
Specialty elastics
Here are five especially noteworthy products—each has a unique characteristic, distinctive purpose, or out-of-the-ordinary application that sets it apart.
Polyester braid
 Lightweight, narrow (1/8-inch and 1/4-inch widths), and very stretchy, polyester braid makes easy work of gathered sleeves and cuffs, and is ideal for baby and doll clothes.
Cut-to-sew guidelines
For ease of application, cut polyester braid 1 inch larger than the body measurement, plus a 5-inch tail.
Sewing/serging tips
Apply the elastic to a flat garment piece, before you sew the sleeve (or pants) seam. Mark the elastic 2-1/2 inches from each end. Draw a stitching line on the garment’s wrong side, and fit your sewing machine with an appliqué foot; place the line face up under the foot’s groove. Using a zigzag stitch (set to a length of 3.0 mm and a width of 4.0 mm for 1/8-inch elastic or 7.0 mm for 1/4-inch elastic), and feeding the elastic through the foot’s top hole, sew over (not through) the elastic. Align one mark on the elastic with the sleeve/pants seamline, and secure in place. Gently tug the elastic through this zigzag casing until the other mark aligns with the opposite seamline; secure. Trim the excess elastic and sew the sleeve/pants seam.
Gripper/cycling
 One side of this 1-inch-wide elastic features three rows of exposed rubber compound that gently grips skin. This ability to hold garments in place makes gripper elastic a popular choice for activewear, especially in hems of bike shorts and in wrists and ankles of ski wear.
Cut-to-sew guidelines
Cut gripper elastic the length of the garment edge.
Sewing/serging tips
Join the elastic ends with a traditional seam. Create a front casing the width of the elastic plus 1/2 inch; draw a line 1/2 inch below the cut edge. Placing the nonrubberized side of the elastic against the garment’s right side, position the bottom edge of the elastic on the line. Using a zigzag stitch (set to a width of 3.0 mm and a length of 2.0 mm), sew along the elastic’s edge. Fold the elastic to the garment’s wrong side. Zigzag the loose edge of the elastic to the garment.
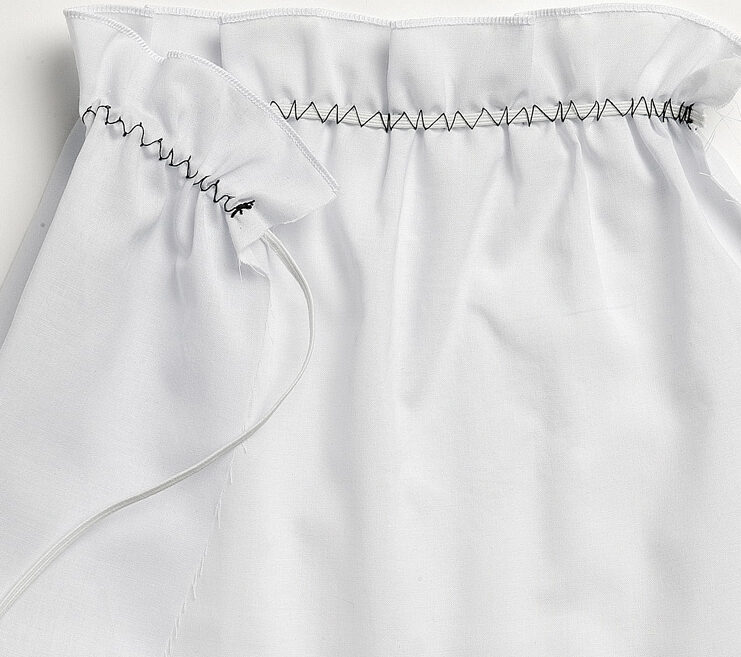
Elastic thread
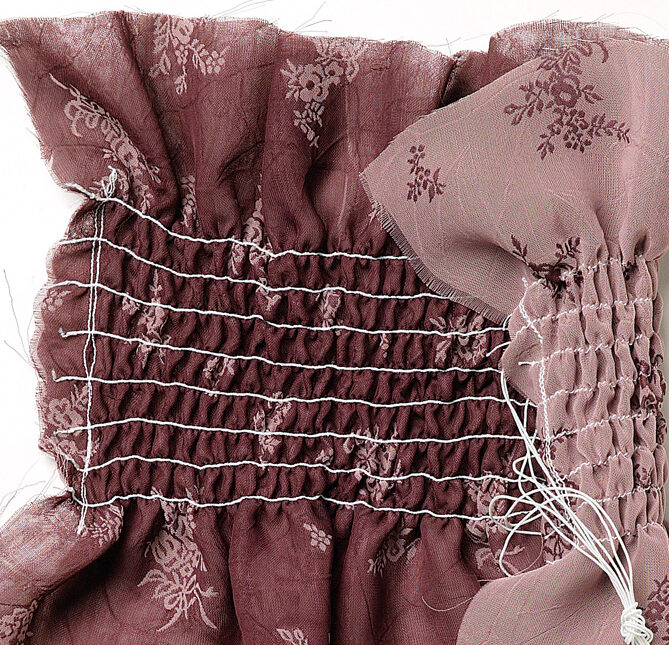 Although this threadlike nylon elastic (available on a spool) is a bit too thick to pass through your sewing machine needle, it can be used in the bobbin to produce beautiful shirred effects on lightweight fabrics. The more rows of stitching you sew, the tighter the shirred effect, so test before cutting your garment.
Sewing/serging tips
Hand-wind elastic thread onto a bobbin, stretching the thread slightly as you wind; use polyester thread in the needle. Test a few rows of stitching on a fabric scrap, adjusting the stitch length and tension until you get your desired effect (the thread stretches considerably, so steam it back into shape after you sew). With the garment right side up, sew in the center of the area to be shirred, then sew parallel rows out to the edges of the area (use a quilting bar or the edge of a presser foot as a guide).
Clear
 Transparent, as well as thin, lightweight, strong, and very stretchy, clear elastic resists oil and chlorine, withstands dry-cleaning, and is available in many widths (1/4-inch and 3/8-inch widths are most common). Although too light for swimwear, it’s fantastic for gathering fabric and as a stay tape for knit seams.
Cut-to-sew guidelines
Cut clear elastic equal to the desired gathered length. To stabilize a seam, cut it the same length as the seam.
Sewing/serging tips
First stretch clear elastic a few times to release the starch product it’s treated with. To gather fabric, quarter-mark the elastic and garment, place the elastic on the garment’s wrong side, then zigzag, stretching the elastic to fit between the marks. To stabilize a seam, center the elastic over the seamline on the garment’s wrong side and stitch or serge in place; don’t stretch the elastic at all while sewing.
Swimwear
 Although this sturdy cotton/rubber elastic (available in 1/4-inch, 3/8-inch, 3/4-inch, and 1-inch widths) is specially treated to withstand chlorine, it can also be used in many other garments.
Cut-to-sew guidelines
Cut this elastic the same length as the swimwear edge. But to prevent gaping at a leg opening, cut the elastic the same length as the front area plus three-quarters the length of the back area. For other garment types, cut this elastic 2 to 3 inches shorter than the corresponding edge.
Sewing/serging tips
Create a cut-on casing. Place the elastic on the wrong side of the casing, 1/8 inch from the cut edge. Serge or zigzag in place. Fold the casing back/elastic to the garment’s wrong side and topstitch along the elastic’s bottom edge. In the back leg area of a swimsuit, pull the elastic taut.
Lingerie elastics
Designed specifically for undergarments, these elastics are soft, pretty, and comfortable. The following directions are written for a waist edge; use the same methods for any edge.
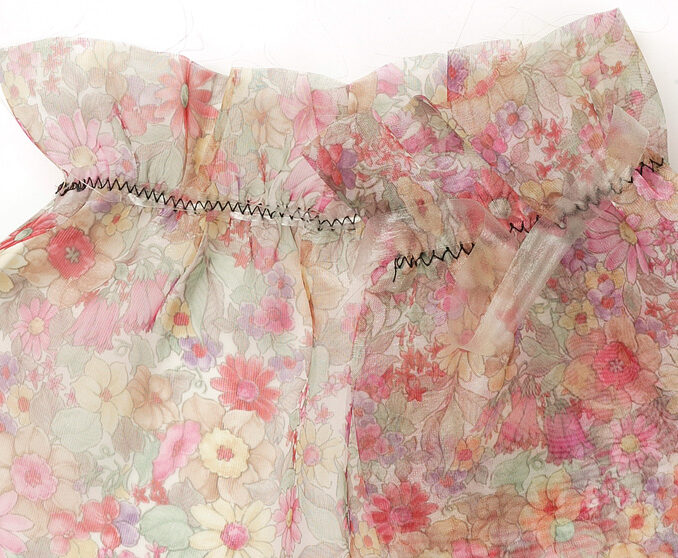
Stretch lace
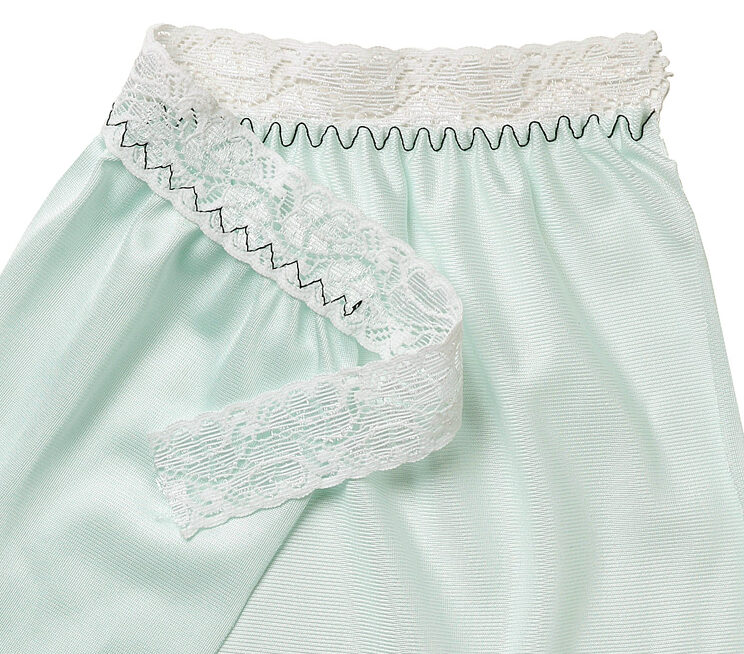 Available in a variety of widths (from 1/4 inch to 3 inches) and patterns, this fine, soft, elastic produces a pretty edge on panties, slips, camisoles, and knit tops.
Cut-to-sew guidelines
Stretch amounts vary by manufacturer, so simply place the lace around the body and stretch until it feels comfortable. For a purely decorative edging on a neckline, cut it 1 inch smaller.
Sewing/serging tips
Join the elastic ends with a traditional seam. Cut the garment with a waistline seam allowance the width of the lace. Place the wrong side of the lace against the right side of the allowance, aligning the top edges, then stitch along the elastic’s bottom edge, using a multiple zigzag stitch (with a stitch length of 2.0 mm to 2.5 mm and width of 3.0 mm to 4.0 mm). Trim the excess fabric close to the stitching (use small, round-tip scissors to make sure you don’t nick the lace).
Picot edge
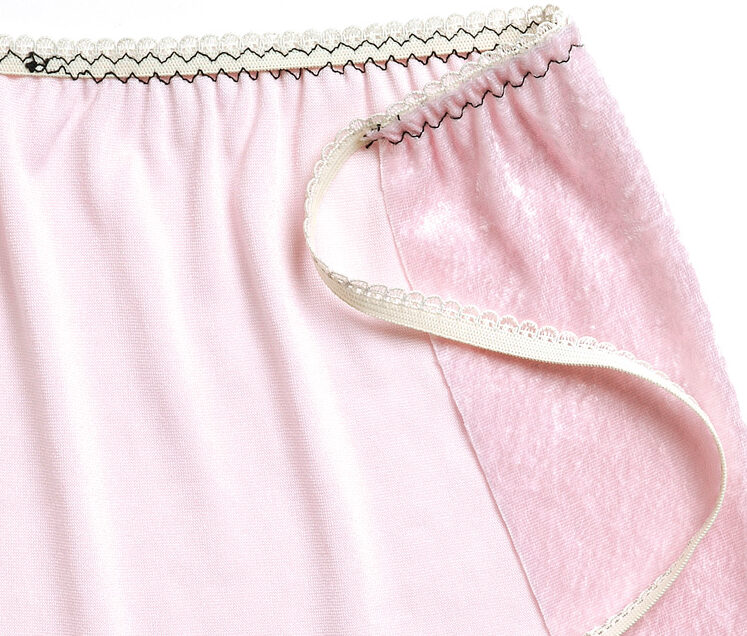 One edge of this elastic, available in 1/4-inch or 1/2-inch widths, has decorative loops that are meant to just peek over the top of the fabric in panties, slips, camisoles, and knit tops.
Cut-to-sew guidelines
Stretch amounts vary by manufacturer, so simply place picot edge elastic around the body and stretch it until it feels comfortable. For a purely decorative edging on a neckline, cut it 1 inch smaller.
Sewing/serging tips
Join the elastic ends with a traditional seam. Cut the garment with a waistline seam allowance the width of the elastic. With right sides together, align the smooth edge of the elastic with the cut edge of the fabric. Using a multiple zigzag stitch (with a stitch length of 2.0 mm to 2.5 mm and width of 3.0 mm to 4.0mm), sew close to the looped edge; trim the excess fabric close to the stitching. Fold the elastic to the garment’s wrong side, making sure the loops extend above the fold, then sew along the elastic’s bottom edge with a multiple zigzag stitch.
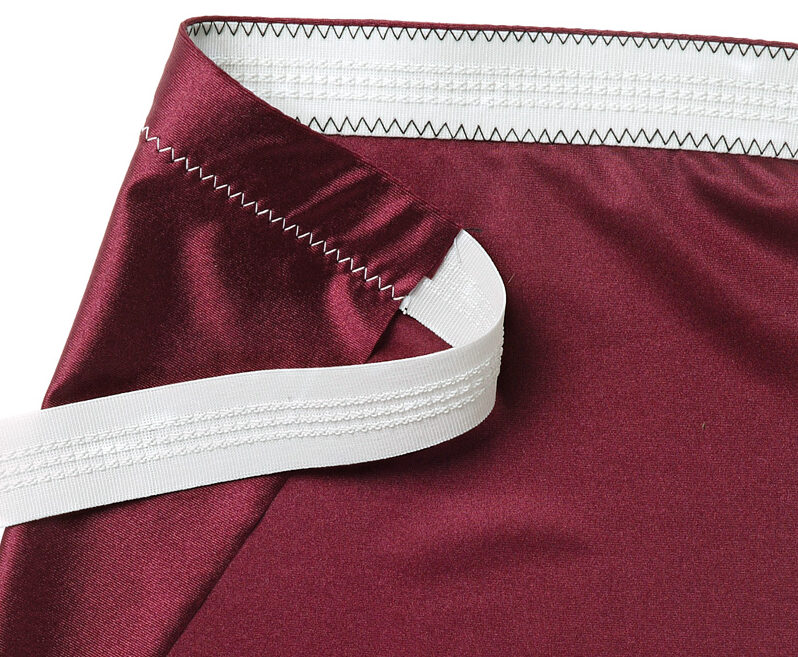
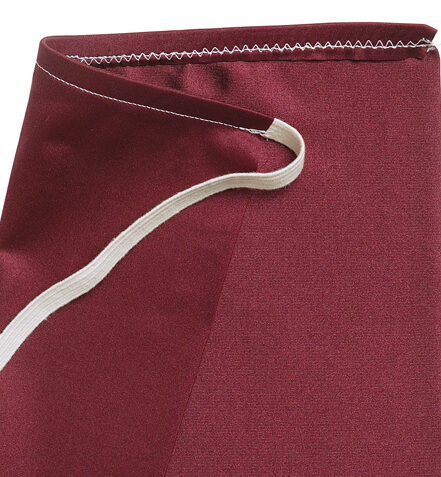
Plush
 One side of this sturdy, 1/4 inch- to 1-inch-wide product (also called felt-back elastic) is soft and fuzzy, making it the ultimate in terms of comfort. It’s a great choice for sport and bandeau shelf bras, as well as waistbands. One edge features decorative loops, similar to the picot-edge elastic.
Cut-to-sew guidelines
Cut plush elastic 3 inches smaller than the body measurement; for a shelf bra, the elastic is only used in the front, so cut it 1-1/2 inches smaller.
Sewing/serging tips
Join the elastic ends with a traditional seam. Create a cut-on casing, but without seam allowance. Placing the nonplush side of the elastic against the garment’s right side, align the smooth edge of the elastic with the cut edge of the fabric. Zigzag close to the decorative loops; trim the fabric close to the stitches. Fold the elastic to the garment’s wrong side. Zigzag the loose edge of the elastic to the garment.
Secrets for S-T-R-E-T-C-H success
Here are a few general guidelines and tips for sewing or serging a successful elastic edge:
• Check your pattern, and make necessary adjustments to add a casing or otherwise accommodate the elastic.
• Always test your technique first using a short length of elastic and fabric.
• Baste seam allowances of vertical seams to the garment before you fold back a casing. This allows for easier insertion of the elastic.
• Stitch in the ditch along vertical seams
to secure the elastic and prevent twisting in the casing.
• To join non-sew-through elastic ends, simply overlap (or to reduce bulk, butt over a piece of ribbon) and zigzag in place.Four tips for sew-through elastic
• Quarter the elastic and the garment opening (fold in fourths), mark with pins, then match up the pins to ensure a perfect fit.
• Stretch the elastic as you feed it into your sewing machine or serger.
• Hold the garment and elastic taut as you sew and serge by placing one hand in front of the presser foot and the other hand behind it.
• Steam the elastic edge back into shape after you sew or serge.
This article by Pamela Leggett first appeared in Threads #115. Pamela is the owner and designer of Pamela’s Patterns. She lives and teaches in Vernon, Connecticut.
View PDF


Log in or create an account to post a comment.
Sign up Log in