

How to Sew a Bias-strip Scarf Tutorial
Learn how to sew a bias-strip scarf in this step-by-step tutorial.
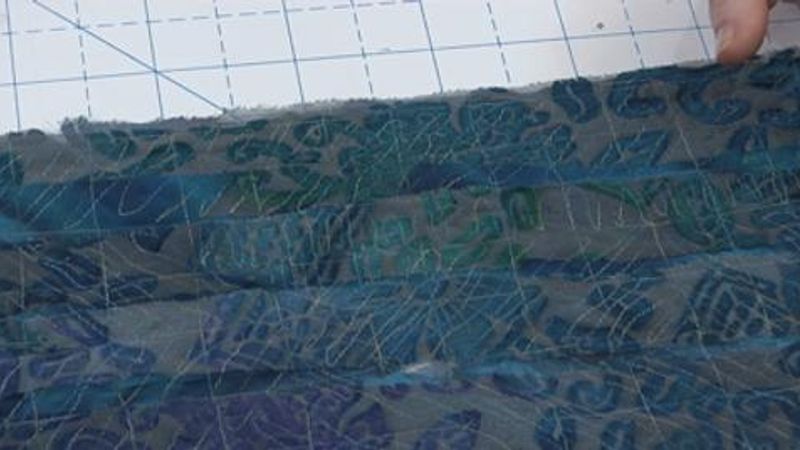
Learn how to sew a bias-strip scarf in this step-by-step tutorial. You’ll learn how to cut bias strips, layer them with a water-soluble stabilizer, and then stitch them into a bias-strip scarf. The end result is a beautiful, textured bias-strip scarf in a fabric you’ve made yourself. The techniques you learn will be useful elsewhere in your sewing as well.
This detailed tutorial is one video in the comprehensive Teach Yourself to Sew series.
Teach Yourself to Sew
Judith got her first taste of sewing when she took the free lessons that came with her mother’s sewing machine purchase. Judith was 9 at the time. Soon after, she was sewing her own clothes and feeding her passion for the craft. In her Teach Yourself to Sew series, Judith shares her enduring love of sewing and her invaluable years of sewing experience.
Getting started
She starts with discussing the equipment and the essential sewing notions for anyone who sews. You’ll learn about shopping for fabrics, choosing patterns (including selecting the correct size), and planning the perfect pattern layout. From machine-sewing simple seams to inserting zippers and stitching buttonholes, Judith demonstrates the key steps to making a custom garment.
Discover methods for clean-finishing seam allowances and applying facings so all edges are neat. To add shape to garments, Judith explains how and why to sew darts, and how to gather fabric for volume. Other garment elements, such as sleeves, pockets, and elasticized waistbands, are shown in easy-to-follow video tutorials.
Advancing your skills
When you’re ready to challenge yourself further, tune in to Judith’s overview of couture garments and sewing techniques. Even if you never intend to become the next Coco Chanel, you’ll learn methods that add quality to your everyday wardrobe. Find out how to perfectly match stripes, plaids, and prints; baste seams; and insert underlinings and linings.
Finally, Judith shares the basics of pattern fitting and adjustment. Her method begins at the shoulders, ensuring the garment hangs properly. Follow along as Judith shows how to create a shoulder template that you can use again and again to adjust patterns before cutting the fabric. As a bonus, you’ll even learn how to create a custom dress form so you can fit garments on a body that truly represents your true body shape.


you are unbearably adorable. :)
Do you use a different sewing machine needle? What stitch length do you use? Thank you
I wanted to clarify something. Ms Neukam stated that machine embroidery thread is finer than regular sewing thread. Regular thread for sewing garments or quilting is 50 wt, machine embroidery thread is heavier at 40 wt, while machine embroidery bobbin threads can be 40 wt, or lighter at 60, or 90 wt, depending on machine specs. You can use the free motion technique in the video with almost any thread, that’s the beauty of of the project.