


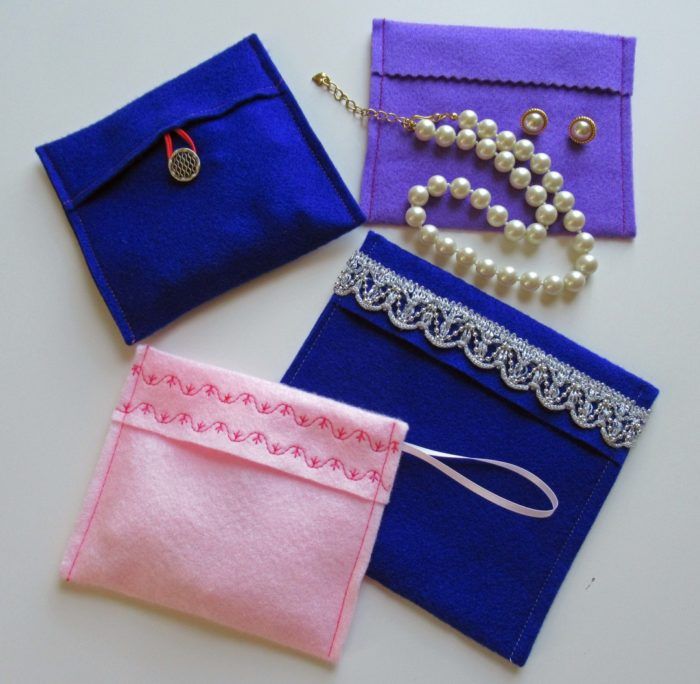
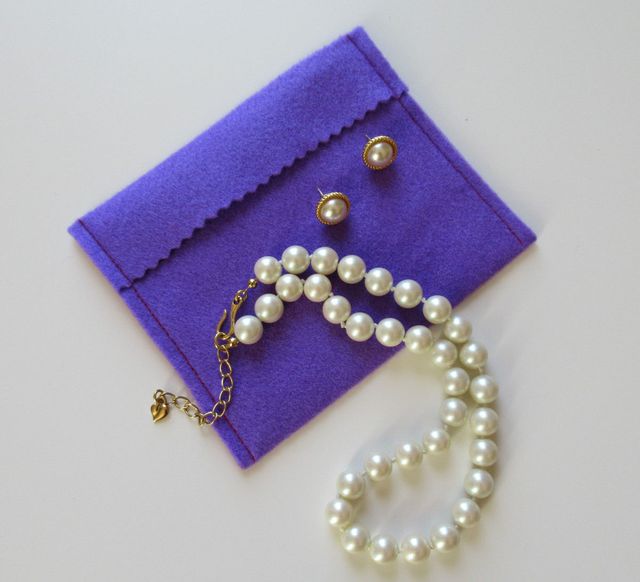
This 3-minute felt pouch project is so fast to create that you’ll want to make many. It’s a holder for earbuds or travel accessories. Make a small one for jewelry, or maybe a larger bag for stockings or delicate lingerie. Or, use them in lieu of gift wrap; that way when you give a friend or relative a gift card for a special occasion, it will be in a felt pouch that’s actually useful and not a waste of paper.
You can easily change the dimensions and make the 3-minute felt pouch project any size that meets your needs. Using felt fabric or any fabric that won’t ravel is the key to making this a simple yet versatile project. The bag’s cut edges become the final edges. It’s easy to add embellishment to your bags to change their look and help distinguish each, and this microproject uses up fabric and trim scraps.
Plan the bag
Decide how large to make your bag. Then choose an embellishment. Add a loop, if desired, before stitching the sides of the bag. You can use it to hang the bag from a clothes hanger when you travel or from a closet hook at home.
Cut the felt
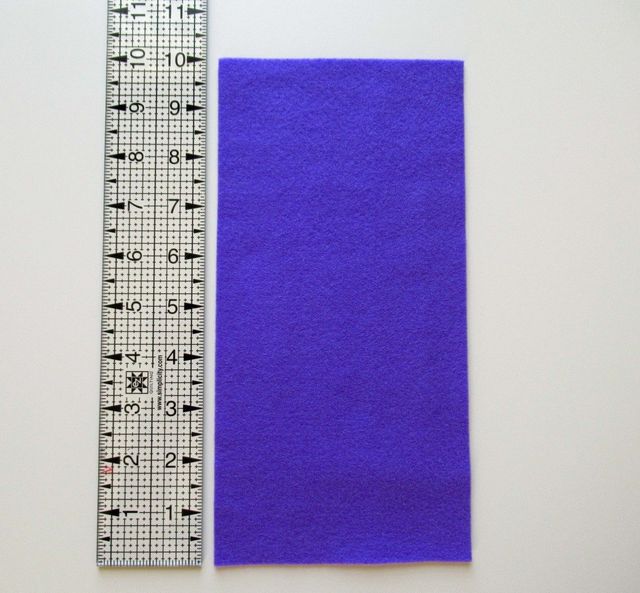
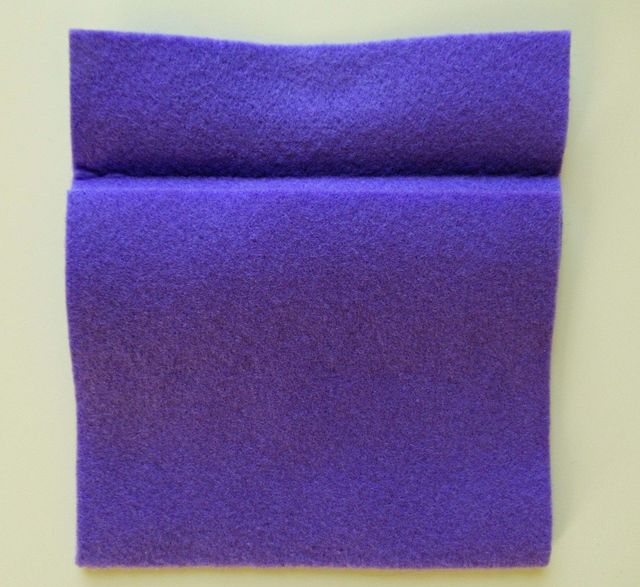
1. Decide how wide the finished bag should be. My example is 5 inches wide.

2. Cut a rectangle. Make it the width chosen in Step 1, by a length equal to two times the width (10 inches long).

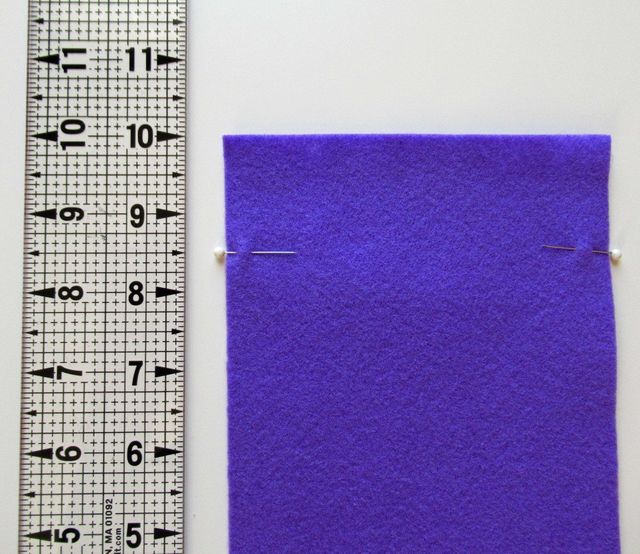
3. Calculate 15 percent of the length to get the length of the top flap. (0.15 × 10 inches = 1.5 inches)

Sew the pouch
1. Mark the top flap’s length with pins. Fold and press the flap with wrong sides together and remove the pins.

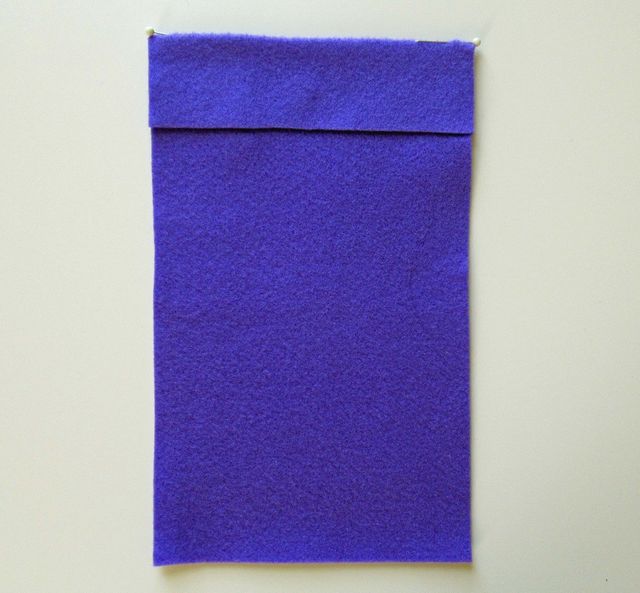
2. Open the top flap and fold the bottom edge under the top flap with wrong sides together. The bottom’s cut edge should be about 1/4 inch below the pressed top flap fold. Press the bottom fold. |

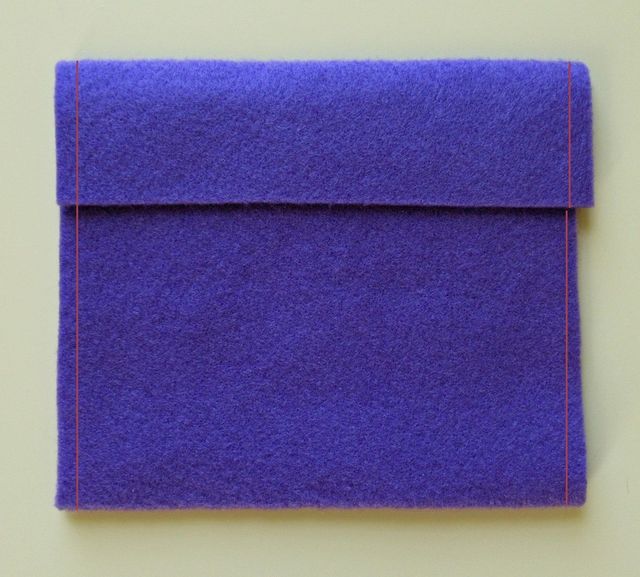
3. Stitch each side edge through all layers. Back-tack at both ends of each side seam.

Embellishment options
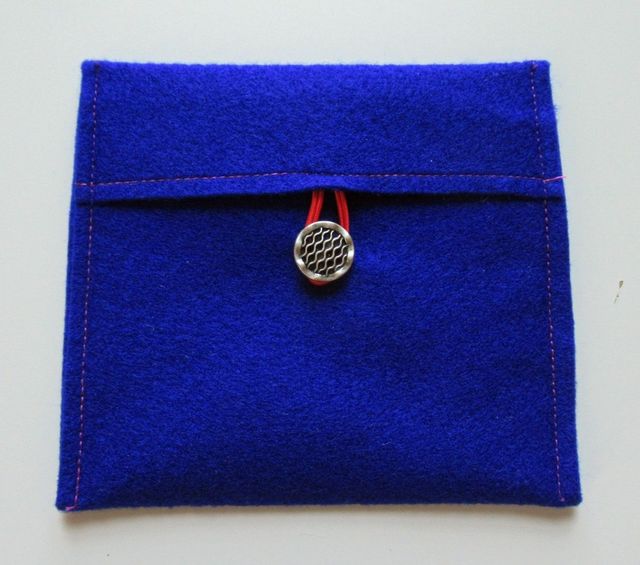
You can add a variety of embellishments and/or closures to decorate your bag. This is your opportunity to get creative. The felt color and added embellishment can help you keep track of what’s in the bag. For example, place your evening jewelry in the bag with glitzy trim, your everyday jewelry in the bag with a simple embellishment. You can come up with a plan that works well for you.
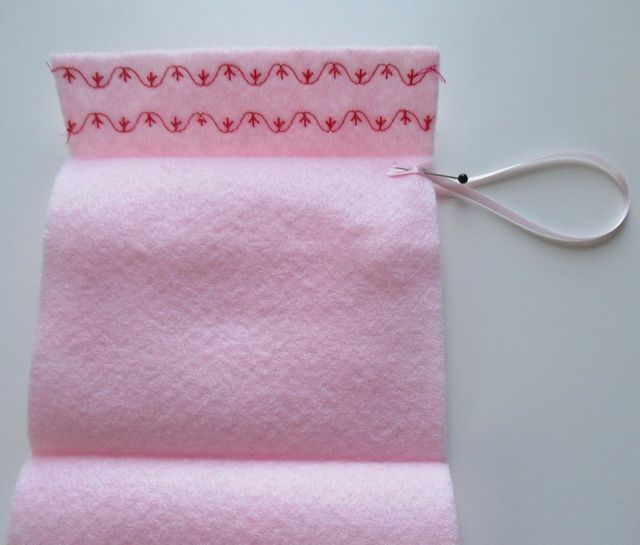
Create a decorative top flap edge.

Use one or more decorative machine stitches.
| Stitch two or more rows of decorative stitches across the edge of the top flap. Choose colorful thread, and experiment with fun stitches. |

Stitch two or more rows of decorative stitches across the edge of the top flap. Choose colorful thread, and experiment with fun stitches.
Add a button-and-loop closure.
| Select a suitable button, and determine how large the loop should be. Audition them, and stitch them in place when you’re satisfied with their location. |

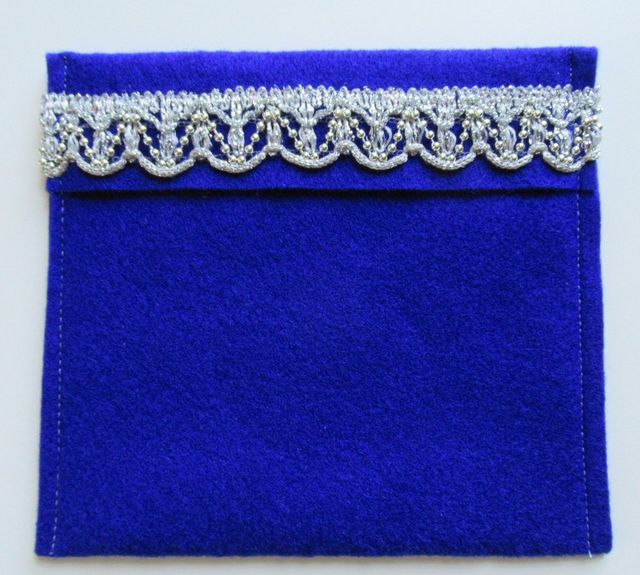
Include ribbon, lace edging, or purchased trim.
| Cut the trim 1 inch longer than the bag’s width. Center the trim on the top flap. Pin it in place through the top flap layer only. Stitch it in place across the flap’s top, leaving the extra length unpinned. Tuck the trim ends between the bottom and back layers. It will be stitched when the sides are stitched. |

Add a loop for hanging.
Cut narrow ribbon or thin cord at least 3 inches long (more if you want a longer loop). Tuck the ends of the loop between the front and back layers near the top fold. Pin in place.

For more microprojects that use up leftover fabric and trim, check out our Quick Stuff to Sew special issues. Do you like wrapping that doubles as a gift? When do you begin sewing for the holidays?


good post
nice article!
so good post
Now I can! It's way easier than I imagined. Thank you!
<3
nice article!
Does the side stitching include the top flat? To put items inside the pouch, the flap will not open flat?