How to Make a Pretty Knitting Bag from Bandanas
Watch to learn how to make a practical knitting bag from two bandanas.
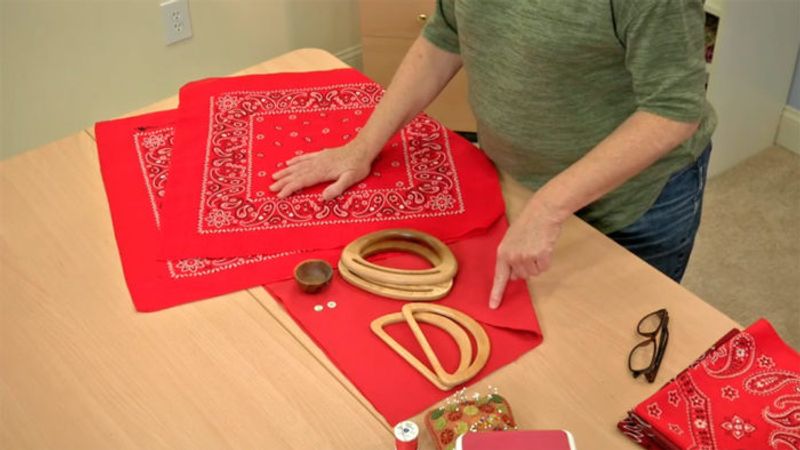
In this tutorial, author and craft instructor Jemima Schlee walks you through how to make a great-looking, practical knitting bag from two bandanas. Follow along to learn how to sew the bag exterior, make and attach the lining, and add the wooden handles. For more on using bandanas to create beautiful projects for your home, purchase a copy of Jemima Schlee’s Take a Bandana.
Supplies Needed:
- 18-inch square bandanas (2)
- Lining fabric
- Wooden handles (2)
- Buttons for reinforcement (4)
- Pins
- Sewing machine
- Thread
First, you’ll take the two bandanas and align them right sides together. Pin the layers together from halfway down on each side, and across the bottom. The best way to find halfway down the sides is to fold the layered bandanas in half.
After pinning, sew the bandanas together along the pinned portions with a 3/8-inch-wide seam allowance. Be sure to backtack at the beginning of the seam to reinforce the stitching.
Next, stitch the lining in the same manner. The lining will have a fold along the bottom.
Trim the corner seam allowances at a 45-degree angle at each sewn corner of the lining and exterior. This reduces bulk in the corners so that they are nice and sharp.
Next, Jemima shows you how to turn the lining right side out and tuck it inside the bandanas, with the right sides together. Watch how she sews the lining into the bag, leaving a turning opening.
Next, you’ll want to see how she turns the bag right side out through the turning opening left on the top edge. To make sure that the corners are nice and sharp, you can use a pin to pull it out.
Sew the turning opening closed, then follow the steps to add the wooden handles to the bag. Fold down the fabric edge of the bag and work it into the handle. To see the steps for completion, watch the rest in the video!


Log in or create an account to post a comment.
Sign up Log in