


It’s hard to beat the comfort and practicality of clothes made of stretch knits. These days, they’re a fashion staple, too, with spandex-blend fabrics appearing everywhere from activewear to eveningwear. Whether you’re making a clingy cocktail dress or sporty yoga gear, a small percentage (2 to 10 percent) of spandex significantly improves the wearability of your garments. In this article, you will learn expert level techniques for finishing stretch knits.
Coping with stretch
But these fabrics, which can stretch up to double their size and spring back to their original shape and dimensions, can be tricky to sew, especially along edges and openings. You don’t want necklines and armholes to pucker or gape, elastic waistbands to bunch, or hems to ripple. You’ll end up with a garment that’s neither attractive nor functional.
To help you avoid all this pain, here are four methods of creating clean, professional-looking edges that hug the body yet stretch with movement. These techniques rely on bands of stretch fabric to strengthen and stabilize garment openings while preserving the elasticity we appreciate in spandex-blend clothes.
Choosing stitches and fabric

a must.
When sewing stretch garments, I use my serger almost (but not quite) exclusively. If you don’t have a serger, you can use your sewing machine’s zigzag stitch in place of a serged seam or edge. Experiment with stitch width and length to find a combination that successfully stretches with the garment.
As you can see in the step-by-step instructions on the following pages, I choose a three-thread serger stitch for “basting” processes to anchor layers together prior to a final pass of four-thread stitching. While this basting step might seem superfluous, it is worth the extra time: It keeps multiple layers of slippery fabrics together and evens out edges for perfect finishes.
I opt for smooth-knit spandex blends for edge bindings. For the body of a garment, I select just about any stretch knit with reasonable recovery, including cotton, nylon, silk, rayon, and polyester fabrics. Fabrics that droop or bag after stretching won’t perform well in a close-fitting garment, so save those for clothes that have plenty of design ease.
Trimming to suit your style

The neckline, armhole, and waistband finishes I show here are ideal for keeping tight, even skimpy, garments in place during high-intensity activities. In fact, I developed them to handle the demands of professional figure skaters. But they’re just as great on any stretch-fabric clothes you care to make, no matter how much coverage you prefer.
If you don’t wear sleeveless tops, you can add sleeves to your tank top and use the smooth armhole-band technique on p. 36 to make a contrasting neckband. Similarly, you can adapt the two-color neckline shown on p. 39 for an armhole band, as in the dress shown on the facing page. My wrapped waistband on p. 38 works beautifully with or without the optional contrasting trim. With these edge-finish treatments, any stretchy garment can have a “serger couture” finish.
Spandex, by any other name
Spandex, an anagram of the word “expands,” is the term most commonly used in North America for an elastomeric fiber. In Europe, the same fiber is called elastane. (Lycra is the brand name used by DuPont for its spandex products.) Spandex is always used in combination with other fibers and can vary from 2 to 40 percent of a fabric’s composition. It gives spandex-blend knits not only their stretch (up to 100 percent, or double their original size) but also their “recovery” (the ability to snap back to their original size and shape after being stretched).
Add a smooth armhole band
For an armhole that really stretches but also fits the body snugly, use a band cut from a separate strip of fabric.
Prepare the armhole and the band
Join the shoulder and side seams of the garment to form the armhole. First, measure the armhole opening. For a 1⁄2-inch-wide finished band, cut a strip of fabric 11⁄2 inches wide and
2 inches shorter than the armhole measurement.
To create the armhole band, join the short ends of the fabric strip, right sides together, to form a ring. Fold the strip to align the long edges of the ring, finger pressing the seam allowance to the opposite sides, as shown at left below.
Pin the armhole band to the garment
Fold the band in half to locate the point opposite the seam. Position this point 1⁄2 inch behind the shoulder seam. Match the band seam to the side seam. Pin the armhole band to the right side of the garment, with its raw edges aligned with the armhole edge.
Serge and topstitch the armhole band
Using a four-thread stitch, serge the band to the garment. With a zigzag stitch, topstitch around the armhole to anchor the seam allowances to the garment.
|
|
|
|


Finish hems with a stretchy binding
To avoid ripples and give stretch-fabric hems extra body, use a binding. If you like, you can include short side slits, as shown here, to provide additional room for movement in a garment with minimal ease.
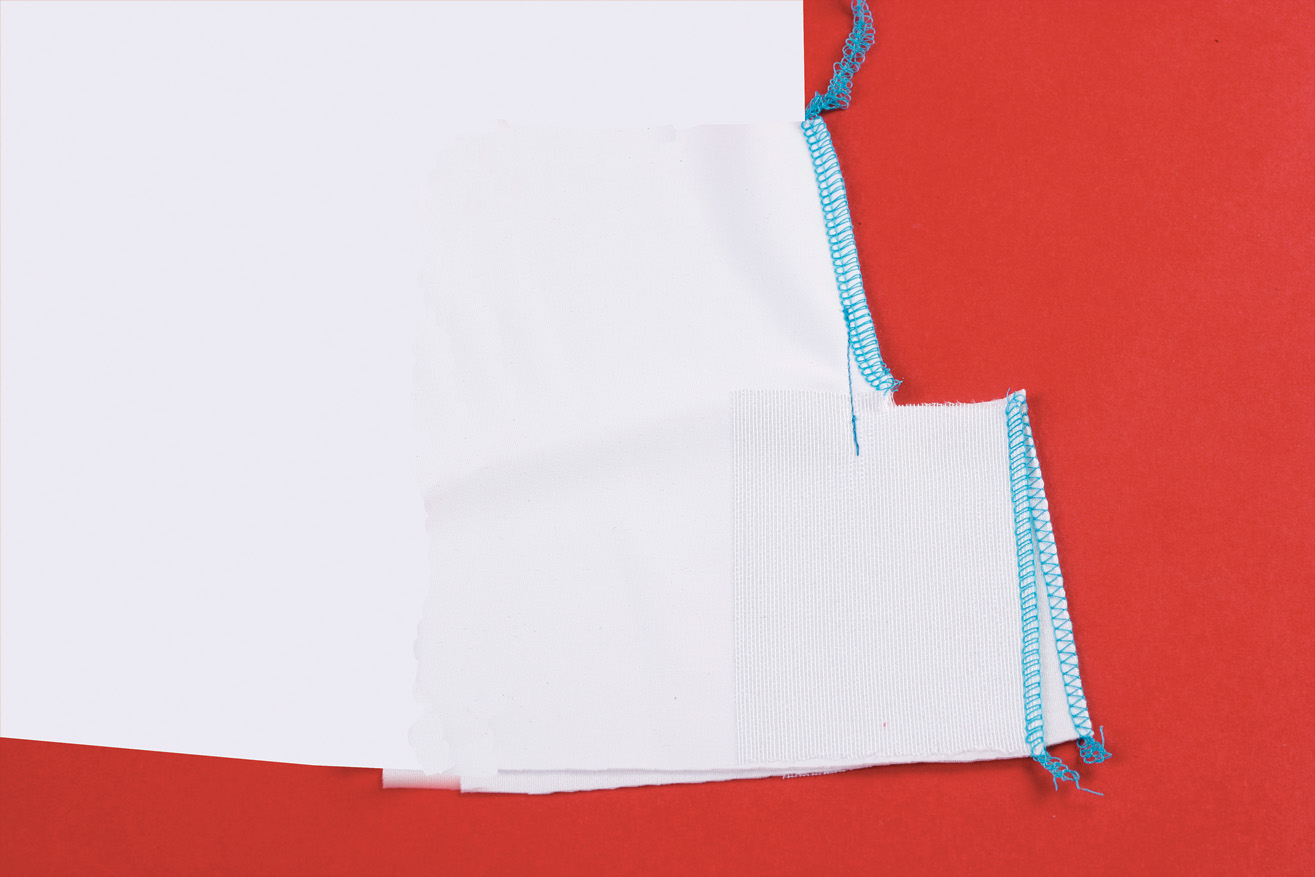
Prepare and stitch side slits
When cutting out the garment, make 1-inch-wide extensions that are the length of the slit plus 1 inch. Cut strips of lightweight, knit, fusible interfacing that are 23⁄4 inches wide and the length of the slit extensions. The greatest stretch of the interfacing should go horizontally across the garment. Fuse the interfacing to the wrong sides of the slit extensions.
With a three-thread stitch, serge the raw edges of the slit extensions. Switch to a four-thread stitch, and serge the side seams of the garment to within 1⁄2 inch of the slit extension. Using your sewing machine, straight-stitch the side seam from 2 inches above the slit extension to 1 inch below the top of it.
Topstitch the slits
Fold the slit extensions to the wrong side of the garment, and press in place. Topstitch with a straight stitch along the outer edges to anchor them.

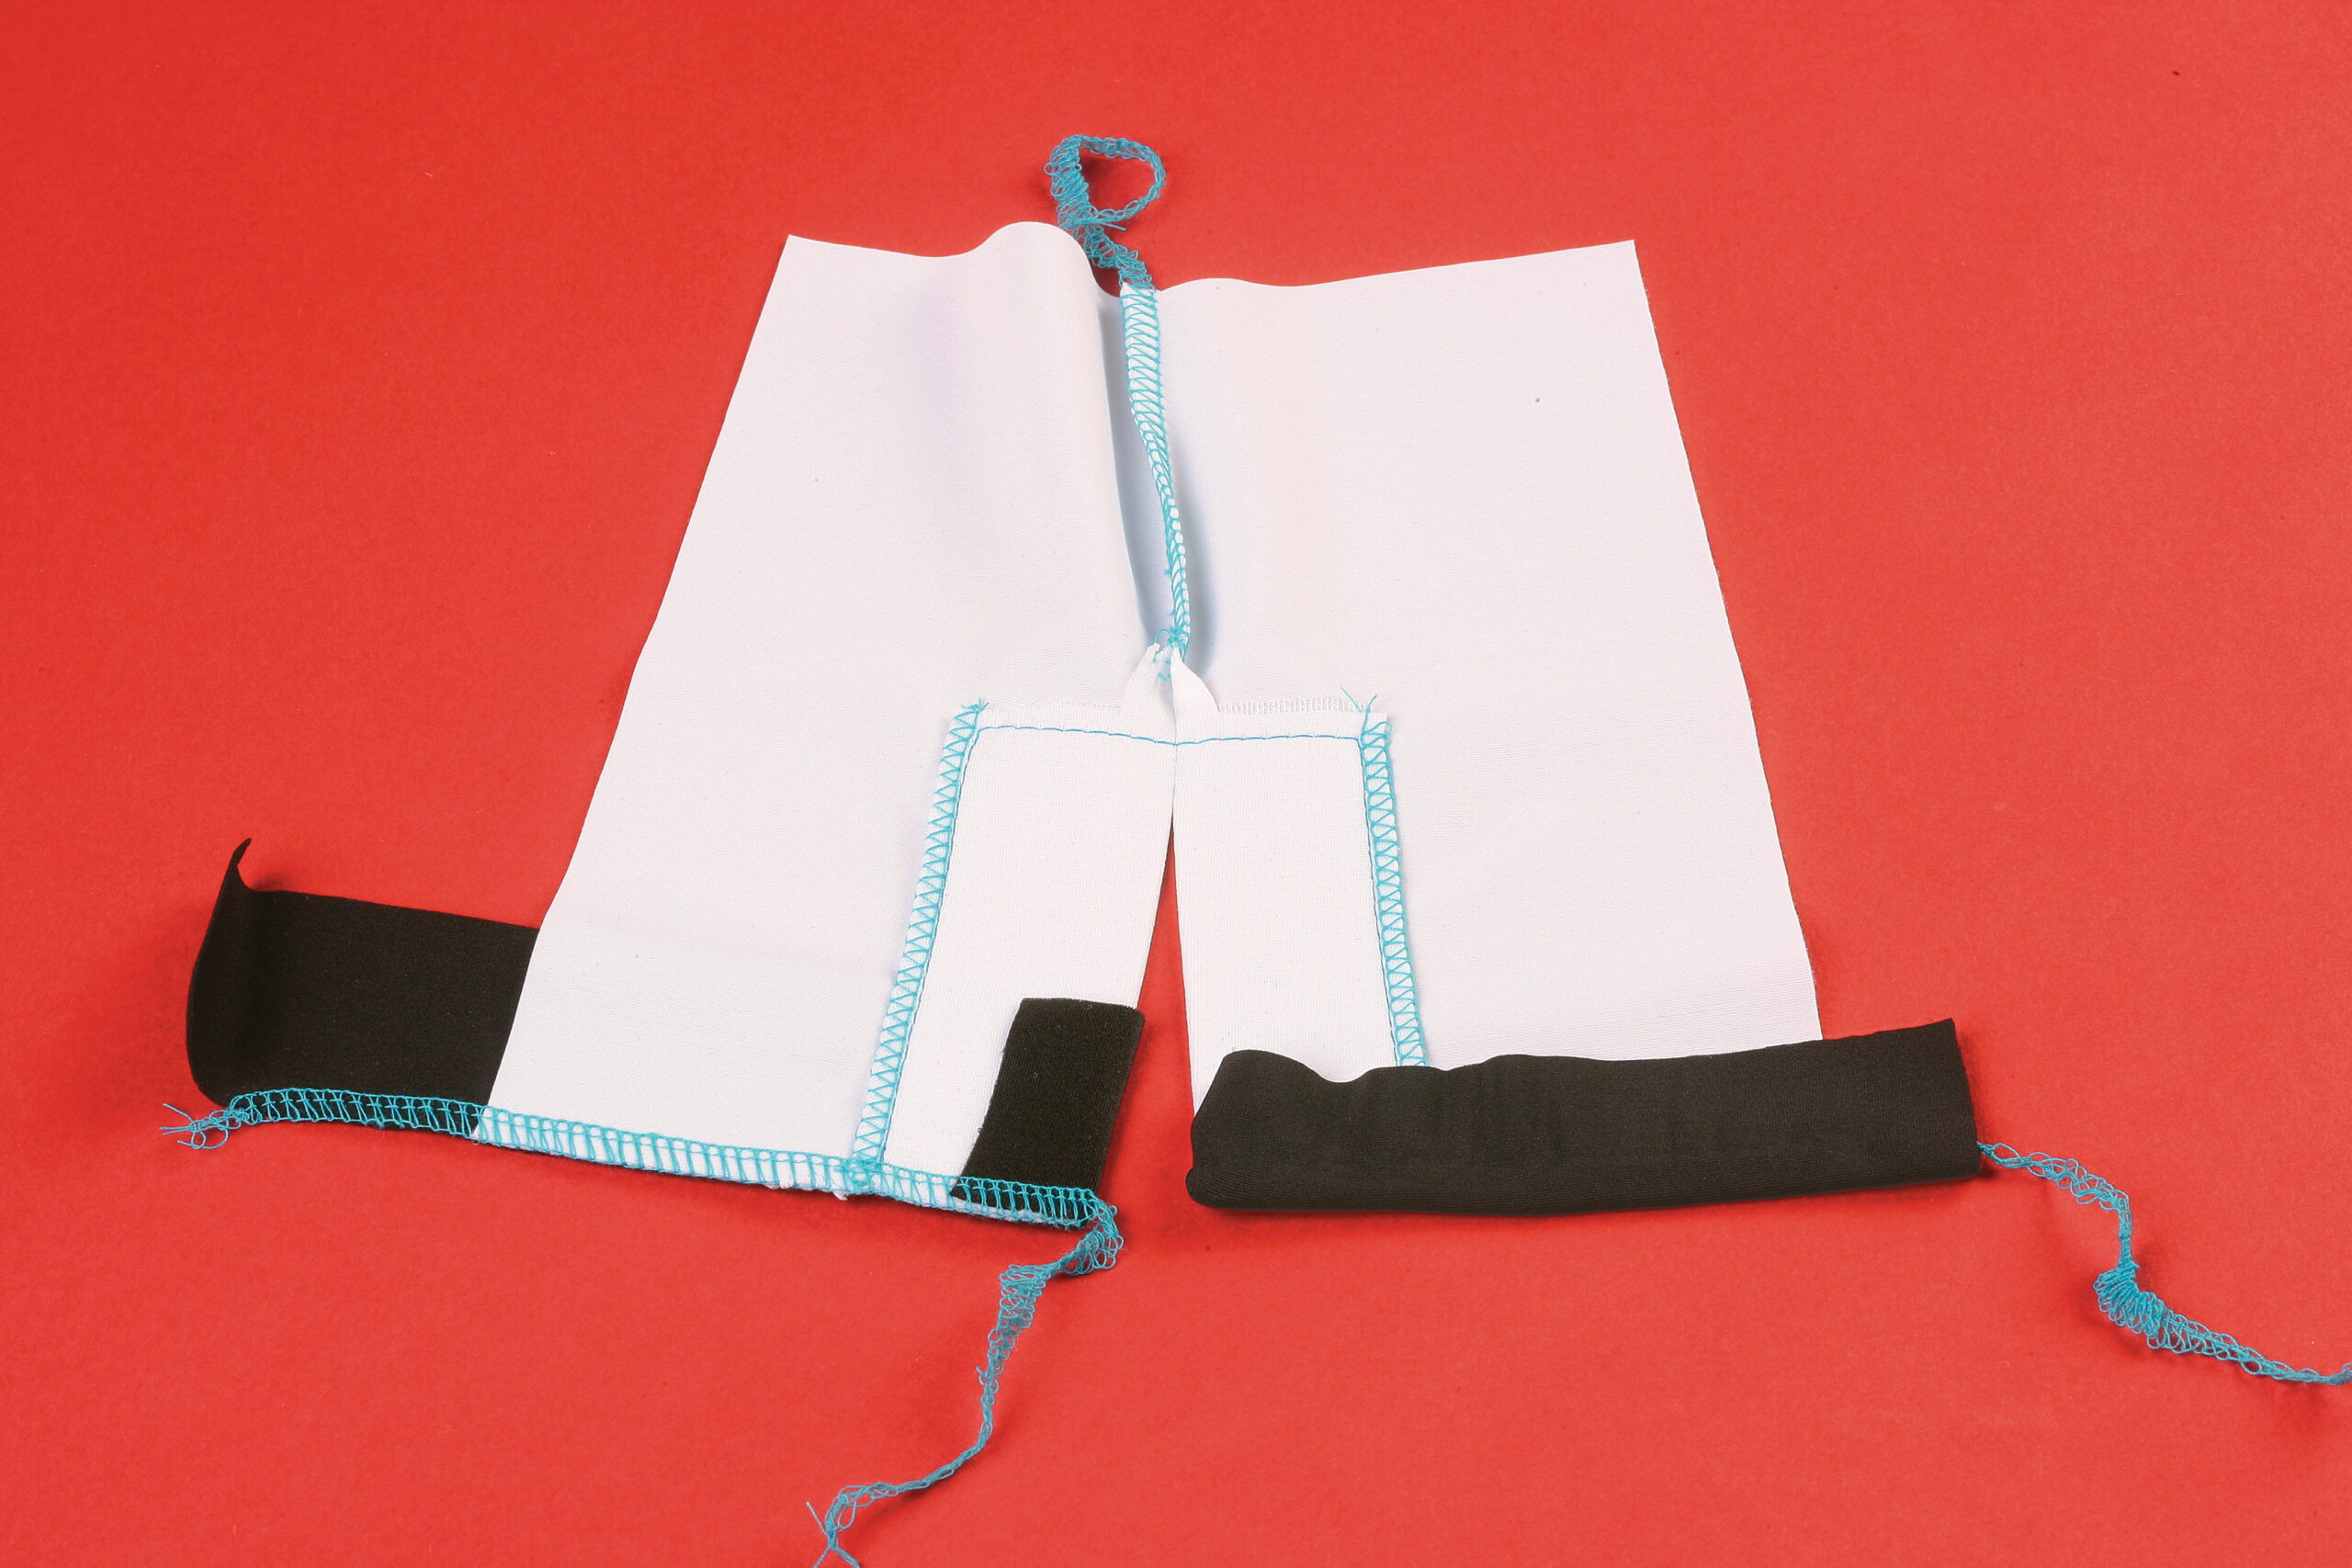
Attach the binding to the hem
Cut two bands of stretch binding 11⁄2 inches wide, with the binding’s greatest stretch going around the body. Make one band the length of the front hem plus 2 inches, the other the length of the back hem plus 2 inches. With right sides together, align one long edge of the binding with the garment’s hem edge, leaving 1 inch of the binding extending beyond the slits. Wrap the extended binding to the inside of the garment at each end, and serge the binding to the hem, using a four-thread stitch. Be sure to catch the ends in the stitching.
Topstitch the binding, two ways
Wrap the free edge of the binding to the inside of the garment, and stitch-in-the-ditch from the right side to anchor it in position. Trim off the excess binding close to the straight stitching. If you prefer a wider band on the inside of the garment, topstitch at the upper edge of the binding, using a zigzag stitch.
|
|
|


Cover and trim an elastic waistband
Stretch waistbands look neater, wear longer, and feel more comfortable when the elastic is snugly covered in fabric. The sporty contrasting trim is optional.
Prepare the elastic and the fabric cover
Cut a length of elastic 2 inches shorter than your waist measurement. Overlap and join the ends to form a ring. Cut a strip of stretch fabric 3 inches shorter than your waist measurement and two times the width of the elastic plus 1 inch. Use the fabric’s greatest stretch along the length of the strip. With right sides together, join the short ends of the strip using a four-thread serger stitch.

Attach fabric, wrap, and serge in place
With the fabric’s wrong side against the elastic, align one long edge of the fabric with the edge of the elastic. Attach the fabric to the elastic with a three-thread serger stitch, stretching the fabric slightly to fit the elastic.
Wrap the free edge of the fabric over the elastic and around until it extends beyond the serged edge. Using a three-thread stitch, serge along this edge over your original serging, trimming the excess fabric.
|
|
|


Add contrasting trim and topstitch
Cut a strip of contrasting fabric that is 11⁄2 inches wide and the length of the finished waistband plus 1 inch. With the right sides together, align the upper edge of the waistband and one long edge of the contrasting strip. Fold the first 1⁄2 inch of the contrasting strip in, as shown. Serge the strip to the waistband, using a four-thread stitch, overlapping the end over the starting fold. Wrap the trim over the upper edge of the waistband to the wrong side, pulling slightly. Fasten the free edge using a zigzag or twin-needle stitch. Cut off the excess trim on the inside of the waistband. With a four-thread serger stitch, attach the waistband to the garment.
|
|
|


Embellish a V-neck with a two-color band
This neckband appears to be piped, but it’s made from two flat strips of fabric.
Join the neckband strips
Cut a 1 1⁄4-inch-wide strip of the main-band fabric (shown here in white). Cut a 2-inch-wide strip of the faux-piping fabric (in red). The strips should be 1 inch shorter than the neckline opening. With right sides together, serge the strips together along one long edge using a four-thread stitch.

Form a faux-piped band
Wrap the faux-piping fabric over the seam allowances and to the wrong side of the main-band strip. Serge the two layers together with a three-thread stitch, keeping the faux-piping fabric snugly folded over the seam allowance and running the faux piping just to the left of the presser foot.

Make the v-neck
Form the v-neck band by overlapping the strip ends at right angles and basting them together at the sewing machine.

Attach the neckband
At the point of the v-neckline, clip the seam allowance just shy of the stitching line. With right sides together, straight-stitch the point of the neckband to the garment, beginning 2 inches before the point and ending 2 inches beyond it.
Return to the serger and serge the entire neckline to the garment, right sides together.
|
|
|


Hazel Matthys designs and sews in Eden Prairie, Minnesota.
From Threads #126


Log in or create an account to post a comment.
Sign up Log in