


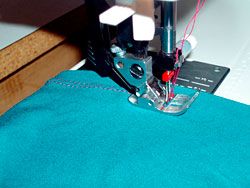
Professional knit hems tend to favor the strength of a double row of stitches.
Nowadays, it seems that knits are the fabric mainstay of our lives. Fashionistas and sewing enthusiasts have embraced the comfort, ease, and wearability that knits afford. But for the beginning—and even experienced—sewer, there are some techniques that make sewing with knits easier and more enjoyable. Here are a few to get you started.
Use the right needle
The needle you use in a project with knits can make or break the results. Generally speaking, you need a specialized needle to sew knits. There are two types I use for knits: Ballpoint (also called Jersey) and Stretch. Ballpoint needles are best used for sweater-type and loosely woven knits. They have a rounded point that penetrates the fabric without catching or cutting through the yarns. Stretch needles are perfect for sewing through tightly knitted jersey fabrics with high Lycra content. I use them on all my wool, polyester, and rayon jersey garments. For more on the anatomy of a machine needle and how to read machine needle packaging when choosing a needle, check out the video Essential Tools: Machine Needles.
Stitch type and length
If you have a straight-stitch-only machine, set the stitch length to a medium (2.5 mm to 3.0 mm) setting. When sewing knits with a straight stitch, stretch the fabric slightly (and gently) as it goes under the presser foot. To do this, apply equal pressure on both sides of the needle by slightly pulling the fabric.
Do not pull the fabric as it goes through the feed dogs: You risk breaking the needle and damaging your machine if you do.
If you have a zigzag machine, set the stitch length to the narrowest zigzag setting (0.5 mm on many machines), and the stitch length to between 2.5 mm and 3.0 mm. For a thick knit, you may need a longer stitch length. There is no need to stretch the fabric as you sew. The slight zigzag provides the stretch needed.
Seam finishes for knits
Knit fabrics, especially jerseys, don’t generally ravel, so you can get away without finishing the seams in many cases. If you are fortunate enough to have a serger or overlock machine, use that to stitch and finish seams in one fell swoop. You can also use a serger to finish the raw edges of hems before sewing them in place. I like to do this when working with sweater knits, terrycloth, or any knit that might have a tendency to “shed” slightly at the edges.
About facing
Many patterns for knits call for using a facing for necklines and other exposed edges. With many knits, especially stretchy jerseys, you can often skip the facing entirely. Simply fold under the seam allowance and stitch in place. I have eliminated the facings on most necklines this way. For a curved edge (like an armhole), test on a scrap of fabric cut to about the same curvature to see how you like the results.
Shouldering the burden
When making a knit top or dress, I stabilize the shoulder seams to prevent stretching. To do this, I fuse a piece of interfacing to the back shoulder piece or pieces. I prefer to use a 3/4-inch-wide piece of fusible tricot, which is made even with the cut edge of the fabric, but extends slightly beyond the seamline. This adds stability, but is light enough and has enough give to work with most knits. For heavier knits or sweater knits, I sometimes center a selvage of silk organza in the seamline and stitch through all layers. The organza provides a lot of strength to the seam, but adds no bulk.
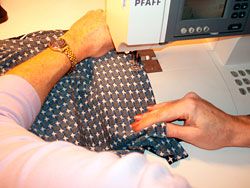
Hemming
Examine ready-to-wear knit garments and you’ll notice most hems are sewn with a double row of stitches on the outside. Manufacturers use a specialized machine, called a coverstitch, to achieve this finish. If you don’t have a coverstitch, you can still achieve this look. Most zigzag sewing machines can accommodate a double needle. This needle sews a perfectly spaced double row of stitches on the needle side of the fabric, with a zigzag on the bottom.
This stitch has more stretch than a regular straight stitch, and is perfect for giving a professional-looking finish. Before stitching a garment, make a test on a scrap of fabric. Double needles may require adjustments to the needle and bobbin tension to achieve a smooth, flat hem. Mark the hem on the right side of your garment. I like to use tailor’s chalk that can easily brush or wash away. Then sew along this marking so the double row of stitches is on the right side.
I hope these hints will help you get started with sewing knits. With a little practice, you will find sewing with knits addicting.


Thanks so much for this posting. I always know where to search if I need a little advice. Keep up the good work!
Good information. I was hoping for some tips on going over a side seam when sewing a Serger Cover Stitch Hem. It is very difficult to keep the stitches consistent when going over Anything with more bulk than just two layers of fabric!
This was a great article! Thanks for the advice! I've been thinking about getting a bernina sewing machine in Orlando FL. What are your thoughts on that kind of machine? Thanks!