
Pregnancy pants
During my third pregnancy, I gained quite a lot of weight. After giving birth, it became clear to me that those extra pounds won’t go down without a fight and that a significant amount of time would have to pass before I go back to my pre-pregnancy look. I had an abundance of quality maternity clothes lying around, and since I knew that I won’t be able to wear my regular clothes for a while, I decided to make the best of what I have. I took two pairs of comfy pregnancy pants I bought on Swap and teamed them up with some blazers of mine, of course I had to modify them to fit my current body shape. And I ended up creating some lovely outfits. Here’s how.
The tools you need:
- a dressmaker’s paper
- a pencil
- a chalk
- a measuring tape
- scissors
- pins
- a seam ripper
- a sewing machine
Step 1: Measure your body
Take measurements of your body so that you know how much fabric you’ll need to remove. First, measure the distance between the center of your crotch and the center of your waist. Then, measure the distance between the center of your crotch and your lower back’s center. Then, measure the length of the side seam that goes from your waist to your ankle. Then, measure the length of the inseam from the center of your crotch to the ankle. Finally, measure the extent of your waist and hips.
Step 2: Make a new pattern
In order to make your pattern you’ll need to place a big piece of dressmaker’s paper on a flat surface, and put your pants on top of it. Use a pencil to make an outline around the pants. Overlay the measurements onto the outline to make a new pattern. Draw a new outline of the pants inside the old one and cut out the new pattern once you’ve finished drawing.
Step 3: Mark the changes on the pants
Put your new pattern on top of the pants and use pins to secure it. Use a chalk to mark the new outline onto the pants.
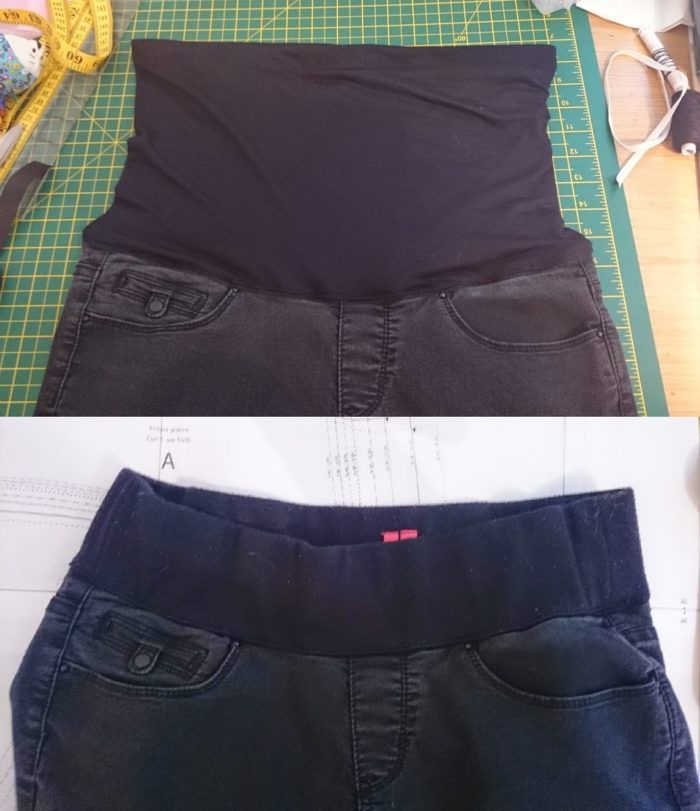
Step 4: Make changes in the waist
Deconstruct the waist by using a seam ripper and cut out the waistband on the back of the pants. Remove the desired amount of the waistband and sew it back together. Put two darts in the centre of each buttock to take in the excess fabrics.
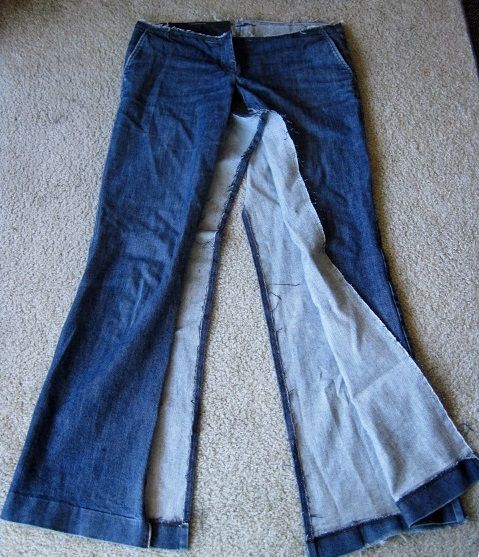
Step 5: Make changes in the width
In order to make a smaller waist, sew downwards from the waist following the outside leg seam. Flip the pants on the inside and start sewing downwards from the waistband to the outer leg seam by using a straight stitch. Cut out the excess fabric when you’re finished.
Step 6: Make changes in the crotch
To prevent the crotch of the pants from hanging too low, sew in a line that’s parallel to the original crotch. Flip the pants on the inside and start sewing from the inner thigh parallel to the seam all the way around. Again, cut out the excess fabric after you’re done.
There you have it – a quick and easy way to transform your pregnancy pants into new, trendy bottom wear. You can do the same with your blouses and dresses.


Log in or create an account to post a comment.
Sign up Log in