
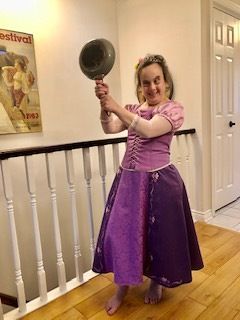
Following the success of Dorothy costume I made my sister last year, I decided to continue our Hallowe’en tradition by making another costume. Carolyn is a dedicated Disney fan and I thought she’d enjoy dressing up as the spunky Rapunzel. She definitely enjoyed wielding that frying pan!
The pattern is custom drafted using my sister’s measurements. At 4’11, she doesn’t fit standard patterns easily. The bodice is a princess line silhouette, piped with narrow gold piping at the arm scyes, neckline and bottom edge. The lace up bodice is a mock front; I machine embroidered the eyelets down each folded edge and then sewed them to a centre panel along their outside edges. This allowed me to insert the lacing (a length of narrow pink suede trim) and tie it in place permanently. The bodice actually closes at the back with an invisible zipper. I hand sewed narrow off-white cotton lace to the neckline and the lower edge of the bodice as a finishing detail.
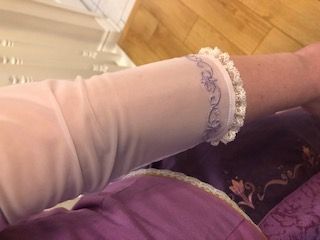
The sleeves have two parts. The upper sleeve is eased in smoothly at the upper edge and gathered at the lower. I sewed 1/4″ strips of pink ribbon onto the lilac polyester satin and then gathered them to fit a bias band. The under sleeve was a very fine, translucent pale pink knit. I embroidered a floral swirl in violet thread around the bottom edge. Because the fabric was so stretchy, I used two layers of light weight stabilizer in the hoop and then floated a layer of wash away stabilizer on top. The bottom of the sleeve was finished with a 4mm rolled hem foot, using a very slight zigzag stitch to ensure the knit sleeve maintained elasticity. I hand sewed the narrow lace trim to the rolled edge.
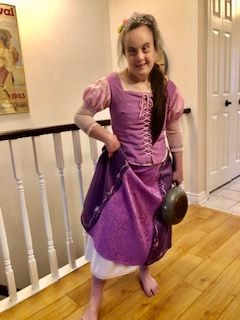
The skirt and the petticoat are both cut from a semi-circle skirt pattern, cut to fit my sister’s waist measurement. Although they look like separate pieces, the skirt and petticoat are sewn to the lining of the bodice, which only extends to Carolyn’s natural waist. This makes getting in and out of the dress very easy and there is no bunching or separation of the bodice and skirt, either.
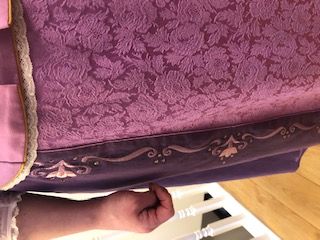
The centre front panel, with the floral jacquard is actually the reverse of the fabric…the front side was so shiny it distracted from the overall dress. Each side of the centre panel is stabilized with narrow purple piping. I embroidered simple folk style flowers and swirls using a dark purple and pink thread down each side of the side panels. Each flower/swirl combination required three rehoopings. I then embellished the embroidery with a small smattering of hot set crystals.


Log in or create an account to post a comment.
Sign up Log in