

How to Sew Flat, Flattering Elastic Waistbands
Make pull-on pants and skirts that keep your waistline streamlined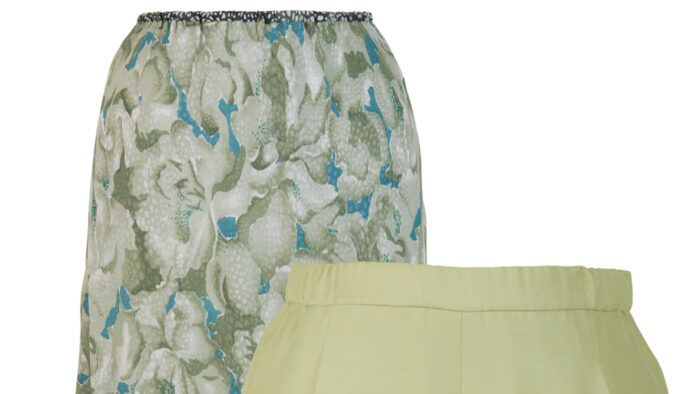
Based on comfort and versatility, my favorite garments have always been skirts and pants with elastic waists, but whenever I set out to design and sew a garment with pull-on construction, I invariably come up against a two-part challenge: how to create a stretchy waist that doesn’t add extra bulk and is as beautifully finished as its fitted waistband cousins.
I love to rise to a challenge, so I’ve developed three different elastic-waist treatments: a cut-on casing for no-roll elastic that is finished with a lining; a narrow cut-on casing especially suited to double-layer lightweight, bias-cut, even reversible garments; and a separate, partial-stretch waistband that has fullness in some areas, but lies flat against the body in others. Each treatment is geared toward fabric of a different weight and drape (thick suedes and wools, fine silks and sheers, and crisp suitings), and each is as flat and professional-looking as can be, so there’s nothing to limit your creative interpretations. Keep reading to uncover the simple pattern alterations, as well as the sewing instructions.
TIP
Butt elastic ends to eliminate bulk inside the waistband. For the flattest join, don’t overlap the ends; instead align them on a tab of grosgrain ribbon (the same width as the elastic) and stitch through all the layers.
Begin with easy pattern changes
 All skirt or pants patterns can be altered to accommodate any of my elastic-waist treatments, but the easiest to adapt is one that already has an elastic or drawstring waist and fits you well. Read through the directions I’ve provided to see how your adjustments affect the pattern above the waistline. Then, to begin, you’ll probably need to cut off the casing or seam allowance from all the main pattern pieces (the front and back, and lining or overskirt, if included) on the marked waistline before you make the adjustments illustrated below.
For the partial-stretch waistband, you can control a bit of the fullness by making darts or pleats, but leave enough around the waistline to allow you to pull the garment over your hips (make a test muslin to be sure). You’ll also need to draft the waistband itself. Note that you can position the flat section (or sections) of the waistband wherever you like, but I find it especially attractive to place them across the front.
Keep the fit comfy
To determine the length of the elastic, cut an unstretched piece the same length as your waist circumference, then wrap it around your waist and overlap the ends until it is snug enough to hold the garment in place, but is comfortable. I like to mark and trim the elastic ends so they butt (not overlap), and then when I sew them together later, I use a special bulk-free ribbon join.
Finish like a pro
After you adjust your pattern, it’s time to cut out your fabric (follow the straight or bias layout as appropriate) and get busy sewing. To make my waist treatments, first assemble each layer of your garment separately, applying details such as pockets and finishing all edges except the waist. Then add the stretch. It’s easy, and the benefits are three-fold—you’ll feel dressed-up, slender, and utterly comfortable.
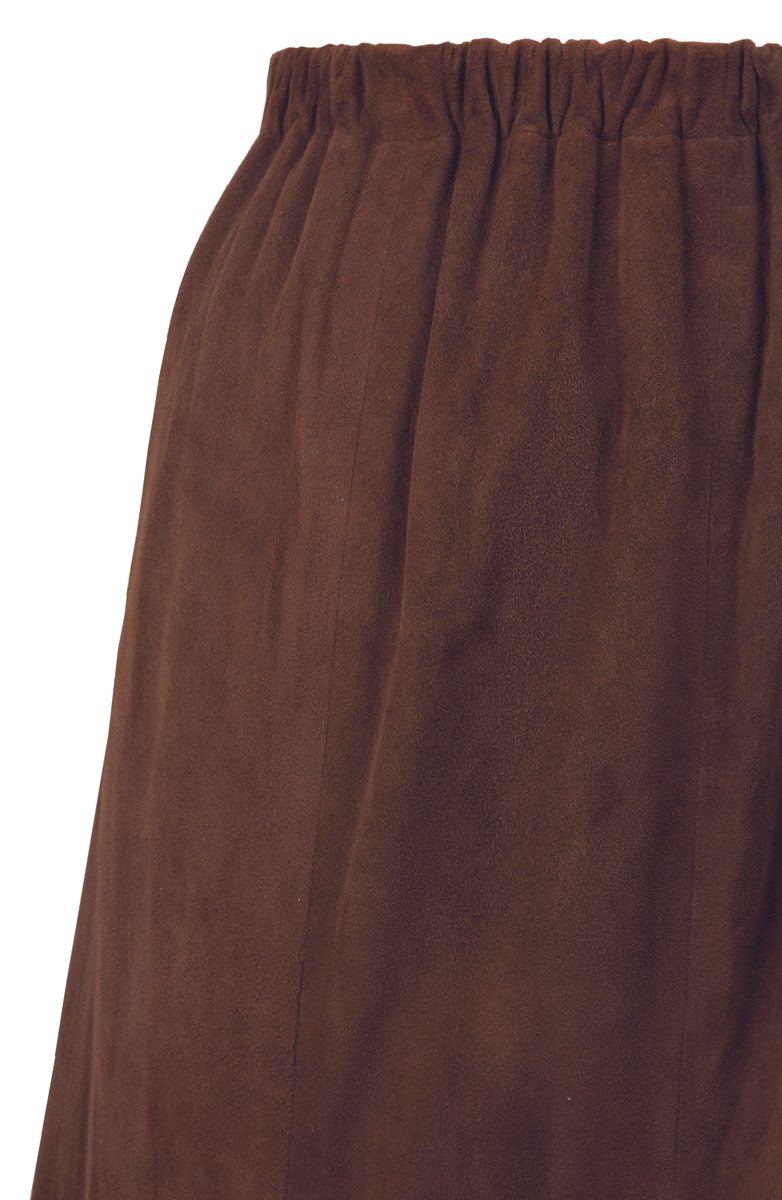
Eliminate seam bulk with a deep cut-on casing
For medium- and heavyweight fabrics, sew the edge of a cut-on casing to the lining, and then press the seam allowances toward the lining; the only bulk in the casing will be the elastic.

First adjust the pattern. Draw a 2-inch-deep casing above the pattern waistline; then add seam allowance. When folded, the casing will accommodate 3⁄4-inch no-roll elastic. On the lining pattern, just add seam allowance above the waistline. Make each change to all main pieces.
 |
 |
 |
| Sew the garment to the lining using 1⁄4-inch seam allowance. Press the seam allowances toward the lining. | Bring the lining and garment wrong sides together, folding the garment along the casing foldline and making sure the seam allowance points down; pin through both layers along the seam. | Stitch-in-the-ditch along the seam; leave about 3 inches unsewn at the center back. Thread elastic through the opening and join the ends. Evenly distribute the fullness and complete the seam. |
A narrow casing gives lightweight sheers a lightweight finish
When using two layers of lightweight sheer fabric, cut the casing onto the underskirt, sew the layers together, and then fold to enclose the seam allowances in the casing, which will form a contrast band.

First adjust the pattern. For the underskirt, draw a 3⁄4-inch-deep casing above the pattern waistline; then add seam allowance. When folded, the casing will accommodate 1⁄4-inch elastic. For the overskirt, just add seam allowance above the waistline. Make each change to all main pieces.
 |
 |
 |
| Sew the overskirt to the underskirt, right sides together, using a narrow zigzag stitch and a 3⁄8-inch seam allowance. Press the seam allowances toward the underskirt. | Wrap the underskirt up and over the seam allowances; pin through both layers along the seam, leaving about 3 inches unpinned at the center back. Thread elastic through the opening and join the ends. To ensure that it doesn’t twist in the casing, stitch close to the bottom edge of the elastic using a zipper foot. | Evenly distribute the fullness around the waistline. A skirt made this way is reversible. |
Use a partial-stretch waistband for a softly tailored look
Because a portion of this band is flat, it looks sleek but still provides pull-on comfort. If you like, baste a lining to the garment waistline before you sew on the waistband.

First adjust the pattern. Draft a separate 21⁄4-inch-deep waistband (the finished, folded waistband will accommodate 3⁄4-inch no-roll elastic); the length should equal the pattern waist circumference minus the depth of any darts or pleats. Add seam allowance all around; also add seam allowance to the garment waistline.
 |
 |
 |
|
Serge or otherwise finish one long edge of the waistband; sew the center back seam and press the allowances open. Pin the unfinished long edge to the garment waist, aligning the waistband seam to the center back; sew. Press the seam allowances toward the waistband. Fold the waistband to the wrong side along the foldline, and pin through both layers along the waistband seam.
|
Stitch-in-the-ditch along the seam; leave about 3 inches unsewn at the center back. Thread elastic through the opening, smooth the area to remain flat, then pin and stitch across the waistband through all layers at each end of the flat area. | Join the elastic ends, then evenly distribute the remaining fullness. Stitch-in-the-ditch to close the center back opening. |
Sandy Scrivano is a clothing designer from Sacramento, Calif.


Thanks for taking the time to create these neat elastic waistband methods and for sharing them! Thanks so much! 😊👍