Why Make Your Own Jeans?
Because creating a designer-style pair is so much easier than you think it is
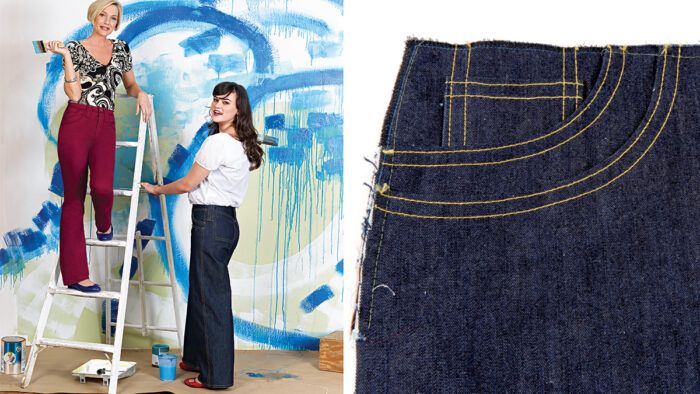
If you’re like most sewers, you shy away from making jeans because you think it’s just too darn hard. But, compared to the struggle of finding a store-bought, designer style that fits and flatters you perfectly, making a pair of jeans is fast, far less frustrating, and leaves you with your self image intact. And, what’s even better is that it is entirely possible to create a professional-looking pair of jeans in a size and style that suits you perfectly and looks designer in every way. To find out how to get perfect-fitting jeans, read my article “Everyone Can Have Jeans That Fit” (Threads no. 111). Here, with my construction tips for achieving flawless seam finishes, crafting perfect pockets, and adding the essential jeans finishing touches, I’ll show you how to get fantastic-looking jeans.
To get started, you’ll need 2-1/2 yards of 10- to 14-ounce stretch or non-stretch denim fabric. Stretch denim is more comfortable to wear but doesn’t hold its shape as well as a non-stretch denim. If the fabric weight is not listed on the bolt, try to remember the feel of the fabric used in purchased jeans. It isn’t too stiff and has body, but it isn’t too thin. Since denim has progressive shrinkage, wash your fabric in hot water with detergent and dry it on a hot setting three separate times.
A good-fitting, multisize jeans pattern is also essential. Vogue 7608 and Vogue 1024 are two of my jeans patterns that offer a great fit. I worked with a patternmaker, making up dozens of samples to get a great fit for these jeans. They have a close fit under the seat, more room over the tummy, and come in a full range of sizes to fit a 34- to 57-inch hip. They’ve also been tested on many women with a multitude of fitting issues. Burda jeans patterns also offer a good fit.
What You’ll Need:
For accurate sewing, you might want to invest in a jean’s foot, which has a small round hole. Lengthen the stitch length to 3.0mm. Whenever topstitching is required, switch to a longer stitch (4.0mm), and use topstitching thread on the top of the machine and regular thread in the bobbin. |
Sew smooth seams and finishes
Accurate topstitching and smooth seam finishes are important for achieving a professional jeans look. Here’s how to give all of your seams a perfect finish:
Topstitching
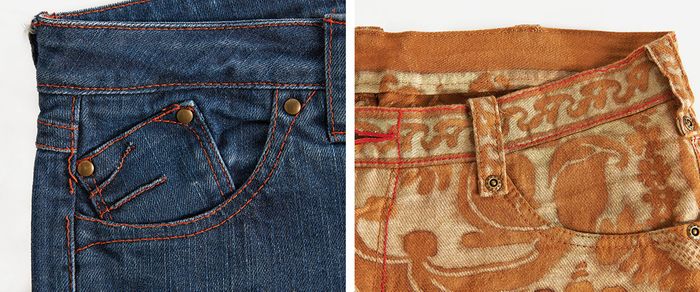
1. For a traditional blue-jeans look, use orange topstitching thread to sew double-topstitched, flat-fell seams. For black jeans, topstitch with heavy white or off-white thread, and topstitch colored jeans with black thread or thread that matches the color of the fabric.
2. To achieve a flawless finish on topstitching, use an edge foot and a topstitching foot. First, use the edge foot to sew a row of topstitching 1/8 inch from the seam. Then, use the topstitching foot to evenly space the second row of topstitching 1/4 inch from the first. Topstitch the side seams, pockets, waistbands, belt loops, and hem.
3. For jeans made of fabrics other than denim, different seam treatments are preferable. For example, if you are making jeans in silk brocade, simply serge-finish all of the edges, and press the seams open after you’ve sewn. If you are using a stretch woven fabric or leather, sew a faux flat-fell seam to eliminate bumpy seams. After the seams have been sewn and pressed open, trim one seam allowance to 1/4 inch. The untrimmed seam allowance is already serged. Press it flat over the trimmed seam allowance, and topstitch the seam flat from the right side.
Inseams
4. For a smooth inseam finish, pin the right side of the front to the right side of the back. Place the pins on the back side, and match the pant pieces at the crotch, knee, and hem. Then make several 1/4-inch clips along the back inseam allowance so the back inseam conforms to the front inseam. Sew with the front inseam against the feed dogs. Stretch the back inseam to fit the front.
5. Serge the seams together. Then press the inseam toward the pant front. While the pants are still open, press up a 1-inch hem. Topstitching is optional on the inseam.
Crotch seams
6. Open out the pant legs so the crotch seam forms a horseshoe curve. Sometimes, in sections where multiple layers of denim join, the machine skips stitches. To avoid this, pound the denim layers flat with a hammer before you sew.

7. On the lower half of the crotch curve, stabilize the crotch with a narrow piece of twill tape sewn into the seam. With right sides together, sew the crotch seam. Then clip the seam just under the fly-front extension. Serge the seams together, press them toward the fly front, and use contrasting thread to sew a single row of topstitching close to the seam.
Side seams
8. After your pockets, zipper, and waistband are in place, pin the side seams with their right sides together. Cross-pin the seams where the yoke and contour waistband meet so that they don’t shift as you sew the seam. Then, machine-baste the side seams, and try on the jeans to refine the fit. You want the pants to have a snug fit in the waist and hip.
9. Next, sew the side seams permanently. Press the seam open. Trim one side of the seam allowance to 1/4 inch, and serge the untrimmed seam allowance. Then, on the right side, topstitch the side seams with two rows of topstitching.
Mastering jeans pockets
The pockets make the jeans. Here, I’ll walk you through all of the pockets you need to know—plus a special one or two.
Coin pocket
Serge-finish around the coin-pocket edges and the front overlay pocket. Fold in the coin-pocket seam allowances. Then, fold down a 1/2-inch hem at the top. Press, and then pound the hem flat with a hammer. Finally, sew the top of the pockets with a double row of topstitching.
Front pockets
1. Cut the front-pocket facing and pocket back from a firm but lightweight cotton. With wrong sides together, pin the side front to the pocket back. Sew the front to the side-pocket back around the edge. Then, place the wrong side of the coin pocket on top of the side front, and topstitch it in place along the bottom and up each side.
2. Next, apply straight-grain fusible stay tape to the pocket-edge curve. Clip into the tape on one side so it conforms to the curve.
3. With the pant front facing you, align the facing with the pocket-opening edge, matching the pocket curves. Sew around the curved top edge of the pocket. Trim the seam allowance to 1/4 inch, and clip into the seam allowances at 1/2-inch intervals, taking out small divots on the inside curve to reduce bulk.
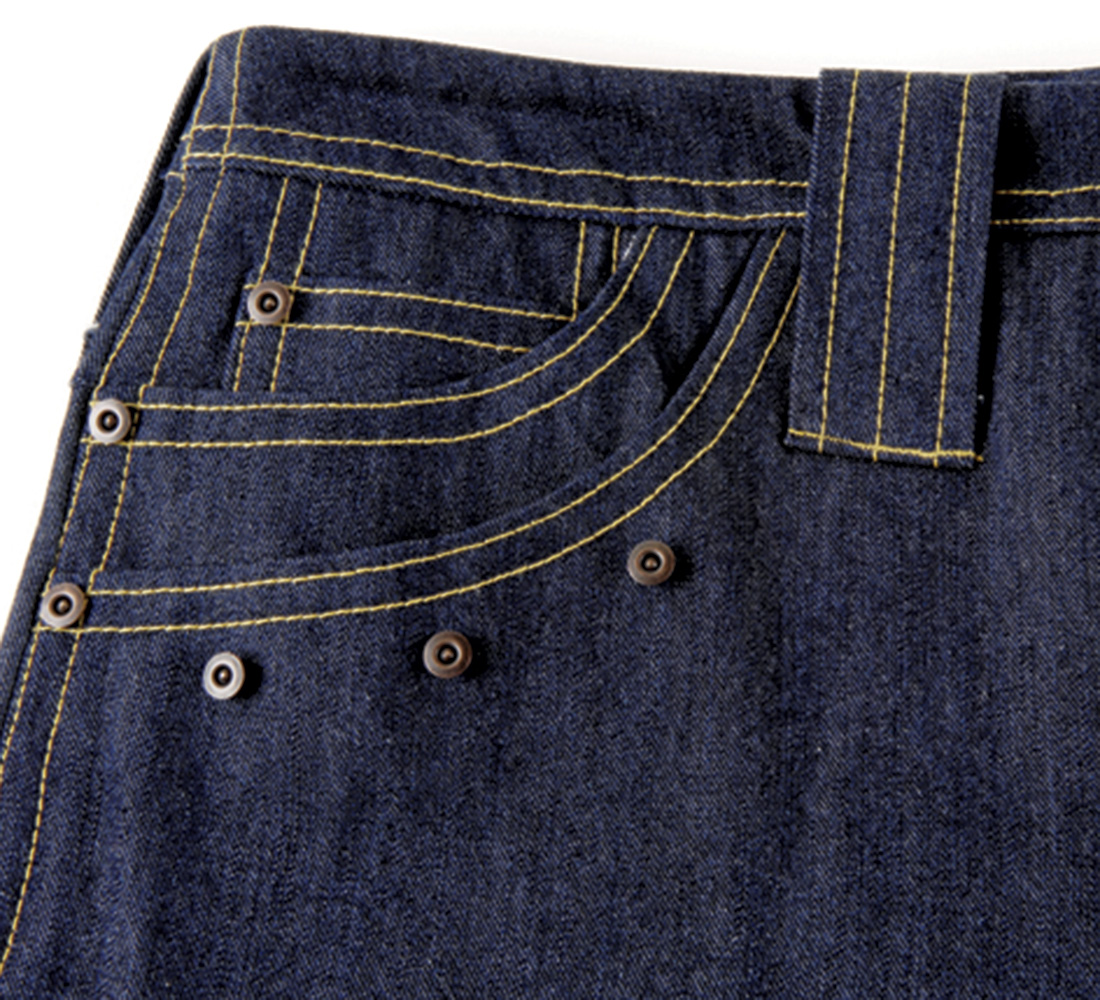
4. Turn the front-pocket facing to the inside of the pants. Press the curved seam at the top of the pocket so that no facing shows on the seamed edge. Using a contrasting thread, topstitch along the curved edge with a double row of stitching.
5. Finally, clean-finish the pocket bags with a French seam. Sew them with wrong sides together with a 1/4-inch seam allowance. Then turn the pocket bags right-side out, and sew again with a 3/8-inch seam allowance. Matching the dots, pin along the side seam. Machine-baste the front facing to the pant front along the waistline and the side front below the pocket opening.
Double pockets
1. This pocket is made in three pieces. For piece “a,” place the wrong side of the side front on the right side of the pocket back. The fabric contrast should show on the inside of the pants as you wear them. Sew the pocket back onto the side front close to the edge of the overlay. Serge finish around the coin pocket as you did before—but do not press up anything on the bottom. Flatten the corners with a hammer, and topstitch along the top hem of the coin pocket. Overlay it onto the right side of the side front, matching the dots. Topstitch the coin pocket onto the side front along the bottom and up the sides. Continue a double row of topstitching on each side of the coin pocket all the way up to the waist.
2. For piece “b,” face the pocket edge with the middle pocket bag, and sew along the lower overlaid edge. Then place piece “b” over piece “a.” Clip, trim, and understitch the seam allowance on the rounded opening to the upper pocket bag. Turn it right-side out, press, and topstitch.
3. For piece “c,” face the pocket-opening edge with right sides together. Sew the rounded edge of the pocket opening. Clip, trim, and understitch the seam allowance as described earlier. Turn it right-side out, and press. Topstitch with contrasting thread and double rows of topstitching.
4. To assemble the pocket, lay “a” on the table face up. Place “b” face up on top of “a,” matching the dots. Pin them together along the waist and side seam. Place “c” face up on “b,” matching the dots. Then join all three pieces with a basting stitch along the waist and the side seam above the notches. Lift up the front pant piece, and smooth out the pocket pieces, but don’t force them together. You can now serge-finish together all of the pocket layers or sew a French seam for a clean finish.
Back pockets
1. Serge-finish around the entire back pocket. Press the top hem allowance under, and topstitch. Then press the side and bottom hem allowances under. Mark the pocket placement on the back of the pants for reference, but do not apply back pockets until the jeans are finished. Once you’ve chosen the back-pocket location, press strips of Steam-a-Seam 2 around the sides and bottom of the pocket—but not the top. This holds the pocket in place and prevents the fabric from shifting while you topstitch them.
 |
 |
2. Place the back pocket on the jeans, matching the dots. Topstitch it onto the pants with a double row of topstitching, and to enclose the seam allowance at the opening, gradually increase the width between the topstitching near the pocket top to 3/4 inch.
Add the finishing details
Once you’ve mastered seams and pockets, add these finishing touches.
Button closures
1. Press, and then flatten out the ends of the waistband with a hammer. Since jeans fit snug at the waist, I prefer to close them with a jeans button. To make a buttonhole, wrap both sides of the waistband end with lightweight Solvy. With a brand-new jeans needle and thread that matches your topstitching color, sew a keyhole buttonhole, and stitch it twice for more definition. Seal the fabric between the stitches with Fray Check, and cut open the buttonhole with a buttonhole chisel.
 |
 |
2. A jeans button has two pieces: a front cap, which looks like a metal button, and a back, which is a pointed nail piece. Poke the nail point from wrong side to right through the waistband. (If you have difficulty getting the nail to come through, use an awl to make a small hole first.) Then place the button cap over the pointed nail piece, and hammer it in place.
Belt carriers
1. Belt carriers can be made any width. You can have them finish anywhere from 3/8- to 1-1/2 inch. To create the carriers, cut a strip 30 inches long and three times the finished width of your carrier. Serge one long side, and press the lengthwise strip into thirds with the raw edge first and the serged edge last.
 |
 |
2. Topstitch the strip with a double row of topstitching. Sew several rows if your carriers are wide. Cut the strip apart in 5-inch lengths. The belt-carrier positions are marked on the pattern. Fold under the top edges of the carriers, and pound them flat with a hammer. Using regular matching thread or thread that matches the color of the topstitching, machine-sew a bar tack. It may take a size 16 or 18 denim needle to go through all of the layers. Since the carrier will hold a belt, sew it lower than the waistband. Insert your belt to make sure that it fits before you bar-tack the bottom of the belt loops.
Hemming
Jeans have 1/2-inch double-turn hems so they require a 1-inch hem allowance. Double-turn the hem, and pin. Use a scrap of denim to protect the fabric, and hammer the seams in the hem; then press. Using thread that matches the topstitching, double-stitch evenly around the hemline.
Rivets
Place rivets in high-stress areas such as on the corners of pockets. Or use them to embellish any place you like. To insert a rivet, make a hole through the fabric layers with a nail. Then, work the rivet back through the hole from the wrong side, and place the rivet front on top. Use the rivet applicator that fits the top of the rivet, and hammer it into place.
Sandra Betzina is a world-renowned fitting expert, pattern designer, and author. Visit her Web site: PowerSewing.com.
Photos: Sloan Howard


Log in or create an account to post a comment.
Sign up Log in