How to Get Accurate Body Measurements

Mark the body so you'll have consistent reference points while you measure.
Use our printable measurement chart and instructions to guide you through the process of taking and recording accurate body measurements
The first step in sewing the right-sized garment for yourself or someone else is to get accurate body measurements. You want to start out with a complete and accurate set of these specific measurements.
In the instructions for marking reference points, I’ll show you how and where to mark the body so your measurements are consistent; print out the Measurement chart and use it to record your accurate body measurements. For more details on measuring, have a look at “How to Take Measurements,” in the April/May 2003 issue of Threads (#106).
More on fitting
• How to Reset Sleeves for a Better Fit
• 13 Essential Fitting Tips & Tricks
• Grade Your Pants for a Perfect Fit
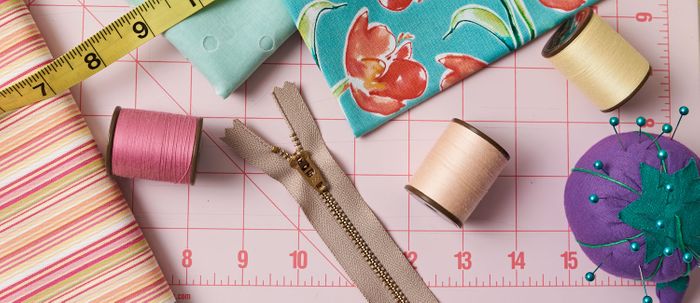
Marking and measuring tools you’ll need
• A short, fine chain necklace- to establish a natural neckline
• Washable markers- to draw lines on skin and/or undergarments
• 1/4-inch adhesive dots
• Pins
• Narrow elastic – to locate and mark the waistline
• Flexible but stable measuring tape
• 12-inch ruler
Optional:
• A form-fitting T-shirt with set-in sleeves- to help identify an armhole
• Twill tape/cotton cording- for marking crotch length
Marking reference points
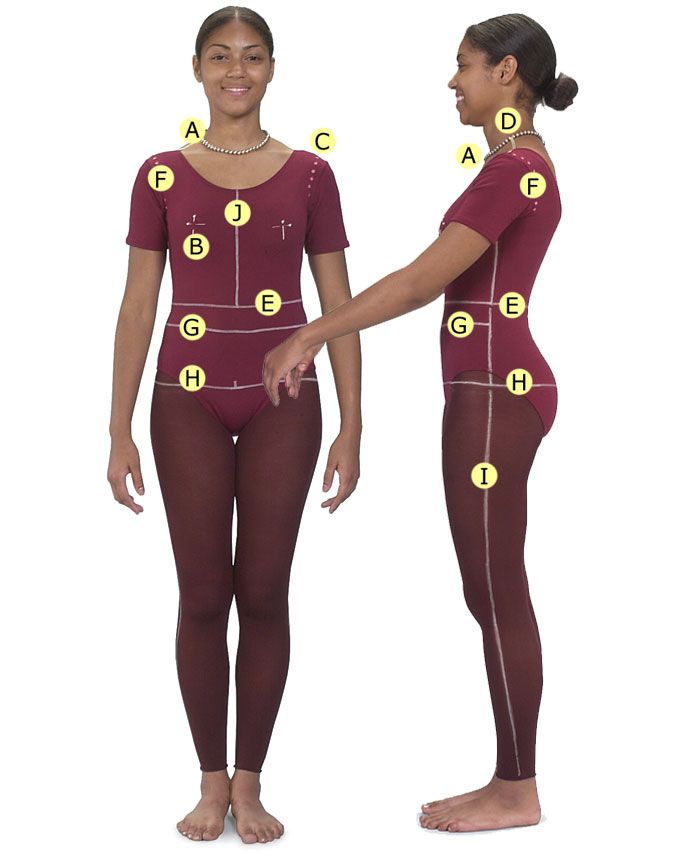
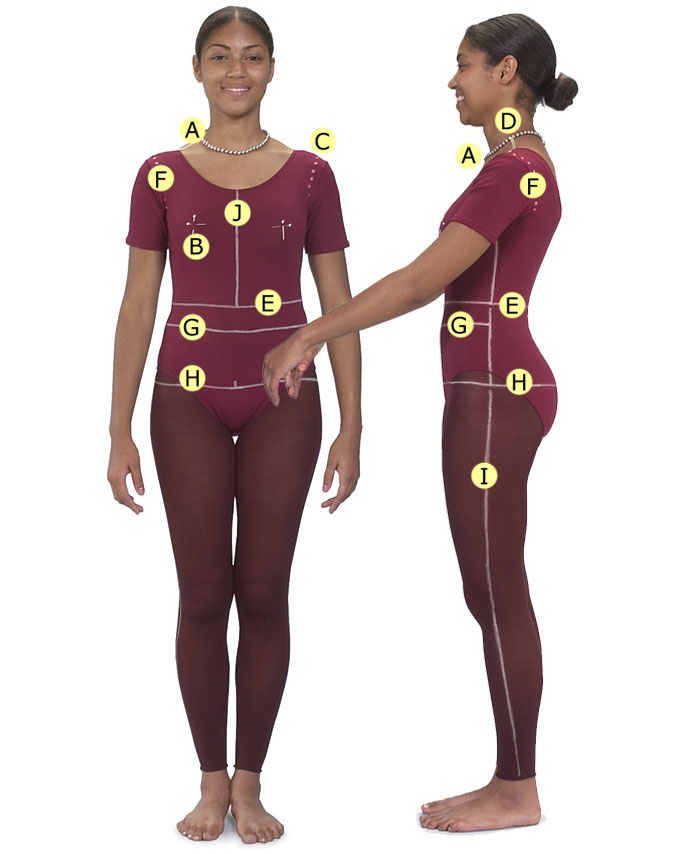
Mark the body so you’ll have consistent reference points while you determine your accurate body measurements. (The solid lines on our leotard are extra-bold for photography purposes.)
As you measure, be sure to check the points of intersection. Be sure all horizontal markings clearly intersect all vertical markings so you’ll be able to identify the exact center front, center back, and side seam locations. (Note the center front of your waistline may not be in line with your navel.)
A. Neckline
Identify the natural neckline with a short chain necklace that settles comfortably, just below the slight hollow at the base of the neck. • Mark the exact center front of this neckline with a…
Start your 14-day FREE trial to access this story.
Start your FREE trial today and get instant access to this article plus access to all Threads Insider content.
Start Your Free TrialAlready an Insider? Log in


Help - I'm confused. My wife asked here to help gathering these measurements for her sewing class, but I can't figure them out. The instructions list the points to mark, but the measurements don't correlate with the points. For example, how do I measure shoulder length? What's the definition of shoulder length? If I search the page for shoulder length, I only get a match on the measurement, not the instructions. What I need is something like the following
Shoulder Length (from the natural neckline side point (A.3) to the shoulder point (C) on the same side)_____________
Does this make sense? Am I being too literal? I'm a computer programmer, so I expect instructions to be 100% complete (like a computer program). Maybe that's too much to expect. Any help would be appreciated.
Hi,
The shoulder length is found by measuring from the side-neck point to the shoulder point on the same side.
I hope this answers your question, and good luck to your wife in her sewing class!
Getmysize.com will allow visitors to the site to be able to create a “body profile” with specific measurements ranging from arm length to torso length to upper-leg length and beyond. Businesses will also be able to add apparel they wish to sell on the website by measuring clothing with specific measurements that will coordinate with the body profile measurements. A shoe company can add a pair of shoes and input the length, width, and ankle circumference of the shoe. A user can then conduct a search with their foot length, width, and ankle circumference and the closest matches will show up in their search.
Getmysize.com is also free to use, so a small business owner will be able to compete with larger businesses when selling their items. In addition to specific measurements, the brand name and size show up in the product description, as well as the price, up to four pictures, detailed descriptions and a space for the URL to be posted so that a potential buyer can link directly to the page where the item can be found.
For more information regarding Get My Size, visit their site at: http://www.getmysize.com
Not loving the color of the unitard on the unfortunate model who was forced to wear it. Guide looks useful and I look forward to putting it to practice on my many clients. Orale!
Perhaps you could create a page with the instructions for measuring a body for those who have never done it before. I know that when I first saw one of these cheat sheets, I had to look up this information. Or if you already have this information somewhere, put a link on the page for the instructions. Thank you.
1) Neck: Measure the neck circumference. To find the base of the neck, have the person tilt his or her head forward. You'll see a knobby bone in back . If the person being measured doesn't like a tight fit here, add a pinch of breathing room.
2) Chest: To measure the chest circumference, place the tape around the fullest part of the chest or bust, under the arms.
3) Back: To measure the length of the back, start at the base of the neck and make a straight line down to the waistline (see number 6 for waistline measurement).
4) Arms:
FOR HER: To measure arm length, start at the base of the neck, then go over the shoulder, down to the slightly bent elbow and then to the wrist bone.
FOR HIM Begin this measurement at the shoulder tip.
5) Shoulders: Measure from the base of the neck (from the side, where the neck meets the shoulder) to the upper-arm bone.
6) Waist: Wrap around your waist starting from your belly button.
7) Hips: Measure the circumference. The person being measured should stand with feet together.
8) Leg outseam: Measure vertically down the outside of the leg, from the waistline to the lower part of the anklebone (or the desired hem length).
9) Leg inseam: FOR PANTS ONLY Measure from the crotch to the lower part of the anklebone (or the desired hem length), running vertically down the inside of the leg.
10) Thighs: FOR PANTS ONLY Measure the circumference, parallel to the floor.
I love your magazines. This is exactly what I have printed from your Issue May 2003 Number 106 of Threads. I carry it with me in my purse at all times.
I can suggest this link to pictures for these measurements:
http://www.renaissancetailor.com/demos_toiles.htm
Scheri
I’m teaching myself how to take complete body measurements, and I struggled a bit.
This article says I need to measure:
Front shoulder slope, Back shoulder slope, Chest width, Crotch(the entire crotch section), Abdomen depth, Hip depth, Fullest part of hip, Fullest hip depth.
The problem is, I don’t know how properly measure those. I’ve googled how to do it and looked for images, but I still don’t have a clear understanding of how to measure them.
*also as a sidenote* What do they mean by Fullest Part of Hip? Wouldn’t that simply be the same as the Hip Circumference. The site list both of those as separate measurements.
Thank you for this article. I only wish that in addition to this lovely proportionate model you would use a plump, lopsided, stooped model so that we could learn to take measurements on not-so-perfect people.
Please provide the measurement chart in Word format.