

How to Stabilize a Shoulder Seam with Stay Tape


Place 1/2-inch-wide fusible woven stay tape along the front shoulder seamlines. The stabilized front then stabilizes the back. If you serge or otherwise finish the seam allowances together, you can press them to the back with the stabilizer flat, not folded.
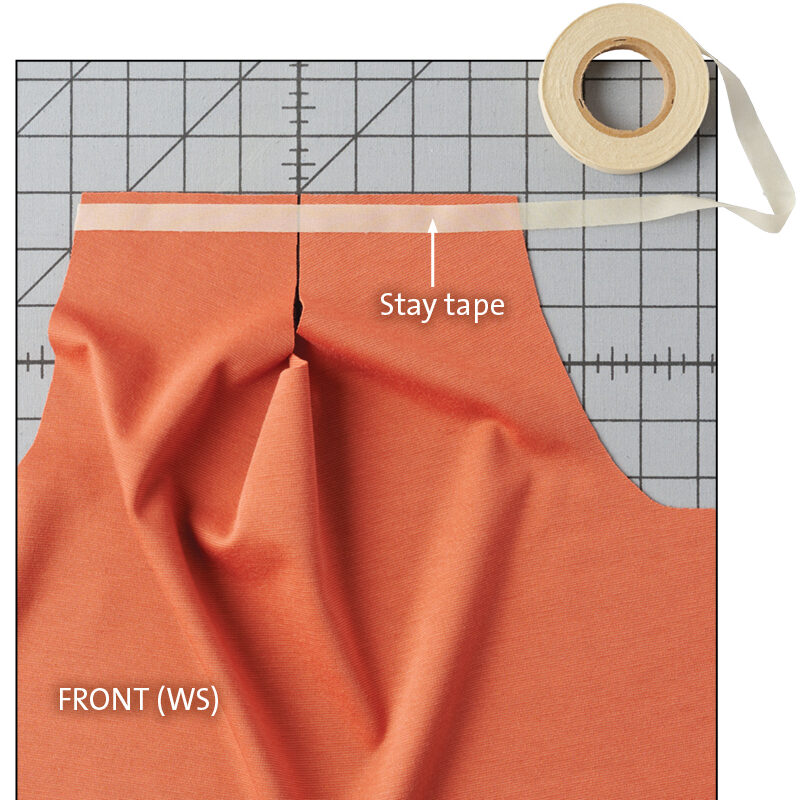
Stay tape placement
The shoulder seam must go through the stay tape. If you are serging or sewing a pattern with 1/4-inch-wide seam allowances, align 1/2-inch-wide stay tape to the garment piece’s edge to be caught in the stitching. If the pattern has a 5/8-inch-wide seam allowance, place the 1/2-inch-wide stay tape in from the garment edge, so the seam passes through the stay tape.
 |
 |
Speedy application
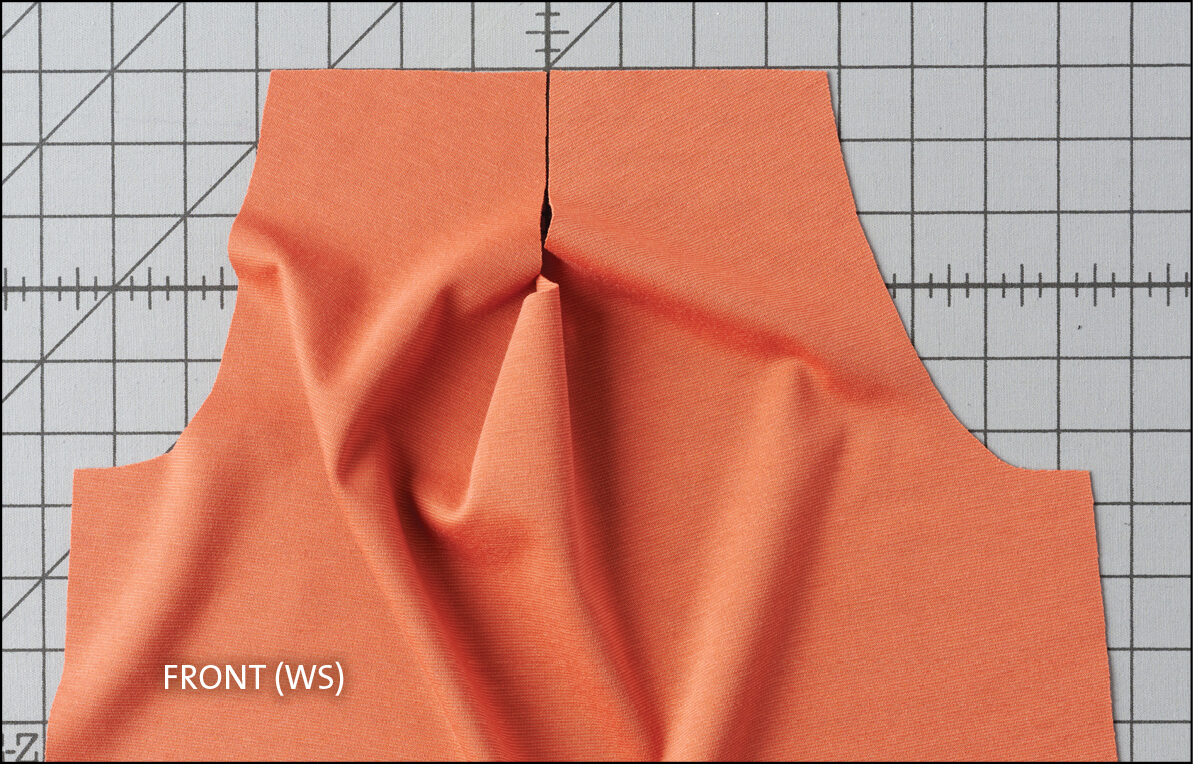
1. Arrange the front shoulders. With the garment front wrong side up, abut and align the shoulder edges straight across.
2. Place a length of 1/2-inch-wide woven stay tape, fusible side down, along both shoulders. Place it inside the fabric edge, depending on the width of the seam allowance.
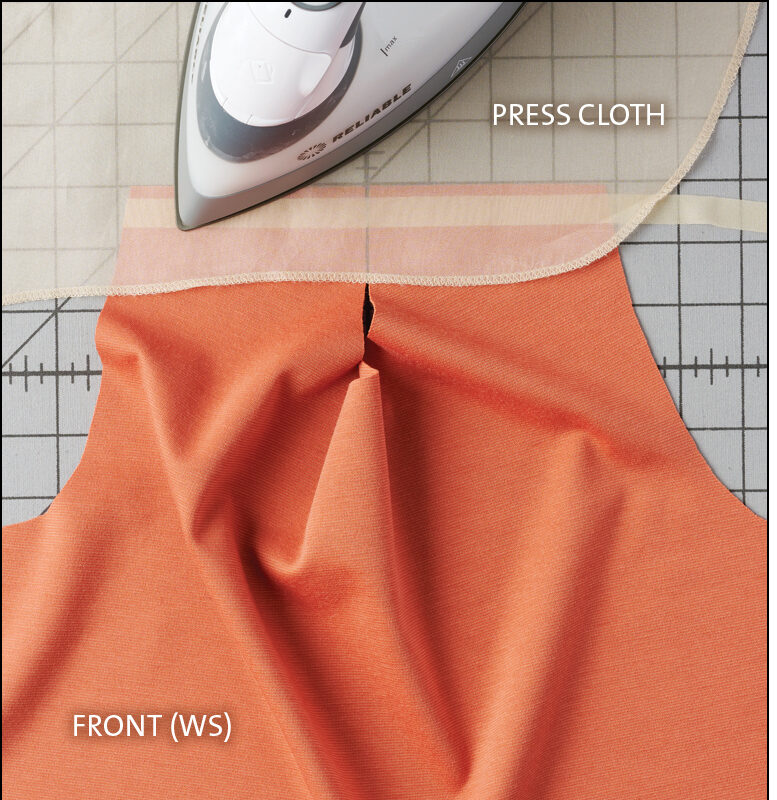
3. Place a press cloth over the work. Set the iron for steam, and at the highest heat the fabric tolerates. Steam the tape and give it 5 to 10 seconds to fuse. It’s important to use a press cloth to protect the fabric from heat damage, as well as catch any adhesive that might seep through the thin stay tape.
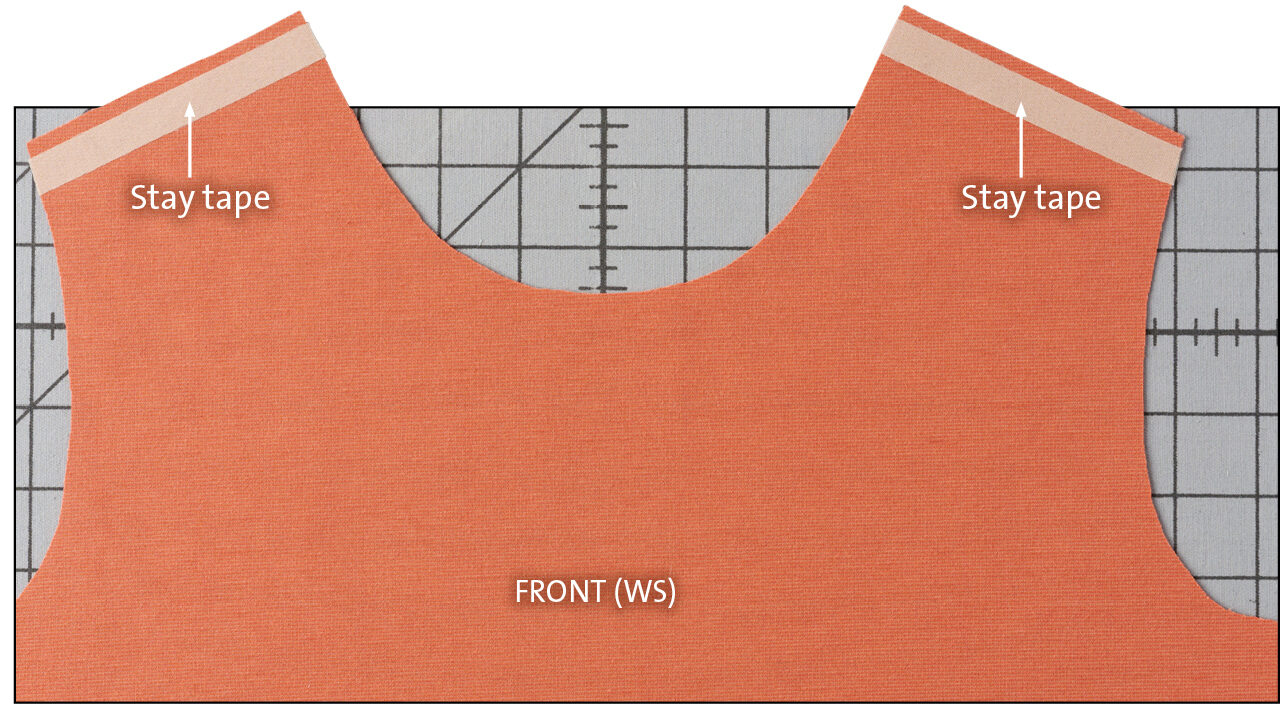
4. Let the work cool. Trim the stay tape, then snip it to separate the shoulders. Both seams have been stabilized.
Continue to
Use Stay Tape to Stabilize a Foldover Neckline Finish
Editor’s note: This is the second of a six-part article about stay tapes, based on the feature “Stay Tape Know-how” by Pamela Leggett, Threads #215 (Fall 2021). For more expert advice from Pamela about applying stay tapes, continue to the article’s other sections:
Start your 14-day FREE trial to access this story.
Start your FREE trial today and get instant access to this article plus access to all Threads Insider content.
Start Your Free TrialAlready an Insider? Log in


Thank you for the explanation, but I think the headline should be "How to Stabilize a Shoulder Seam".
Thanks to the wrong headline I searched the whole internet, if there are meanings of french seam or french binding that I didn't know yet.