From T-Shirt to Twin Set
Easy adjustments turn a basic T- Shirt pattern into a wardrobe of stylish tops
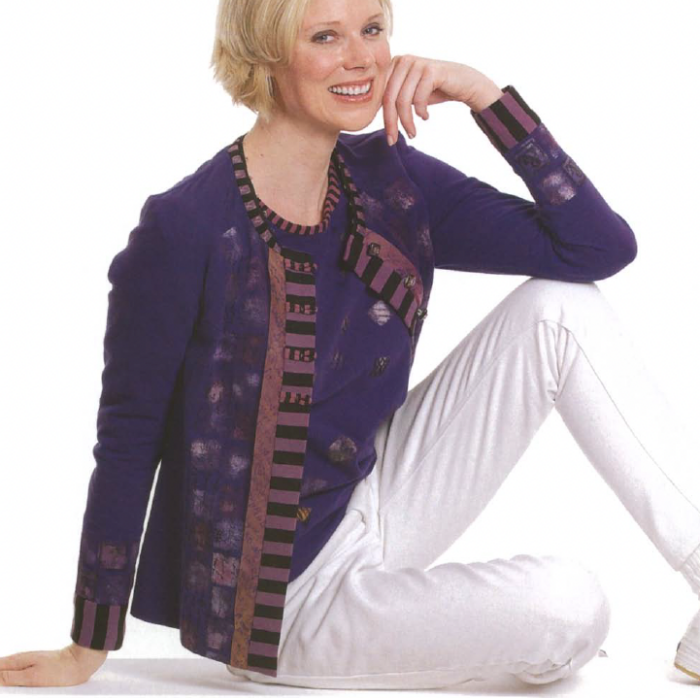
Whether your style of dressing is pared-down and minimalist or creatively embellished, you won’t find many garments more versatile than a well-fitting T-shirt. And if you make your own, you can add a coordinating cardigan made from an adjusted version of the same pattern, giving your tee double the dash. Begin with a basic, well-fitting T-shirt pattern. I’ll show you how to add a dart for an even better fit, turn the tee pattern into a cardigan pattern, and finish the cardigan From T-Shirt to Twin Set. Easy-adjust statements turn a basic T-shirt pattern into a wardrobe of stylish tops with a smooth neck binding, a durable, non-stretching button band, and ripple-free hems.
Collect fabric and use it
I’m always on the lookout for knits in basic colors I wear often. Solids form a great canvas for the surface embellishment of all kinds, but I also collect coordinating stripes and textured fabrics such as stretch velvet, which I use for sleeves, trims, bindings, and other small details. I usually purchase I to 3 yards of any intriguing fabric I find, and often mix and match fabrics within a single garment.
Add a dart for a better fit
Most commercial T-shirt patterns are drafted for an easy, casual look, but I prefer to add a small bust dart, originating from the armscye, to provide shaping and to control fullness through the upper torso of the garment, in both the tee and its cardigan incarnation. Adding a dart is an easy process you can do while tissue-fitting the original T-shirt pattern (see “Improve fit with a bust dart” on p. 32). Keep the dart as small as you can while still improving the fit of the garment- I find that even small-busted figures can benefit from this adjustment. (Tip: A bit of fusible stabilizer under the dart makes it easier to sew.)
Convert the tee into a cardigan
Because the cardigan part of your twin set must fit over another top, you’ll want to make a few changes to the T-shirt pattern to give a little extra room in key areas. The process is as simple as adding some length and width to the body and sleeves, as shown in the drawings at the bottom of p. 32. You’ll also need to cut two button bands and a neck binding.
Build quality into your twin sets
To keep my knit garments looking and wearing like finely sewn ready-to-wear, I never skimp on construction. Using the proper stabilizers and interfacings in the right places, sewing durable seams, and finishing edges neatly all contribute to the designer-quality look and the longevity of the garment. For twin sets, I pay special attention to the neckbands, button bands, and hems. I begin by stabilizing the shoulder seams with an l-inch-wide strip of fusible knit interfacing (such as So-Sheer), pressed over the stitching line of the back shoulder (I keep the nonstretch grain of the interfacing parallel to the seamline). I interface the button bands with a fusible knit, placing the non-stretch grain of the interfacing lengthwise on the band, to prevent the buttonholes from stretching. I sew the shoulder seams first, apply the neck binding, and then attach the button bands (see the drawings on p. 33 for instructions). Sewing the side seams and setting in the sleeves comes next. The final step is to stitch a smooth, nonrippling hem. Before assembling the top, 1 press up all the hem allowances, then sew or serge an l-inch-wide strip of fusible knit interfacing to each. 1 cut these strips with the stretchy grain parallel to the stretchy grain of the fashion fabric, and place the nonadhesive of the hem. 1 sew the garment together and when I’ve finished construction, 1 repress the hem, this time fusing the interfacing to hold the hem in place for topstitching. To keep the hem from stretching as 1 topstitch, 1 press down on the fabric behind the presser foot 2 to 3 inches. If 1 finds this doesn’t prevent stretching, 1 simply hand sew the hem. And remember, there’s no rule saying twin sets have to match, so don’t forget to have fun with your fabrics and embellishments.
Improve Fit With a Bust Dart
To determine the size and placement of the dart, pin the front and back pattern tissues together at the shoulder and side seams, and try them on. Mark your bust point on the pattern, and fold out any extra fullness at the armhole to form a provisional dart. Experiment with the size, placement, and direction of the dart (which should end 1 to 3 inches before the bust point. A void over-fitting the tissue. Pin the dart into position, remove the pattern, and unpin the seams.
Mark the tip, legs, and fold of the dart on the pattern, and unpin the dart. Beginning at the dart fold line at the armscye, draw a line perpendicular to the center front across the pattern. Measure the dart across its widest point, at the armscye.
Slash the pattern on the horizontal line and separate the two sections by the measured dart width. Add tissue to fill the gap. Redraw the dart with its armscye seam allowance. When stitched, the dart won’t change the size or shape of the armscye, but it will allow for better bust shaping.
Convert a Tee Into a Cardigan
To turn your basic tee into a cardigan, make these adjustments to the pattern. The cardigan will fit over the T-shirt, or a slee veless version of it if you prefer, nicely concealing all the edges of the bottom layer.
Attach Cardigan Bindings and Button Bands
Neck bindings
Cut a neckband 2 to 3 inches shorter than the total neckline length, depending on the stretch of the fabric. For a 1/2-inch-wide finished binding, cut the strip 2 inches wide.
With the right sides together and raw edges aligned, pin the midpoint of the binding to the center back of the garment neck. Pin the binding ends to the garment at the center front edges, and, distributing the neckline’s extra fabric evenly, pin again at the shoulder seam. Sew the binding to the neckline, stretching the strip slightly as you sew and using a 1/2 inch seam allowance. Trim the seam allowance to an even width, but don’t clip or grade it.
Using a ham for support in the following steps, press the binding flat as sewn, and trim it to an even width. Then fold the binding up over the neckline seam allowance and to the inside of the garment; do not turn under the raw edge. Working from the right side, press and then pin the binding in place. Stitch in the ditch of the previous seam to secure it. The binding edge may be serged or left raw.
Button Bands
Apply the neck binding and press the cardigan hem into position before attaching the interfaced button band. Serge or leave raw one long edge of each band (finish opposite edges to make a pair).
With the right sides together and raw edges aligned, pin the unfinished long edge of a band to each front edge of the cardigan; leave 3/4 to 1 inch extending at the hem and neckline. Sew using a 1/2, inch seam allowance. Trim or grade the seam allowance, and press it toward the band. Then, 1 inch from the seam, fold the band toward the wrong side of the garment and press the fold.


Log in or create an account to post a comment.
Sign up Log in