

Tips for Fitting a Straight Skirt on 3 Body Types
Easy adjustments for three body types

A straight, or pencil skirt is a wardrobe staple, thanks to its versatility, timelessness, and—when it fits just right—flattering silhouette. Any figure type can be showcased in a straight skirt, and once you perfect your pattern, you can make one in a couple of hours. Here’s how you go about fitting a straight skirt.
A basic, straight skirt pattern is deceptively simple: just a couple of seams and darts, a zipper, and a waistline treatment. The goal is a smooth fit that skims the body. If the size and shaping aren’t personalized for your curves, however, this chic column can become a mess of drag lines. Overfitting, by leaving out necessary ease, results in a skirt that simply looks too small rather than sleek and sophisticated.
I’ll show you how to measure your body and adjust the skirt pattern for a variety of common fit issues, including full upper hips, a projecting tummy, and curvy thighs. A key approach is to work with half measurements, to isolate the fitting needs of the body’s front and back. You’ll make the changes where you need them and eliminate strain lines and skewed grainlines. Each straight skirt you sew will become a go-to in your closet.
Essential measurements
Getting a good fit in a straight skirt requires more than the waist and hip circumference listed on the pattern envelope. Take and record the following measurements.
Full circumference
With the tape measure parallel to the floor, take these measurements.
- Waist
- Upper hip, 3 inches below the waist
- Mid hip, 6 inches below the waist
- Lower hip, 9 inches below the waist
Half body
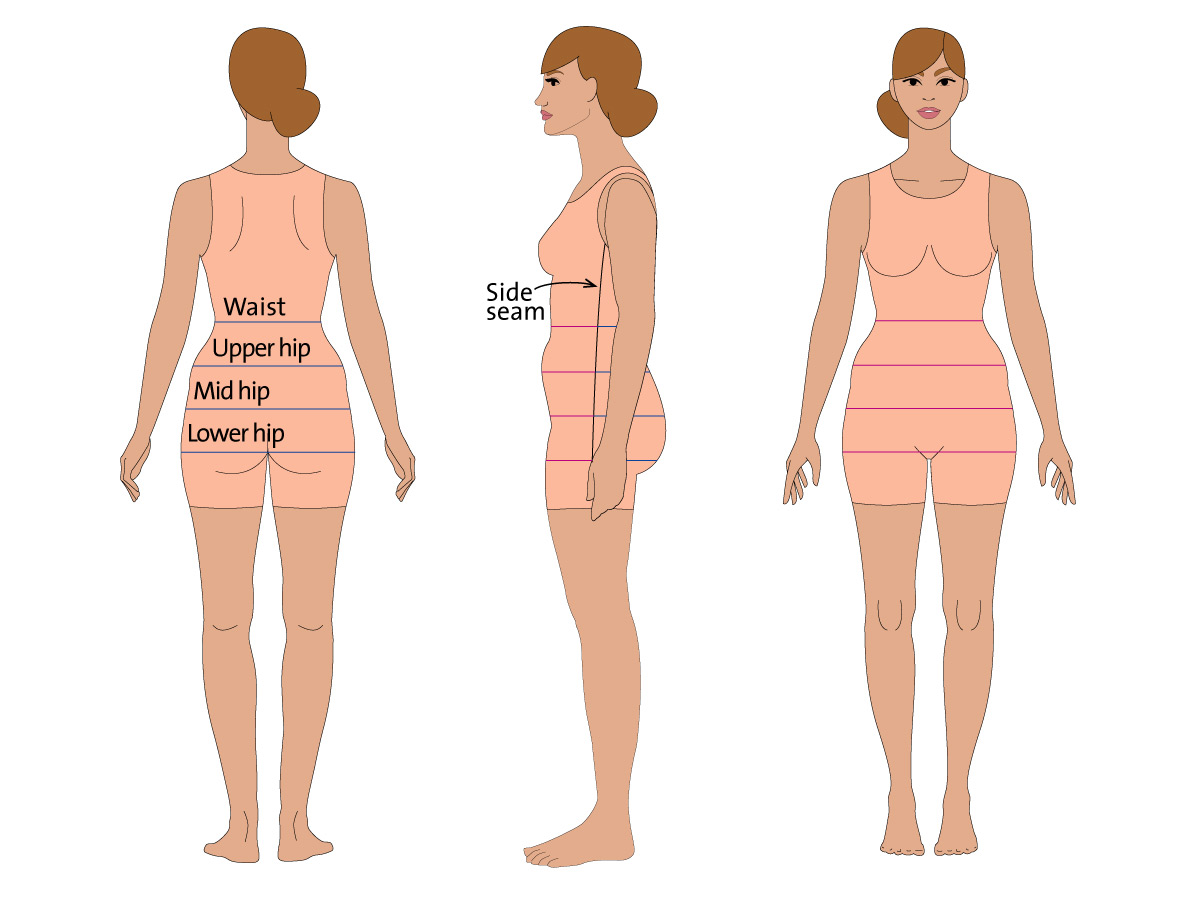
Take separate measurements of the body’s front and back from side seam to side seam. Put on a fitted garment with side seams in the correct place,…
Start your 14-day FREE trial to access this story.
Start your FREE trial today and get instant access to this article plus access to all Threads Insider content.
Start Your Free TrialAlready an Insider? Log in


Log in or become a member to post a comment.
Sign up Log in