


As a designer and patternmaker, I love working with cotton/Lycra knits, because they provide so many design possibilities that can be made with simplified construction and patternmaking techniques. I also love wearing cotton/Lycra garments like those shown here, because they fit well, look great, and are so comfortable.
I want to share what I’ve learned about sewing with Lycra knits, drawn both from my experience in creating ready-to-wear lines and, more recently, in developing my own pattern collection. The patterns are designed with Lycra knits in mind, but the cutting, sewing, and pressing techniques I’ll show you can be adapted to other patterns as well.
Choose a pattern that suits the fabric
Look for classic designs with clean lines- symmetrical or asymmetrical- that are shaped, but not tight. Jackets with slightly curved center back seams, shaped waistlines, and darted bodices are great, as are finger-tip-length straight and A-line shapes that give definition through the shoulders and neckline. Avoid boxy jackets, lots of details, highcap sleeves, and linings. Choose skirt and pants patterns with darts or pleats for shaping, but eliminate zippers, interfaced waistbands, and side seams on pants.

Don’t preshrink the fabric!
I know it goes totally against the grain to recommend not preshrinking cotton knits before cutting and sewing them, but trust me. Shrinking the garment with a steam iron during construction is the better alternative for cotton/Lycra knits, because this molds shape into the garment, which can’t be done if you preshrink the fabric. The challenge is to anticipate how the fabric will react to all this steam pressing and how much it will shrink.
The knit I use is a blend of 90% cotton and 10% Lycra, and I’ve found that it will shrink approximately 1 in. to 1 1/8 in. in length and 1/4 in. to 1 in. in width, depending on the garment. Other knits are available with more or less Lycra, from 2% to 35%, so it’s always best to test your fabric. Cut two 4-in. squares; press one with your iron on the highest setting using lots of steam until it stops shrinking, then compare it to the other unpressed swatch. You should notice about 1/8 in. to 1/4 in. of shrinkage. In my pattern line, I’ve taken this amount of shrinkage into consideration.
However, if you’re using other patterns, consider taking slightly smaller seam allowances and adding at least 1 1/2 in. to the length of a garment to accommodate the shrinkage. I don’t think it warrants going up an entire size. I’ve tested some fabrics that have had as much as 3/4 in. of shrinkage per 4-in. square, though this is rare; and I would not recommend using fabric that shrinks this much because its quality is probably inferior.
Is there a right and wrong side?
Cotton/Lycra knit fabric does have a right and wrong side, but sometimes it’s difficult to determine which is which. If you look at the fabric closely in good lighting, you’ll see rib lines running parallel to the selvage, and these lines are more pronounced on the fabric’s right side. You check this by folding the fabric so you can see both right and wrong sides at once, then stretch both sides of the fabric, one at a time, against the grainline and look for the rib lines.
Try this approach to cutting
Cutting a pattern from cotton/Lycra knit fabric is simple and fast because the fabric is so stable and easy to handle. First cut out the pattern pieces along the cutting lines, cutting out any darts as well. Then instead of pinning the pattern pieces in place or using weights, lay them out on the wrong side of a single thickness of fabric and hold each piece in place with your hand while you lightly trace around it with chalk (I use regular school chalk), tracing around the cut-out darts as well. I like this method because when I remove the tissue, I can see the garment sections outlined in chalk. Minor alterations, such as adding to a side seam or dropping the crotch, are easy to visualize, and I can do them by simply redrawing the chalk lines.
Once you’ve traced around all the pieces, fold the fabric with the chalked side up to create a double layer, and cut along the chalk lines through both thicknesses, using long, smooth scissor strokes. Cut out the darts about 1/4 in. inside of these lines to form a narrow seam allowance.
You’ll need to interface collars and facings, so also cut the interfacing (l use a lightweight fusible tricot/knit) and fuse to the appropriate fabric pieces using lots of steam (this is the only case in which you should press before sewing). Applying the interfacing causes the fabric to shrink, so cut front facings 2 in. longer than the pattern (you can trim any excess later). Cut a collar 1/8 in. larger on all sides (my patterns are drafted with a slightly larger collar and longer front facings).
Streamlined construction
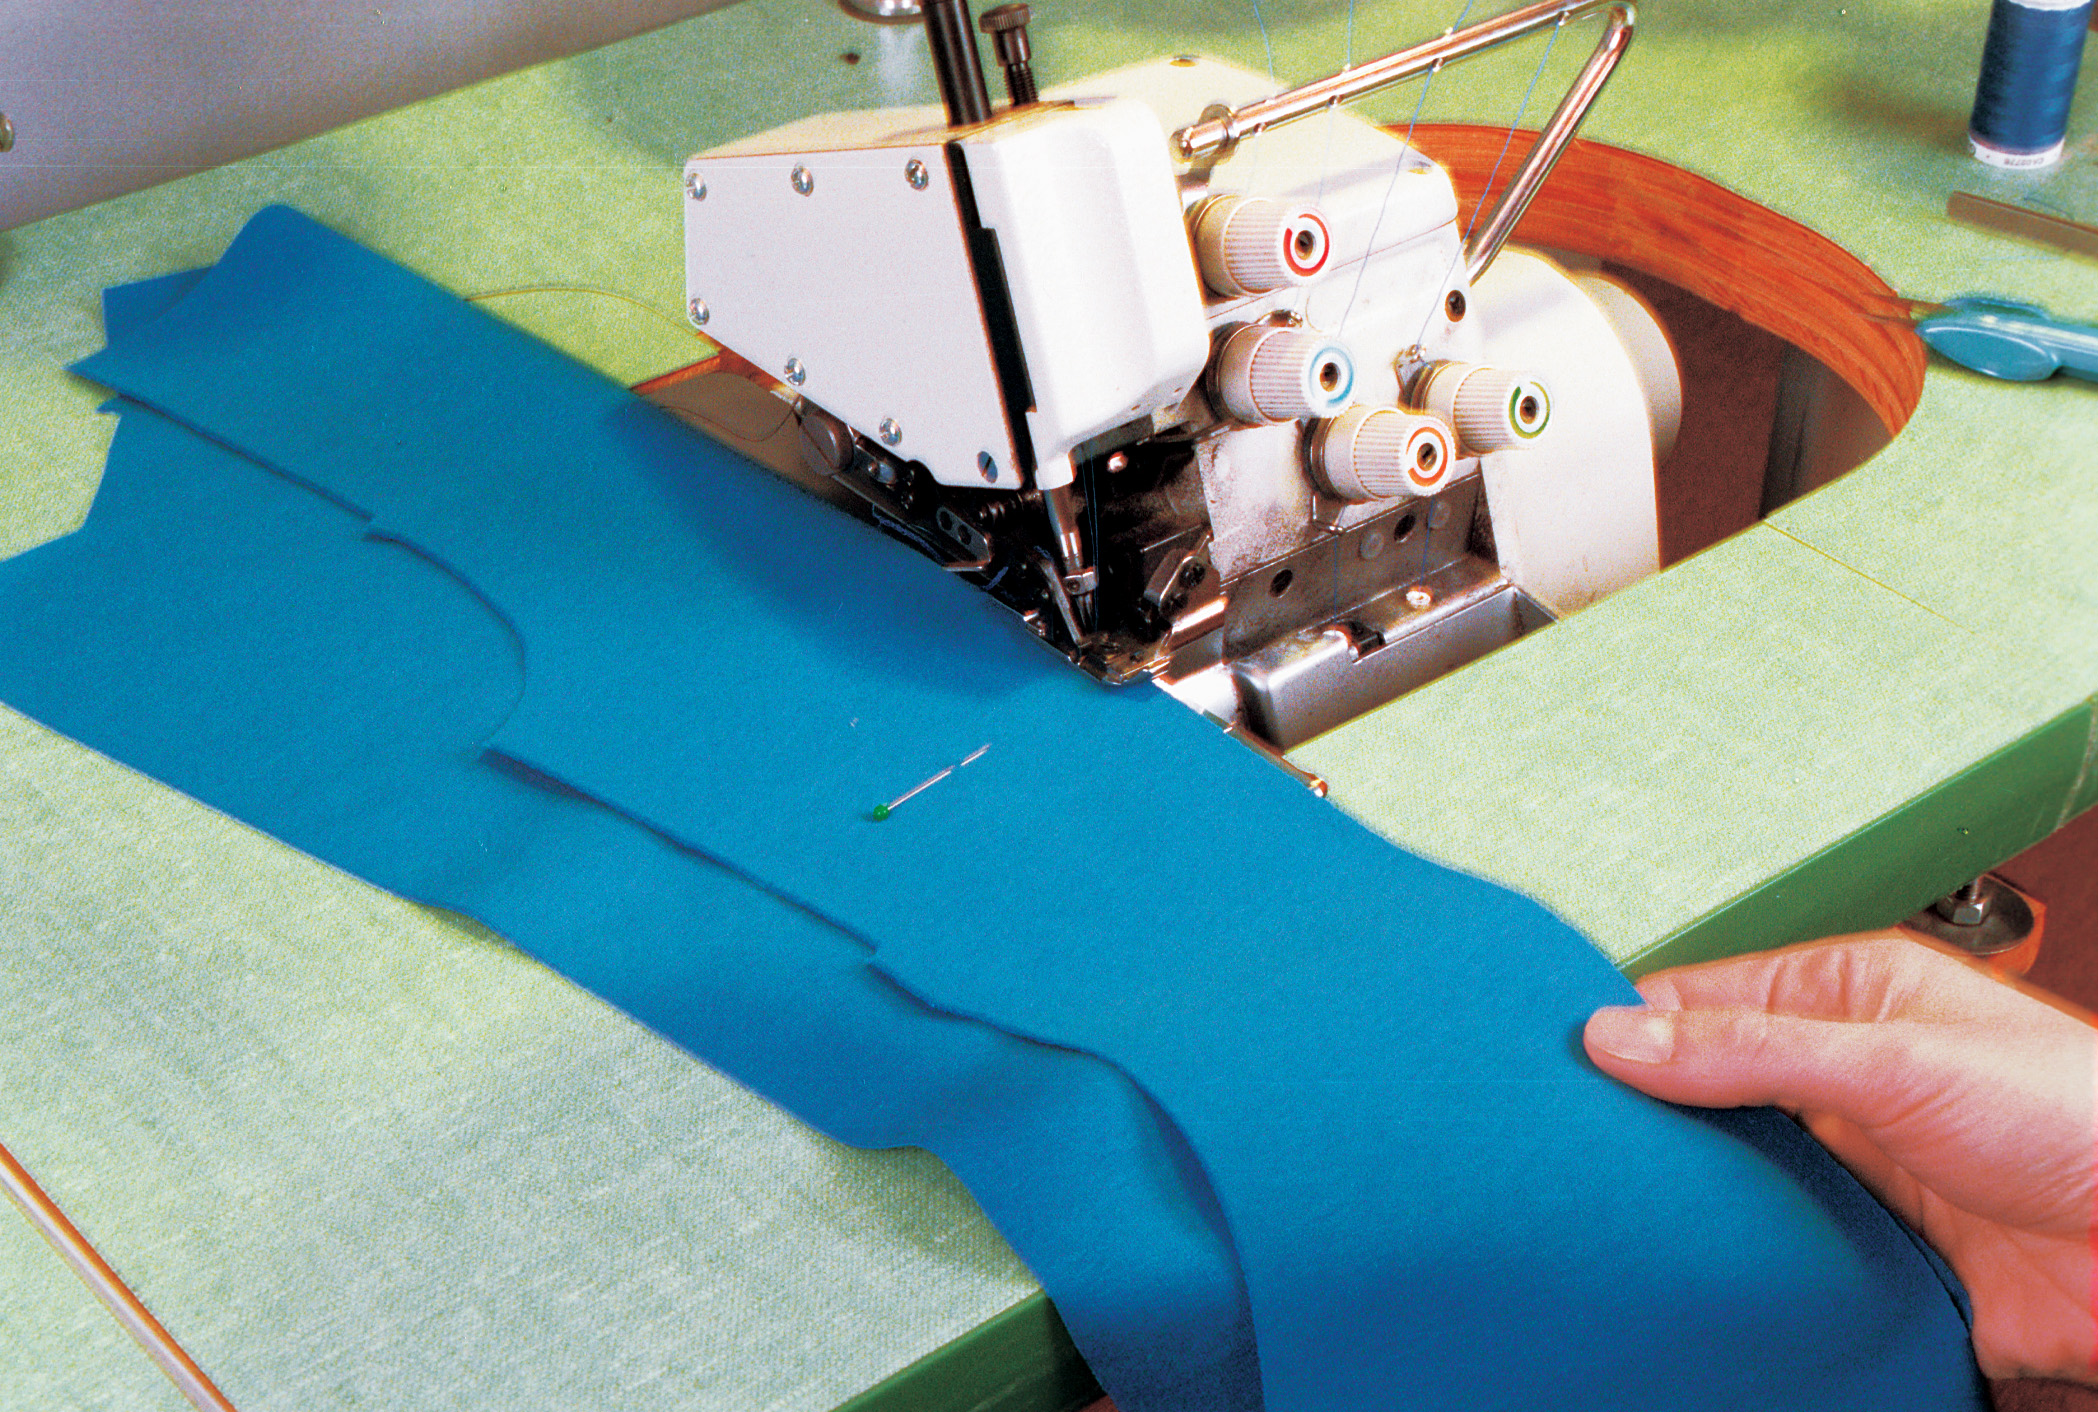
I use my four-thread serger for the entire sewing process with cotton/Lycra knits, except for topstitching. You can use a regular sewing machine as well, but if you’ve only been using your serger for finishing seams, now’s the time to break that habit. The serger gives a clean finish to the inside of the garment and builds in the stretch and recovery that knit seams require. If you use a regular sewing machine, stitch the seams with a narrow zigzag, trim to 1/4 in., and press to one side.
Whether you use a serger or sewing machine, here are some things to remember: Always clear your sewing-machine table so there’s plenty of room for the whole garment, because it might stretch unduly if you hold it in your lap while sewing. Use a new, size 14/80 ballpoint needle and, to reduce sewing time, try to sew without pins.
Sew seams by starting at their bottom edge. Keep raw edges together and pull the fabric gently from behind the presser foot, guiding it in the front with your other hand, stretching just enough to get the fabric to do what you want. It’s best not to stretch a lot over a short distance, but stretching a little over a long distance is fine. Continue to hold the fabric until the last 1/4 in. is under the presser foot, because it tends to veer off to the right if you let go too soon. For maximum control, keep your eyes on the needles as you stitch. In intricate areas, guide the fabric with your fingers close to the needles and serger blade.
You can sew the darts with the serger as well: Start at the point, inserting the left needle along the edge of the fold, gradually forming a 1/4-in. seam. It is a little hard to see the dart’s point under the serger’s presser foot, so place a pin in the body of the garment to you help find the location.
Completely serge the garment together, except for the hems. Then you’re ready for the ironing board.
Pressing is key
I think you’ll be amazed at what steam pressing can do. I always use a Teflon sole plate on my iron when I press, to prevent shine and heat damage from a high heat setting. First press all the seams to one side. Shrinkage will occur as you press and you’ll notice that the areas in between the seams look wrinkled and puffy. Then press the entire garment using lots of steam, holding the weight of the iron off the fabric slightly as you watch the fabric shrink out any puckers. Avoid exerting pressure at the point of the iron, because this can push the fabric forward, pressing a permanent fold in your garment. Press the garment thoroughly, molding and shaping with your hands, until you can’t see the fabric shrink any further.
If you have pressed the shrinkage out of the fabric successfully, it won’t shrink anymore; but if you don’t spend enough time using a high-temperature setting and lots of steam, the garment will continue to shrink when washed or dry-cleaned. So spend as much time and effort pressing the garment as you do preparing the pattern, cutting it out, and sewing it together.
Collars, facings, and pleats
When sewing a collar, finish it completely before sewing it to the garment. Interface both upper and under collar with fusible tricot interfacing and sew them, right sides together, by serging across the long edge, then each end from corner down. To turn the point, fold the seam allowances along the stitching line toward the collar at the corners, lapping one side over the other. Using your thumb on the inside and index finger on the outside, hold the folded corner flat and pop the point right side out. Turn the other point, press the collar flat with your hands, and serge its neck edges together to keep them from slipping.
To attach the collar to the neck edge, match collar to garment at the center back, and walk it in both directions first to be sure it fits the neckline (easing to fit if necessary). Then hold the collar in place and stitch from one end to the other.
Stitch facings in place with the interfacing on top so the garment feeds evenly without stretching as you sew. If you cut the facings slightly longer than the pattern piece, trim them to match the hem of the garment after sewing them in place.
Soft pleats work beautifully in cotton/Lycra fabric, especially on pants. Form pleats by folding at the waistline and continuing the fold evenly down the pant leg. Work on a flat surface so you can fold the pleats straight along the grainline.
Topstitching
Sewing hems on cotton/Lycra garments is all done on a regular sewing machine. I top stitch them with a double needle because this adds detail to the garment and allows for stretch and recovery without breaking any stitches. When using a double needle, you may need to loosen the bobbin tension slightly to get an even, flat zigzag stitch on the bottom and consistent rows of stitches on top with a flat space in between. A walking foot is helpful to maintain a uniform stitch length.
Never topstitch to the end of a fold, because the needles can cause distortion here. Start and stop about two or three stitches from the fold, and backstitch in these same holes.
I hope this inspires you to try sewing with cotton/Lycra. You’ll be surprised at how quickly and effortlessly you can make garments that fit and feel so well, and always look terrific.
Cotton / Lycra workroom techniques
|
|
|
|
|
|
|
|


Log in or create an account to post a comment.
Sign up Log in