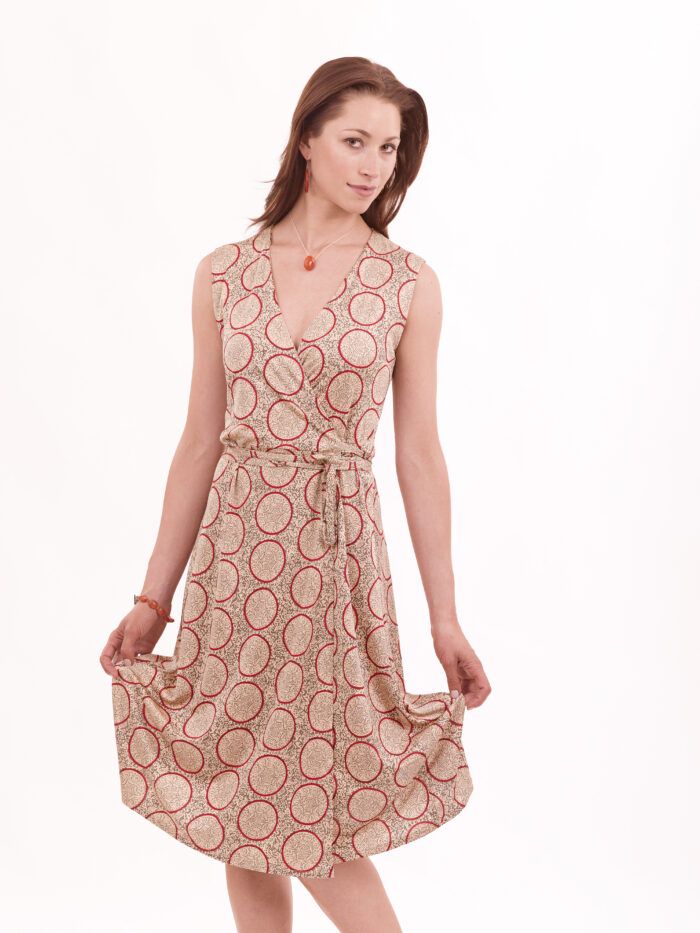
If you long to better your knowledge of all things knit, start with the queen of knits: jersey. You can’t get much better than this soft, comfy fabric—talk about easy, luxurious dressing!
On the following pages, you’ll learn about the many wonderful varieties of jersey knit and discover the best jersey retailers. You’ll also pick up handy tips about caring for this fabric, pre-and postconstruction, and add quite a few design tips to your repertoire. Best of all, you’ll master the art of soothing and calming this slippery beast with unconventional construction methods. With jersey, less is definitely better: simple cutting, sewing, pressing, and hemming are the name of the game.
Get to know this versatile textile
Jersey knit—named for the Isle of Jersey in the English Channel, where it was first made—comes in many different forms, fiber contents, prints, and finishes. At below right, I’ve included swatches of my favorite types. Also, browse the sources on p. 59 for more varieties. Prices range from $4.99/yard to $79.99/yard and up, depending on the fiber content and quality.
Learn the signs. Because jersey comes in so many flavors, fabric retailers often mislabel jerseys as other knits. Therefore, it’s important to be able to correctly identify jerseys. You don’t need to be a fabric scientist to do so. Just train your eye and hand, as outlined in How to Identify Knit Fabrics.
Play with the cloth. The best way to become good at identifying jerseys, and making their special properties and eccentricities work for you, is simply to play with them. Purchase some inexpensive yardage and hang it, drape it on a dress form or friend, stretch it, and try out all of the techniques at right and on the following pages.
Bend the rules. As you play and experiment, I’m giving you a license to be a sewing rebel. Jersey really has a mind of its own, so you can pretty much ignore all traditional sewing rules. You’ll be surprised at all the creative possibilities. I recently started tugging on the cut edges to purposefully create runs, and I love the deconstructed look. I also can’t wait to experiment more with bias strips, as well as twisted-and-gathered bindings.
Jersey-worthy design
Jersey has been the designer fabric of choice for the last few seasons. It swishes beautifully down the runways and layers like no other fabric. Designers like Diane Von Furstenberg, Stella McCartney, and Costello Tagliapietra have featured jerseys in everything from draped-and-tucked designer T-shirts to simply elegant evening gowns. You, too, can design like a pro. Here are a few tips to help you get started in this hands-on enterprise:
Go for simple silhouettes. Choose uncluttered styles and simple lines for your jersey garments. They let the fabric speak for itself. Also avoid shaping devices commonly used in tailored woven garments, like darts and princess seams. And before you sew any seams of a jersey garment, pin or baste the pieces together to make sure the fabric isn’t too clingy or too loose. You want it just to skim the body.
Look in your closet for inspiration. There are many wonderful knit patterns out there. My favorites include CJPatterns.com, KwikSew.com, LoesHinseDesign.com, and HotPatterns.com. Just make sure the “suggested fabrics” section includes jerseys; other knits don’t drape and fit the same way.
Commercial patterns are usually basic shapes; this gives them a long shelf life. Because I often want to create a more trend-conscious knit top, I also study existing ready-to-wear garments for inspiration. I’ll take a knit top from my closet and trace a pattern off from it. (Knit garments have little or no shaping details like darts, so this process is fast.) Then I make creative adjustments or additions to give myself a unique look.
For the copper top at right, for example, I traced a pattern from a long-sleeved scoop-neck top in my closet and eliminated the sleeves. I added an oversize cowl neck (a tube folded in half), lengthened the bodice at the hem, and added a horizontal hem band. Voilà! Instant fashion.
Drape, twist, and stretch. Jersey is made for draping. Throw it on a dress form and start experimenting with stretch, gathers, and twisting. As mentioned in “How to I.D.,” the greatest amount of stretch is in the crosswise direction. Use that to your advantage by positioning the fabric around or across the body for a flattering, comfortable fit.
Even though the lengthwise direction of the jersey has minimal stretch, it will usually stretch or lengthen a little when worn. Or it may shrink up with each washing, especially if it is a natural fiber. Keep this in mind when you hem your garment.
I usually hem 1/4 inch to 1/2 inch shorter than my preferred length, depending on how stretchy the knit is. This ensures that I won’t be tripping on my pant hem by lunchtime.
Unadorned is best. Stay away from fancy, heavy closures and embellishments. Most jerseys can’t support them. If you simply must add some bling to a jersey garment, choose lightweight beads, trim, or sequins, and limit them to stabilized areas, such as neck bindings, waistbands, and hems. With more substantial jerseys, you can add other details like pockets and convertible collars.
As a general rule, eliminate facings—they’ll create ridges in the garment. Instead, just fold under armhole and neck edges and topstitch, or bind the edges with bias strips of jersey. Or double the fabric as shown in the wrap dress on p. 54. Follow this easy-does-it design and construction, and you’ll enjoy a soft, fluid confection-of-a-garment—worthy of any catwalk.
Don’t Oversew
Jersey stretches out of shape easily so the less handling, the better. Fancy seams and hems add unsightly bulk.
Cut simply and carefully
Treat jersey with kid gloves right from the start. You can cut the fabric on the fold unless it’s a print that needs to be matched at seams, in which case, cut it in a single layer.
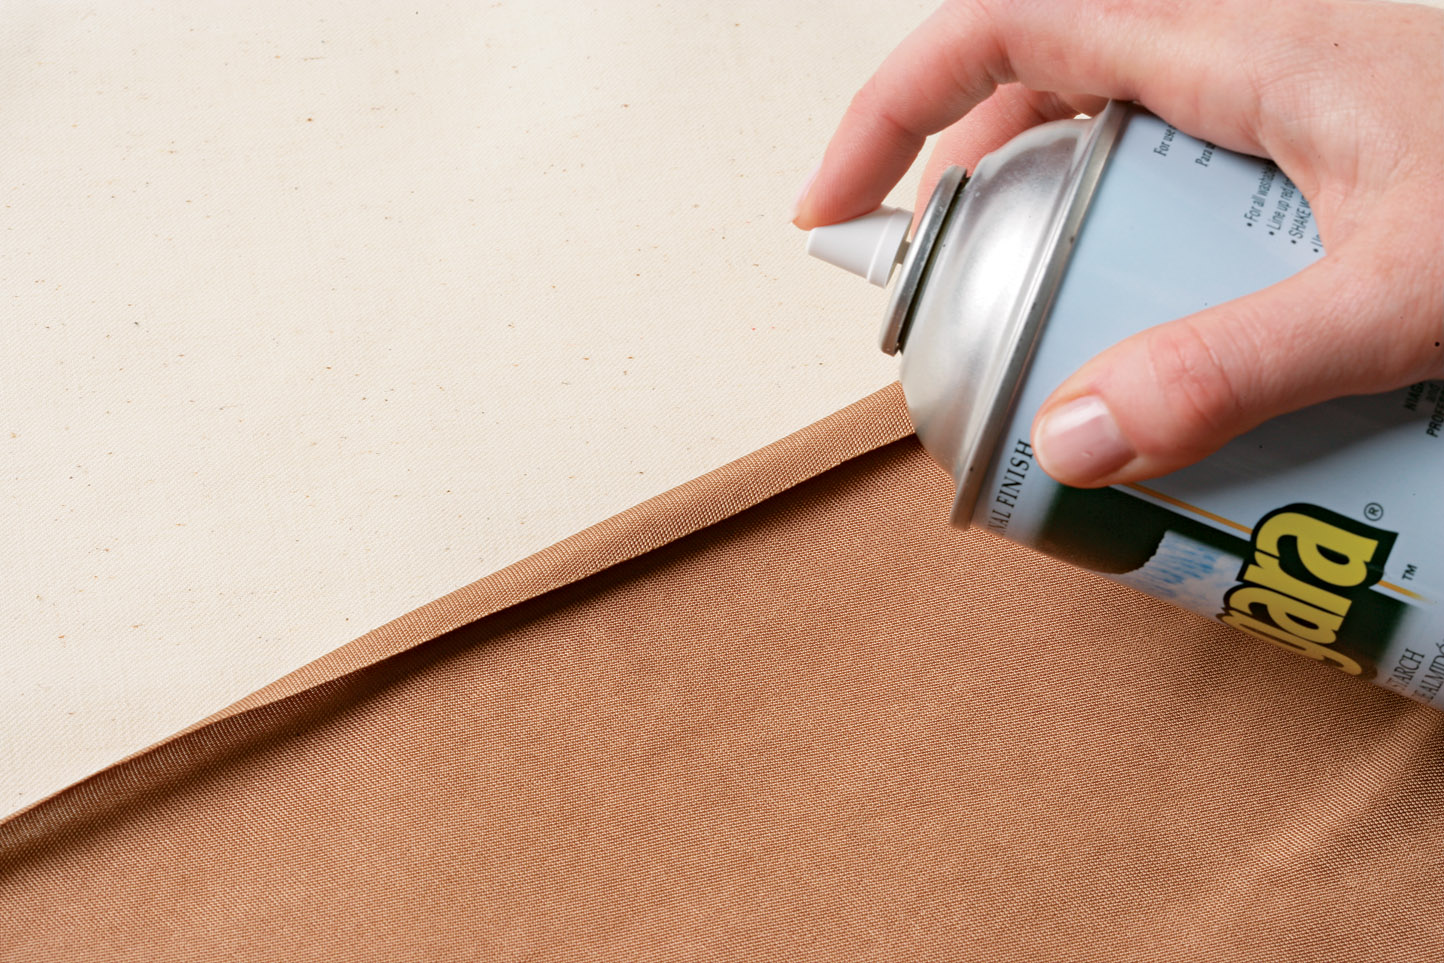
- Starch and press the curled edges. The cut edges of the jersey often curl up due to the way the fabric is knitted. To flatten, spray with starch and gently press with a steam iron.
-
Watch the stretch in both directions. Lay the fabric out on a flat cutting table and align the selvages—the factory edges identified by globs of starch or glue—with the table’s straight edge. Make sure it lies completely flat, without pulling or puckering.
-
Never hang the fabric off the table. Jersey is born to stretch, so even its own weight can distort the fabric.
-
Don’t use pins. They can damage the fabric and leave behind pulls and holes. Use pattern weights instead.
-
Use a rotary cutter and mat. This ensures that the fabric lies completely flat on the table at all times. A rotary cutter also produces a smooth cut edge (scissors lift the fabric and create a jagged cut).
Seam like a pro
You’ll need polyester thread, like Metrosene or Gütermann, and a ballpoint needle in a size appropriate for the thickness of your jersey. Also use a walking, or even-feed, foot to make sure the layers don’t pucker or shift as you sew.
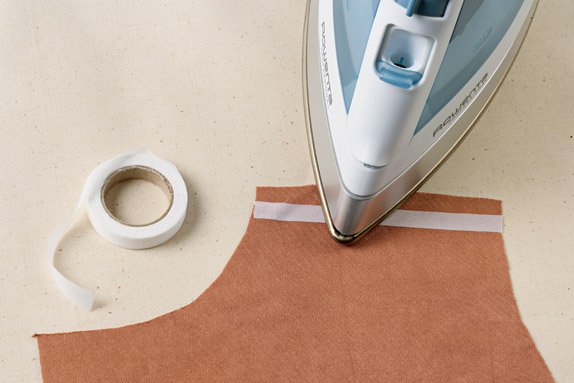
1. Stabilize high-stress areas with stay tape. Fuse a strip of superfine straight or bias stay tape (LJDesignsOnline.com) to shoulder seams, crotch seams, the front edges of a wrap dress, and any other areas that can be pulled out of shape during everyday wear.
2. Place the paper under the fabric as you sew. It prevents it from sinking into the throat plate. Test a piece of plain printer paper, water-soluble stabilizer, or tear-away stabilizer on a scrap first to see which one works best with your particular jersey knit.
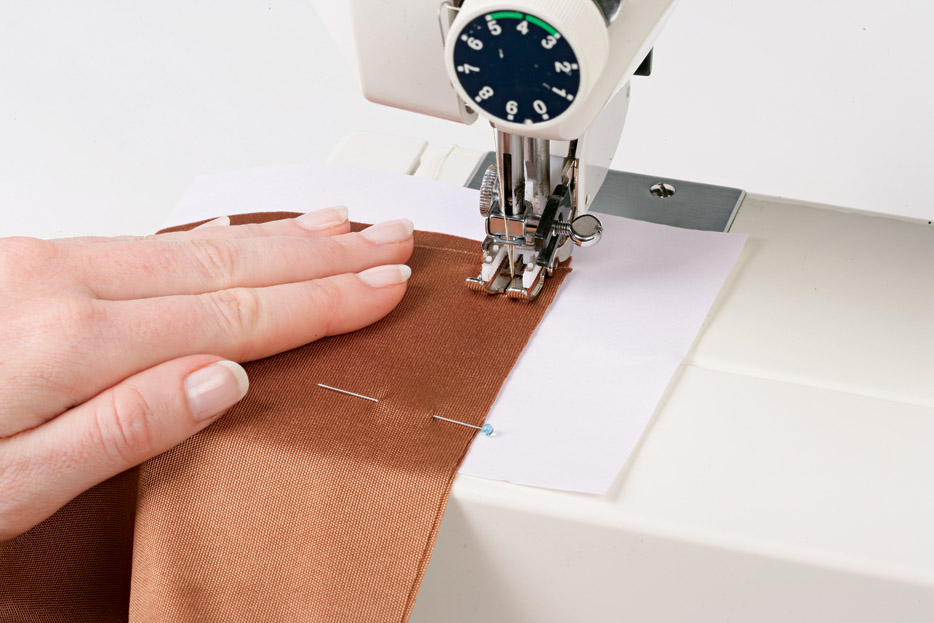
3. Use a stretch stitch or zigzag stitch. A stretch stitch is marked with three parallel lines and doubles back on itself. It produces a seam that stretches, so the thread doesn’t break when you move in the garment. The narrowest zigzag stitch on your sewing machine also works. If desired, sew a second line of stitching 1⁄16 inch away for added strength. And always test your seam first on a scrap of your fabric. Shorten or lengthen the stitch as needed.
 Press carefully
The key to pressing jersey is to use plenty of steam. And, again, don’t overdo it. Press only when absolutely necessary.
- Steam first to shrink the fabric. It also sets the stitches. After you sew a seam, hover your iron an inch over the seam, as sewing, and blast with steam. Turn the seam over and repeat on the other side.
-
Don’t overheat or overpress. Next, test the iron’s heat and pressure on a scrap of the jersey. A too-hot iron and pressing with gusto can damage the fabric.
-
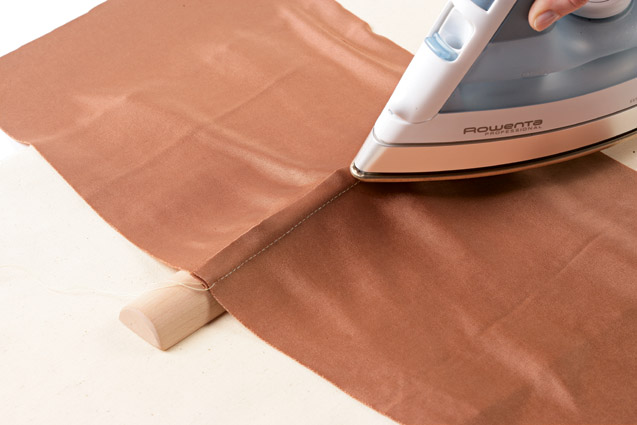
Press seam allowances to one side. Place the seam on a wooden seam stick (TheSewingPlace.com), wrong side up. Press with an up-and-down motion along the length of the seam. Use plenty of steam. Wait for the fabric to cool, then flip the fabric over. Press again. NOTE: The seam stick lets you concentrate directly on the seamline and prevents the seam allowances from making a ridge on the right side of the garment.
-
Never iron. To remove wrinkles in jerseys, never iron using a back-and-forth motion. This can stretch the fabric and create areas of shine. In addition, the steam holes of your iron can leave behind telltale marks. Instead, just hover the iron an inch above the fabric and blast with steam.
Stabilize hems
You have quite a few hem options, including leaving a raw, cut edge. For a traditional folded hem, described below, you’ll need to stabilize the fabric first. Then single-fold the hem. Double-folding creates bulk and distorts the fabric.
1. Fuse in a strip of interfacing. I like lightweight, stretchy FusiKnit interfacing (TheSewingPlace.com). Choose a color that blends with your fabric. Cut a strip the depth of the hem allowance and the width of the garment; piece as necessary at the side seams. Fuse in place according to the product’s directions.
TIP: Don’t finish the raw edge of the hem allowance with a zigzag stitch or serger. This creates bulk.
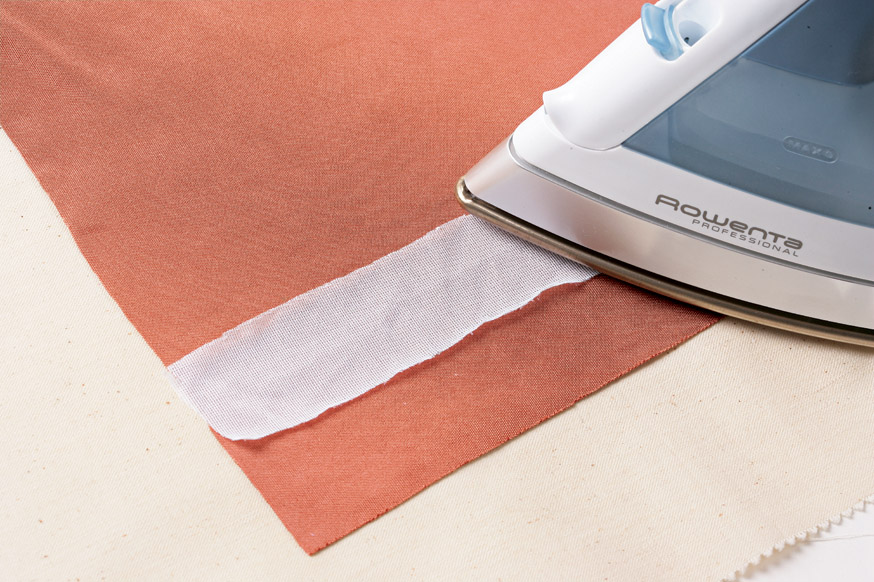
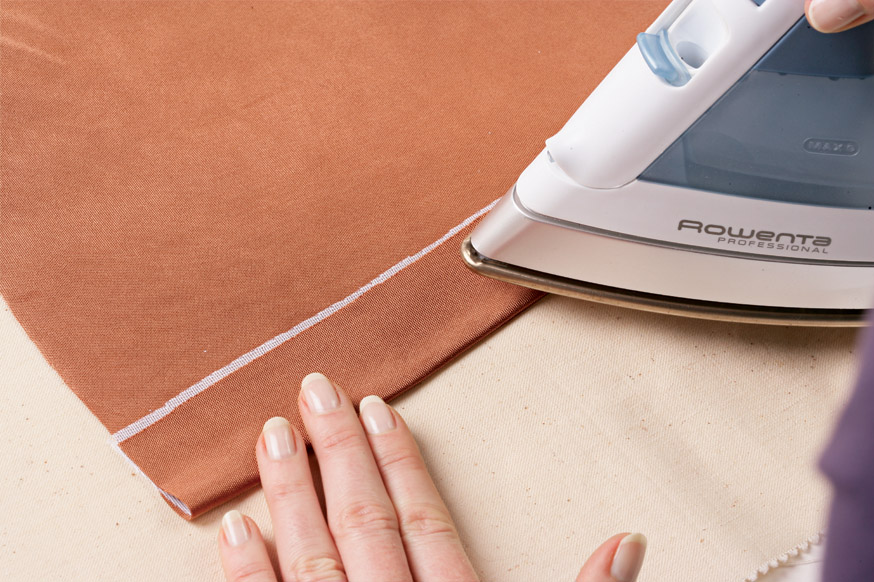
2. Press up the hem allowance. Press up the hem allowance along the hemline using just the tip of your
iron. (This prevents the raw edge from forming a ridge on the right side of the garment.) Hover the iron an inch above the hem allowance and blast with steam. This shrinks the fabric to fit.
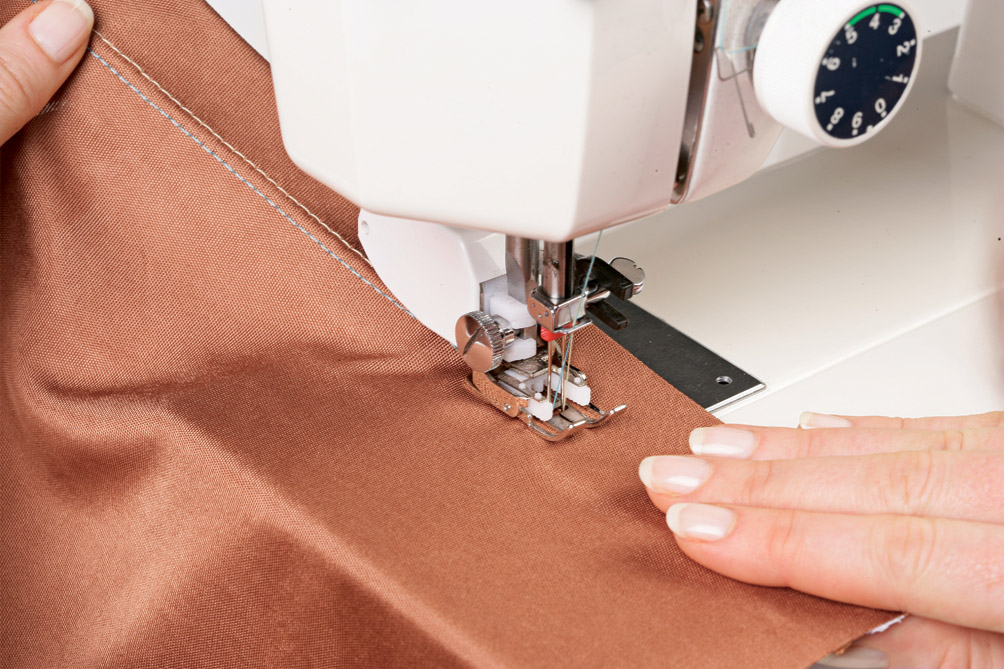
3. Topstitch using a walking foot. With the right side facing up, as shown, topstitch using a single or double needle. (A double-needle will give you a ready-to-wear look.)
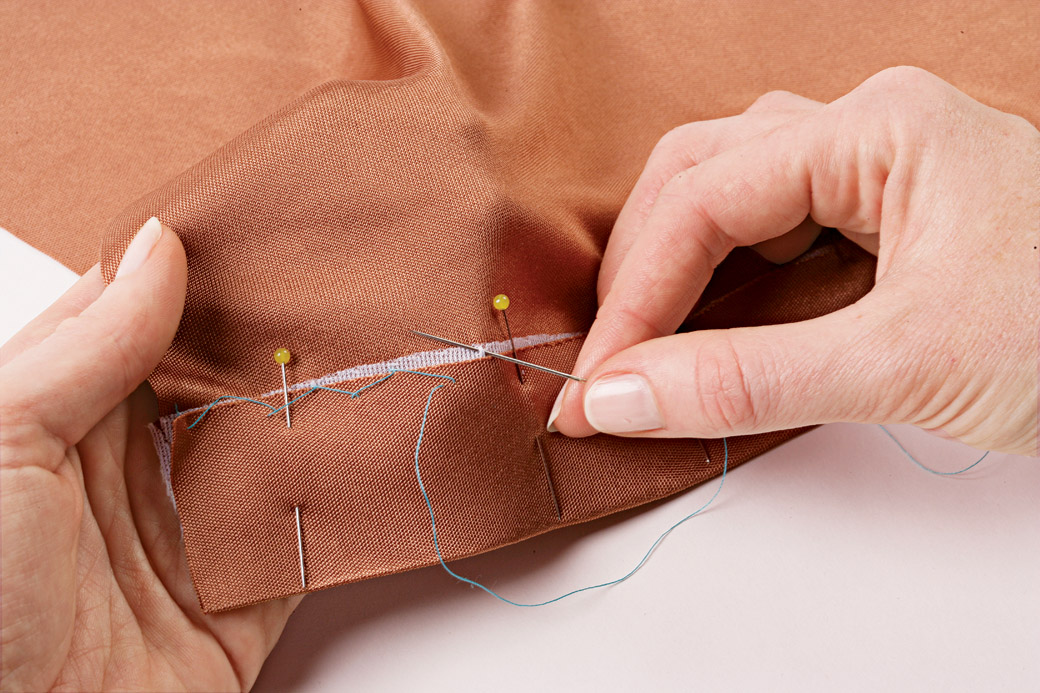
Or hand-sew for an invisible hem. The catchstitch stretches slightly, so it’s a good choice for a knit fabric. Sew from left to right in a crosshatch pattern, as shown. Just pick up a few yarns of the interfacing on your needle to ensure a truly invisible treatment.
How to Identify
Jersey is a single knit, so it is lightweight, smooth, and has much crosswise stretch but only a slight lengthwise stretch.
To pick a jersey from a crowd of knits, look for distinct knit stitches—lengthwise ribs—on one side of the fabric. On the other side of the fabric, rounded purl stitches run crosswise.
At a cross-grain cut edge, the jersey tends to curl toward the right side of the fabric. That edge will also run slightly (like nylon stockings) if you tug on it.
Oh, the Varieties!
Jersey is a versatile fabric. It comes in a variety of fiber blends, thicknesses, prints, and finishes. Here are a few:
What puts the “matte” in jersey?
Designers love to use this lightweight knit. The dull-luster finish is due to its fine crepe yarns, which impart a pebbly, crimped texture that lets the fabric graze, not cling to, the body. Matte jersey also keeps its springy shape and doesn’t wrinkle, making it a coveted travel fabric.
Some T.L.C. is required
Jersey garments should be easy to care for—the aim is to machine-wash and -dry your finished creation. Prewashing and drying the fabric before cutting it will help you realize this goal.
- Wash it first. To prewash jersey, consider its care instructions, then disregard them and start experimenting. Cut 4- by 4-inch swatches, and try a bunch of washing temperatures and drying methods; wash some swatches several times. Then wash and dry the whole length of fabric for the results you like best. A long length of jersey can wrap around the washing machine’s agitator. To prevent this, sew the raw ends together before you toss it in.
- Give wool jersey new life. Any jersey made from animal fibers changes drastically when pretreated. As the scaly texture and springlike crimp are exposed to heat, moisture, and agitation, the fibers entangle or fuse. This “felting” creates a non-raveling, almost suede-like fabric that doesn’t stretch.
- Plan for progressive shrinkage. No matter the fiber content, most jerseys progressively shrink when washed, so buy at least 1⁄4 yard more fabric than required. Also machine-wash and -dry your yardage twice before cutting out.
- Store flat or rolled. Jersey is a stretchy fabric that doesn’t take kindly to gravity. Its own weight will pull it out of shape. So store uncut yardage and finished garments flat. Or better yet, gently roll the fabric or garment into a loose tube. This prevents fold lines of any kind.




This is the BEST article I've ever found on how to handle jersey. Beautifully explained, constructed and written and so comprehensive. Thank goodness for this! I can now approach my jersey fabrics sternly and with confidence, and my first attempt at a jersey skirt can be rescued. Phew.