

Hawaiian-Style Summer Skirt
This pattern-free Hawaiian-style summer skirt features an adjustable waist that fits many sizes.
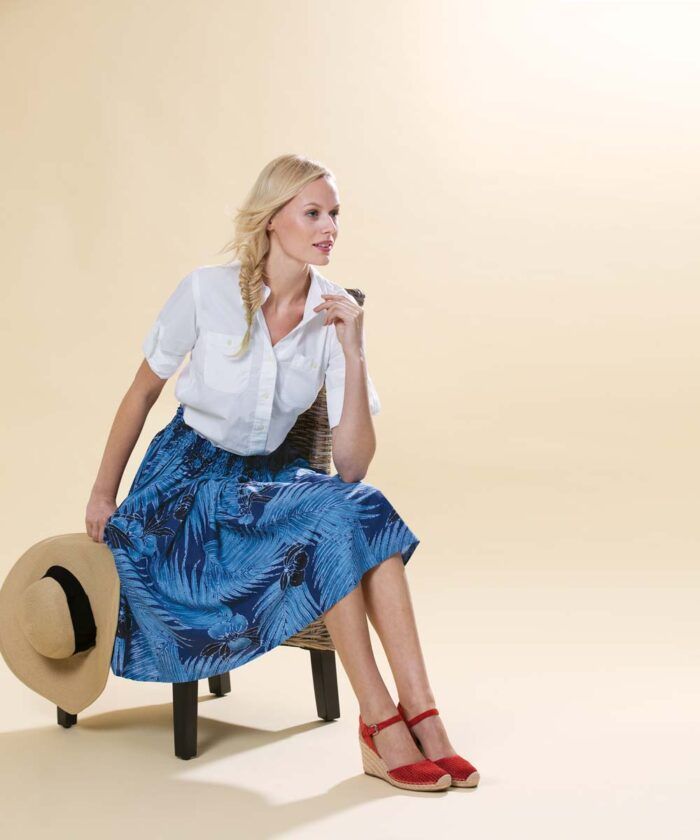
This Hawaiian-style summer skirt requires no pattern and is a 10-step cinch to sew. It fits most sizes, with its waistline ribbons that gather and distribute the skirt fullness. It can be made in a lightweight tropical print, among other fabrics.
Based on the “pa’u” Hawaiian skirt, it is fun to sew and wear anywhere, no tropics required.
This adapted skirt design gets its gathers from multiple drawstring channels at the upper edge, which create a shirred effect. Below the channels, the skirt has lots of volume. A true pa’u is open at the side seam, but this version is closed so you can wear it off the beach.
Traditionally fashioned in a tropical print—often with a border motif—this skirt can be made of any fabric that’s thin and supple enough to be gathered. The fabric’s body plays a key role in creating the silhouette. Soft, drapey fabrics such as chiffon and rayon challis yield a narrower skirt with flowing movement. Stiffer fabrics, such as taffeta and cotton broadcloth, make a more bouffant skirt. Playful cotton prints, rustling silk, or wool gauze all work well with this skirt style and make it suitable for many seasons and occasions.

Select materials
This Hawaiian-style summer skirt is cut on the cross-grain, with its waist edge (or hem edge, in the case of a border print) running along one selvage. The yardage needed depends on your size and how full a skirt you prefer.
Fabric
For heavier or stiffer fabrics, use two to three times the hip circumference. With lightweight and sheer fabrics, use at least three times the hip circumference; you can go up to five times or even more for a very full skirt. Consider gathering a swatch of fabric to determine your preferred gathering ratio. We used 3 yards of blouse-weight woven rayon for the skirt shown. Fabric that’s at least 45 inches wide is wide enough for a below-the-knee-length skirt for most average-height adults.
Drawstrings
Grosgrain or petersham ribbon, 1⁄4 inch wide, makes an ideal drawstring, but you can use cord or smooth, narrow trim, too. For each drawstring channel, purchase a length equal to your hip circumference plus a yard. For a three-channel skirt, like the one shown, and a hip circumference of 36 inches, you’ll need 6 yards.
Opening underlap
The skirt has an added underlap at the side-seam opening. Make this from a 1⁄4-yard length of 1-1⁄2-inch- to 2-inch-wide grosgrain or petersham ribbon.
Make the skirt
This garment is made from a long rectangle of fabric and calls for straight seams only. You may want to use a quilting guide or template to sew even, parallel channels.
1. Cut the fabric to width. Measure along the fabric selvage the desired skirt circumference, plus 1 inch for seam allowances. Cut the fabric on the cross-grain.
2. Cut the fabric to length. Measure from your waist to the desired skirt length. Add 5 inches for the waist channels and hem allowance; if you use the selvage as the hem, omit the 1-inch hem allowance. Use one selvage as the upper edge or hem, and cut or tear the fabric along the straight grain to the length you calculated.

3. Finish the side-seam opening edges. If the upper skirt edge is raw, finish it by serging or zigzagging. On each side seam, measure 7-1⁄2 inches from the top edge, and clip 1⁄2 inch. Press the 1⁄2-inch-wide seam allowance in this area to the wrong side, and topstitch 3⁄8 inch from the fold.

4. Sew the side seam. With right sides together, sew from the bottom of the finished opening to the skirt’s lower edge. Finish the seam allowances together, and press them to one side.
5. Sew the casings. Press the waist edge under 4 inches; pin to secure. Starting at one side of the opening, sew around the waist, 1⁄4 inch from the upper fold, ending at the other side of the opening. Sew another line of stitching 3⁄4 inch below the first line; repeat twice more, to create three casings, each 3⁄4 inch wide, separated by 1⁄4-inch-wide spaces.

6. Prepare the underlap. Cut a 9-inch length of the wider ribbon. Fold it in half and, with a 1⁄4-inch-wide seam allowance, join the short ends to form a loop. Press the seam allowances open, and turn the loop right side out. Flatten the loop with the seam centered on one side, and press. Edgestitch along the long edges through both layers to form a flat strip.

7. Attach the underlap. Place the underlap along the wrong side of the back skirt opening edge, aligning its upper edge with the top row of casing stitching. The underlap should extend at least 1 inch toward the skirt front. Whipstitch the underlap in place, sewing only through the casing’s inner layer.
8. Secure the underlap end. With the opening edges aligned, topstitch across the side seam, below the bottom row of casing stitches. Sew through all layers, anchoring the underlap’s bottom end.

9. Insert the ribbon drawstrings. Cut three ribbons, each measuring your hip circumference plus a yard. Pin a large safety pin to one end of each ribbon, and use the pins to guide the ribbons through the three wider channels. Inch them along simultaneously, in short increments. Knot the trailing ends together temporarily so they don’t get pulled inside. Hem the skirt with a 1⁄2-inch-wide, double-fold, topstitched hem.

10. Tie on your Hawaiian style summer skirt. Adjust the ribbons so the tie ends are equal, and distribute the gathers evenly. Put on the skirt with the waist opening at the left side, fine-tune the waistline fit and position, then pair and tie the ribbon ends.
This article, originally titled “DIY Project: Simple summer skirt,” appeared in Threads #185, June/July 2016.
For another fun, summer sewing project, check out this Insider member article on how to make a stylish, strapless jumpsuit.
For additional Insider member videos, articles, projects, and more, visit the website’s Insider page.


This is such a cute easy-breezy skirt. I made it using a flowy rayon and just love the way it hangs. The ties at the waist are adorable! So so easy. And free!
Am and going the make this skirt, it seems to be figure slimming, Thank you for the instructions