

Neckline Binding for Knits
A method for jewel necks and V-necks
One of my favorite garments to make is a knit T-shirt, and I have a few TNT (tried-and-true) patterns I rely on. There are many ways to finish the neckline. I’ll show you the bound method. You’ll construct your garment as suggested in your pattern guide sheet and finish the neckline afterward.
The technique to bind the neckline of a knit top is similar to a Hong Kong finished seam (Also see Pamela’s “Hong Kong Lining Technique” post).
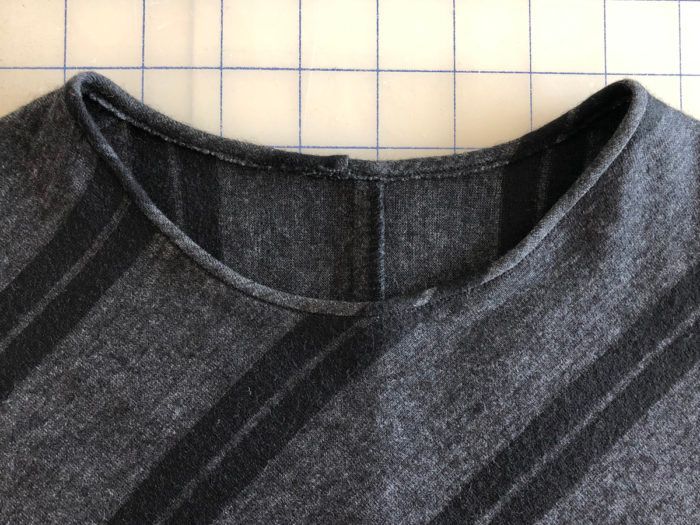
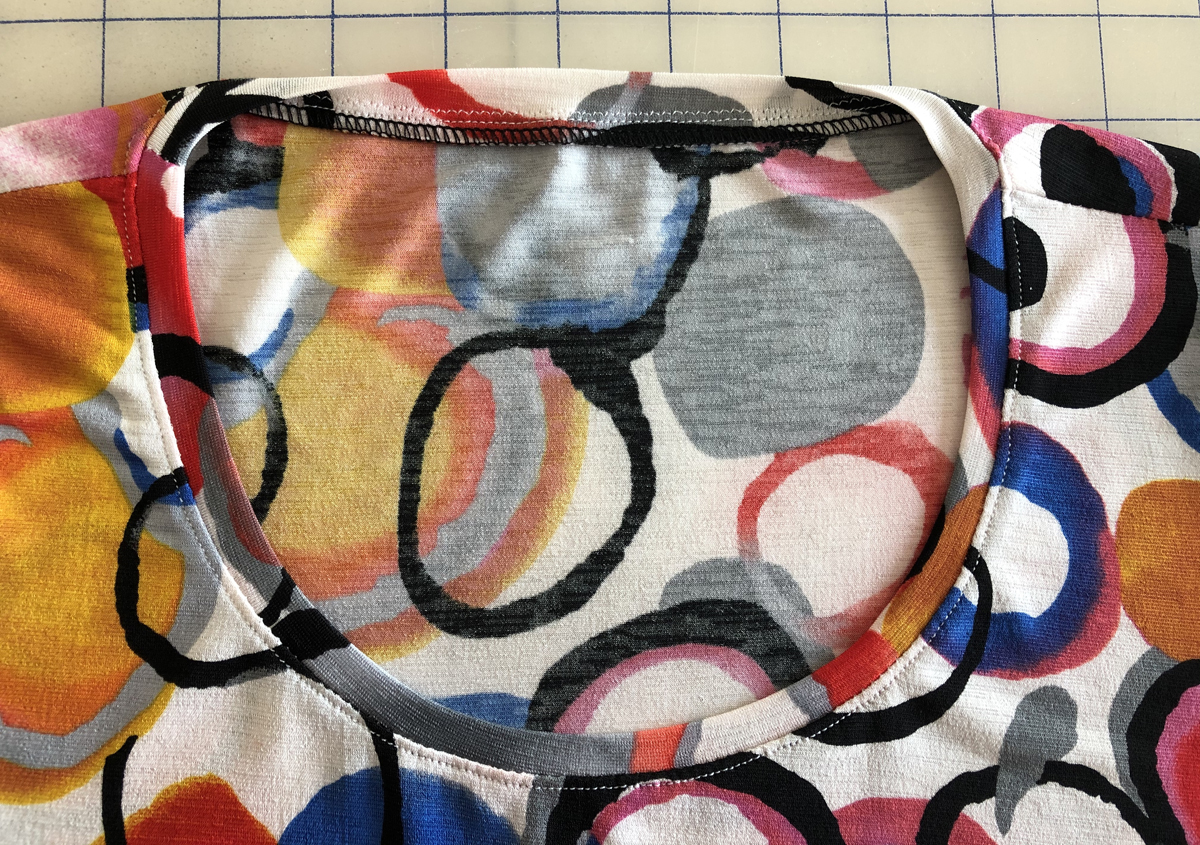
Two sample tops from my wardrobe have different finishes. The printed knit top has a neckband sewn onto it. The second, striped top has a neck binding. For these finishes, keep in mind that you are using fabrics that stretch.

Bind a jewel neck
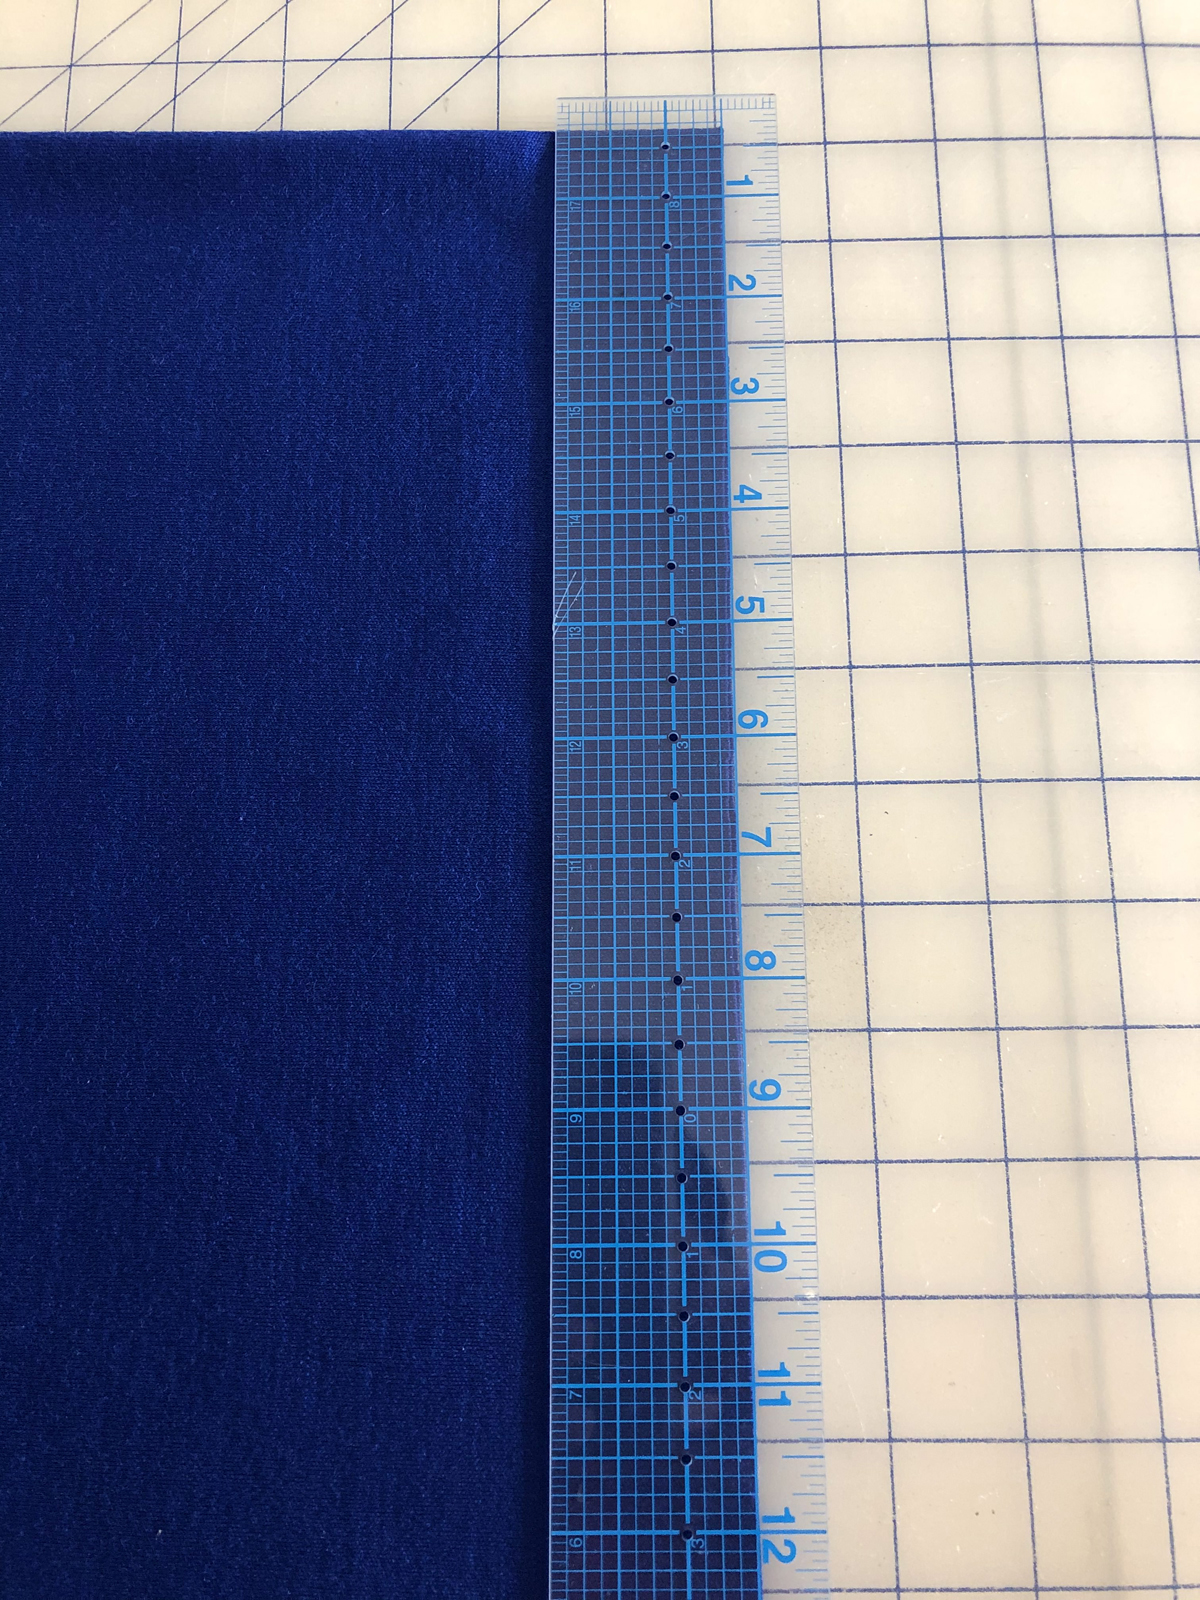
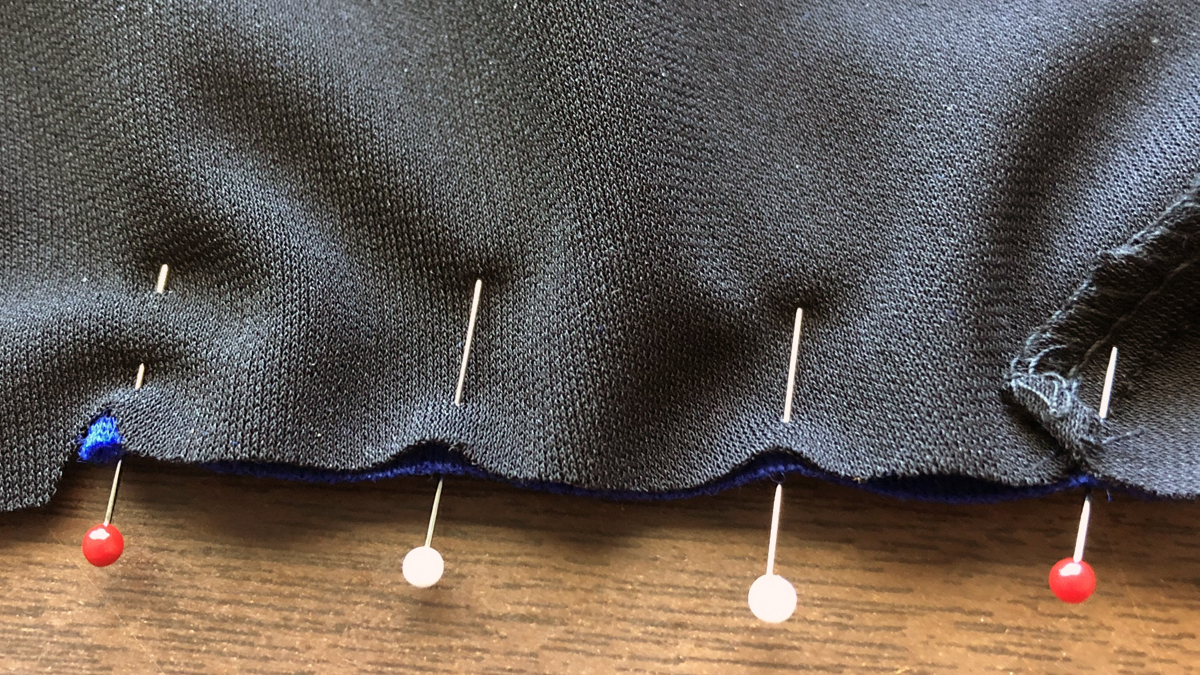
1. For lightweight fabrics and for striped fabrics, cut the binding 1 1/2 inches wide on the cross-grain or bias. For heavy fabrics, cut the binding about 2 inches wide. Any excess width can be removed. Measure the circumference of the neckline, and cut the binding 2 inches longer for insurance. It’s better to err on the side of having a strip that’s too long than what you will need instead of too short.
2. If the garment is cut on the fold, make a snip at the top neckline to mark the centers back and front. Starting at the center-back neck, make a fold in the binding end and pin in place.
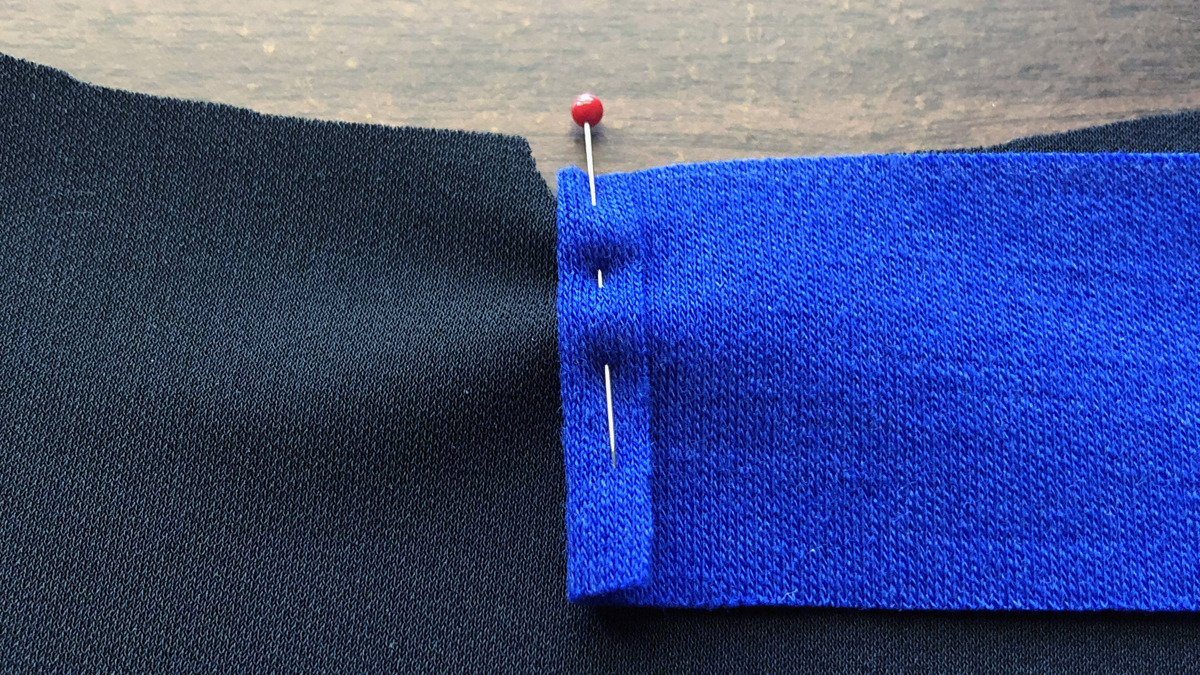
3. Slightly stretch the binding to create tension on it and place a pin to hold it. Continue this same technique every 3/4 inch to 1 inch and place a pin to hold the binding. Keep going until you get around the neck edge and back to where you started.
Cross over the original fold in the binding and cut off the excess binding fabric. Notice that on the…
Start your 14-day FREE trial to access this story.
Start your FREE trial today and get instant access to this article plus access to all Threads Insider content.
Start Your Free TrialAlready an Insider? Log in


Thanks for the very clear instructions for binding a knit jewel neckline. Would applying a wider binding work the same way for a lower neckline to cover surgery scars without gaping?
Please see Pamela's answer to your question below.
Carol Fresia, Threads Senior Technical Editor
I appreciate an article for binding knit necklines, but the images for the v-neck don't really follow the explanation. Since v-necks are quite popular, it would be more helpful to have a video seeing the process instead of images that don't.
Hi user-7041052
You may want to raise a lower neckline first to cover surgery scars if needed. You could then use this method with a wider seam allowance to be able to wrap the binding around for this method. Using a knit with great recovery helps to keep the binding from gaping. Best of luck!
Pamela
Hi Grandma2six,
You would use the same steps as in the crew neck binding. The only difference will be that the excess at the “V” is stitched to form the shape in the front. So sorry for any steps that we’re not included for the variation.
Thanks,
Pamela
Hi Pamela,
I didn't see your reply until today, 6/16/2020. Thanks so much for your answer, which I'm sure will help with those sometimes troublesome v-necks!
Grandma2six
I just made my first knit tee...a boat neck. Following pattern directions, I serged the neckline, then turned under 1/4 inch and stitched with a straight stitch. I must have inadvertently "pulled" on the fabric as I was straight stitching, because the result is a stretched out almost "scalloped" edge. Would applying your binding technique fix the problem?
Hi, the first thing I would try would be to lay the neck area on your pressing surface. Hold the garment in place by sticking pins straight into the board through the knit tee. Using an up and down motion, steam the area and pat gently with your other hand to try to shrink the neckline. If this doesn’t help, you can try to remove the straight stitches used to hem the neckline. Then Steam press to shrink out the excess waving. The boat neck shape lends itself more to turning under rather than binding it. Pressing on a narrow stay tape before hemming would help to keep it from stretching during the hemming process. Also, try adjusting your stitch length to 3.0 to 3.5 to keep it from waving. I hope this helps, best of luck on your new tee :-)
Pam, thank you so much for your suggestions. I'll give them a try. I'm determined to learn to sew knits!
Hello user-5183543. Please see Pamela's answer to your question below. Thanks!