

I try to make or customize my daughters costume each year, I love for her to feel special and stand out from the crowd. This year she asked to be Ursula, she loves villains. All in all the costume cost about $50 (thanks Joanns for all the coupons!) and was a massive success at Mickey’s Not-So-Scary Halloween Party. I do have to go in and do some repairs before Halloween night, maybe riding Big Thunder Railroad was a mistake?
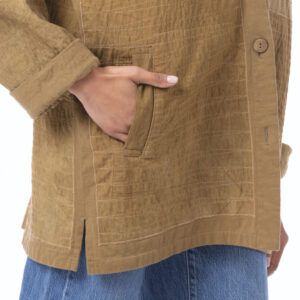
First, living in Florida it was important to make sure that the costume would be lightweight so she wouldn’t have heat stroke. I started with a hand-me-down dress that was not attractive at all. After dying it black and cutting off the shoulder straps I had my base.
For the tentacles, I measured from my daughters waist to the floor and doubled the length since they would be curling around her. To get the width of the tentacles, I measured the circumference and divided it by 8 and got the base width of each tentacle. As for the top width I just eyed it and decided on 2 1/2″. I drew a template out and began cutting. I brought the dress to Joanns to match the black material as best as I could and found a wonderful (and expensive) cosplay fabric that was purple and bumpy. It turned out to be a great decision for the underside of the tentacles. Next I had crafting wire that I cut to double the length of each tentacle folded in half and placed in the front 4 tentacles (originally I was going to do all 8 but since we were doing Mickey’s Halloween Party at Magic Kingdom I decided to under stuff the back tentacles and tack them up so she could go on rides and sit down). After the wires were in place I stuffed all 8 pieces. The front 4 are fully stuffed and the back 4 are under stuffed to accommodate for sitting. To attach them to the dress I sewed them onto a strip of sturdy black felt and sealed them. Before attaching them to the dress I took a string of battery operated lights and tulle and sewed it to the same strip as the tentacles. I tucked the battery pack into one of the tentacles in the back so it was hidden and secure but still able to turn on and off. Next came sewing them onto the dress itself, probably the most difficult part. I then shaped and twisted the tentacles one by one and tacked them in place, utilizing 2 of the back ones as shoulder straps to keep the dress up.
For Flotsam and Jetsam I made them from inexpensive fleece and felt. The eyes came from the dollar tree and I cut them in half. For the 2 yellow eyes I dyed them so they had the proper color ( I used Rit Synthetic dye). The white eyes are sewn on completely and the yellow are only sewed on the bottom half, allowing me to pop it out from under the eyelid and put a light in so it glows. They are under stuffed and sewed onto the tentacles.
The necklace was a challenge. In the end I used a real shell that I carefully drilled a hole in the back of that is large enough to fit the light into and I sealed the whole up with white playdough. The leather cord is simply superglued to the shell. The lights I used in the eyes and necklace are battery powered led white balloon lights.
Last year we temporary colored her hair and she hated having to wash it out and was adamant about not coloring her hair this year so we found a very inexpensive white wig that I styled and put so much product in that it can be used as a bike helmet!


Log in or create an account to post a comment.
Sign up Log in