
Hand-Sew Collars and Facings for Extra Neat, Sharp Results

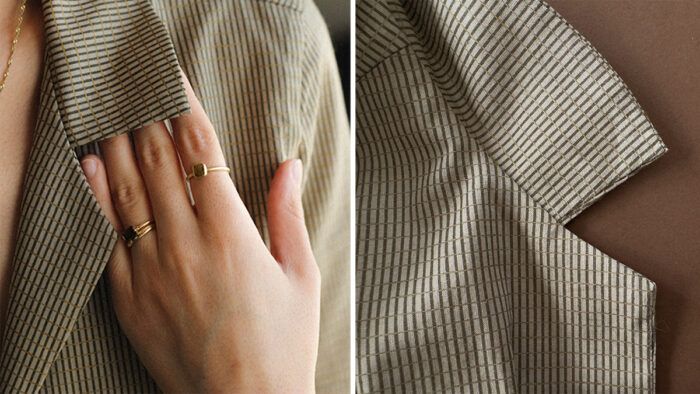
As part of my goal to incorporate more hand sewing into my sewing practice, I’ve recently completed one of my dream sewing projects and fully hand-sewed a semifitted camp collar shirt. It was an incredible learning experience, and I want to share what I picked up from the process with you. In this article, I show how I achieved the neatest, sharpest results for the collar and facings using traditional tailoring methods.
Overview of the Technique
This technique applies to all instances where you join two layers of fabric, and you want one layer to remain hidden on the inside or underside of the project. Examples include collars, facings, linings, cuffs, and waistbands. Joining the layers typically involves placing the two layers with right sides together, machine-sewing the edges, and then turning the stitched result right side out. When following the traditional technique learned from tailoring, however, you begin by folding and pressing the seam allowances to the wrong side, then move on to stitching the layers together by hand from the right side.
There are two major benefits to this method. The outside layer wraps around the edges and slightly rolls to the inside, keeping the edges neat. (If you’re sewing by machine, you need to “favor” the seams to get a similar result.) It’s also easier to achieve sharp corners without having to trim excessively, resulting in potential weak spots at the corners. I use the example of a shirt collar for the purposes of this tutorial, but you can easily adapt it to the project you’re working on. The seam allowance I use is 1.0 cm, or 3/8 inch.
Preparing the Pattern Pieces/Fabric
Interface
Start by trimming the pattern’s edges by 8.0 mm, or just over 1/4 inch, to create a template for the…
Start your 14-day FREE trial to access this story.
Start your FREE trial today and get instant access to this article plus access to all Threads Insider content.
Start Your Free TrialAlready an Insider? Log in


Log in or become a member to post a comment.
Sign up Log in