
This submission comes from Sarah Magnuson
Sarah was a frequent contributor to Show us Your Threads! on the Threads Facebook page over the last several months. Followers of our Facebook page began to look forward to seeing progress on her dress. Below, we get insight into the inspiration and the labor behind the construction of this marvelous garment.
So the beginnings of this project actually take place when I was in 2nd grade and my dad handed me a well loved copy of one of his favorite childhood books, The Hobbit, by JRR Tolkien. I almost got stuck at the tea party at the very beginning, but quickly picked the book back up when my dad asked me if I had gotten to the part with the dragon yet! Thus started my love of fantasy books. My mom also was the one that initially started teaching me to sew, which eventually grew into a form of artistic expression for me (also a love of cosplay).
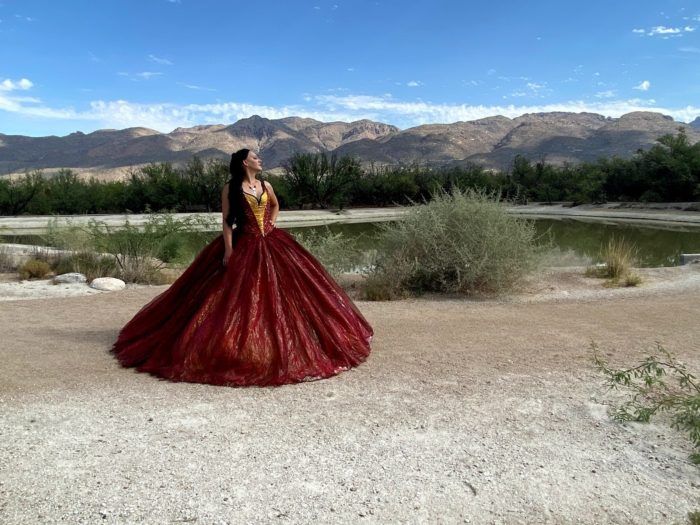
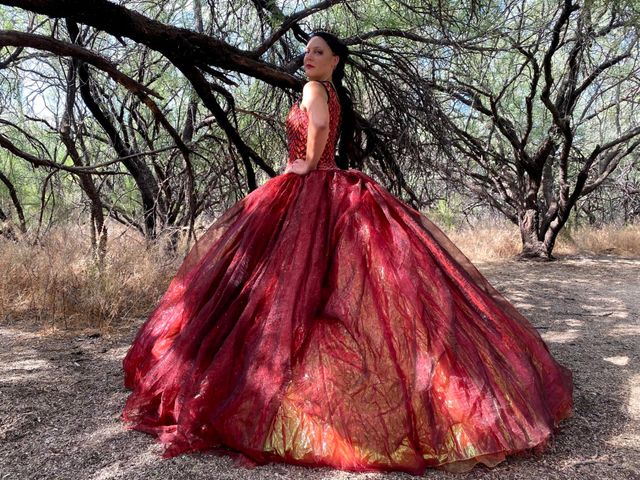
Several years ago I saw the live action Cinderella and quickly fell in love with Cinderella’s dress and how it moved, but since I had never felt a particular connection to Cinderella I decided to make my own version. There are actually 2 different versions planned, a Lady Gryffindor version (which is still under construction) and of course Smaug the Dragon. Last year I managed to find some red and gold dragon scale fabric and just knew it would be perfect for Smaug.
I already had an elliptical hoop skirt that I had made for a separate project so thankfully I didn’t have to make that part of the gown and was able to start on the massive petticoat I would need in order to achieve both the movement that I wanted and the volume I would need. I initially started with a base petticoat based on Truly Victorian’s grand parlor skirt, and gradually added more and more ruffles using layers of godets in increasing size. Initially I had paired organza ruffles that had a fishing line hem with cotton crinoline fabric that I had dyed red and then attempted to re-stiffen but the ruffles ended up collapsing from the weight of the crinoline so I cut it off and switched to using tutu netting to help support the organza ruffles. In the end there were roughly 700 yards of ruffles of ruffles made from organza and tutu netting, with roughly 100 yards of fabric used to make the what was affectionately named the petticoat of DOOOOOM.
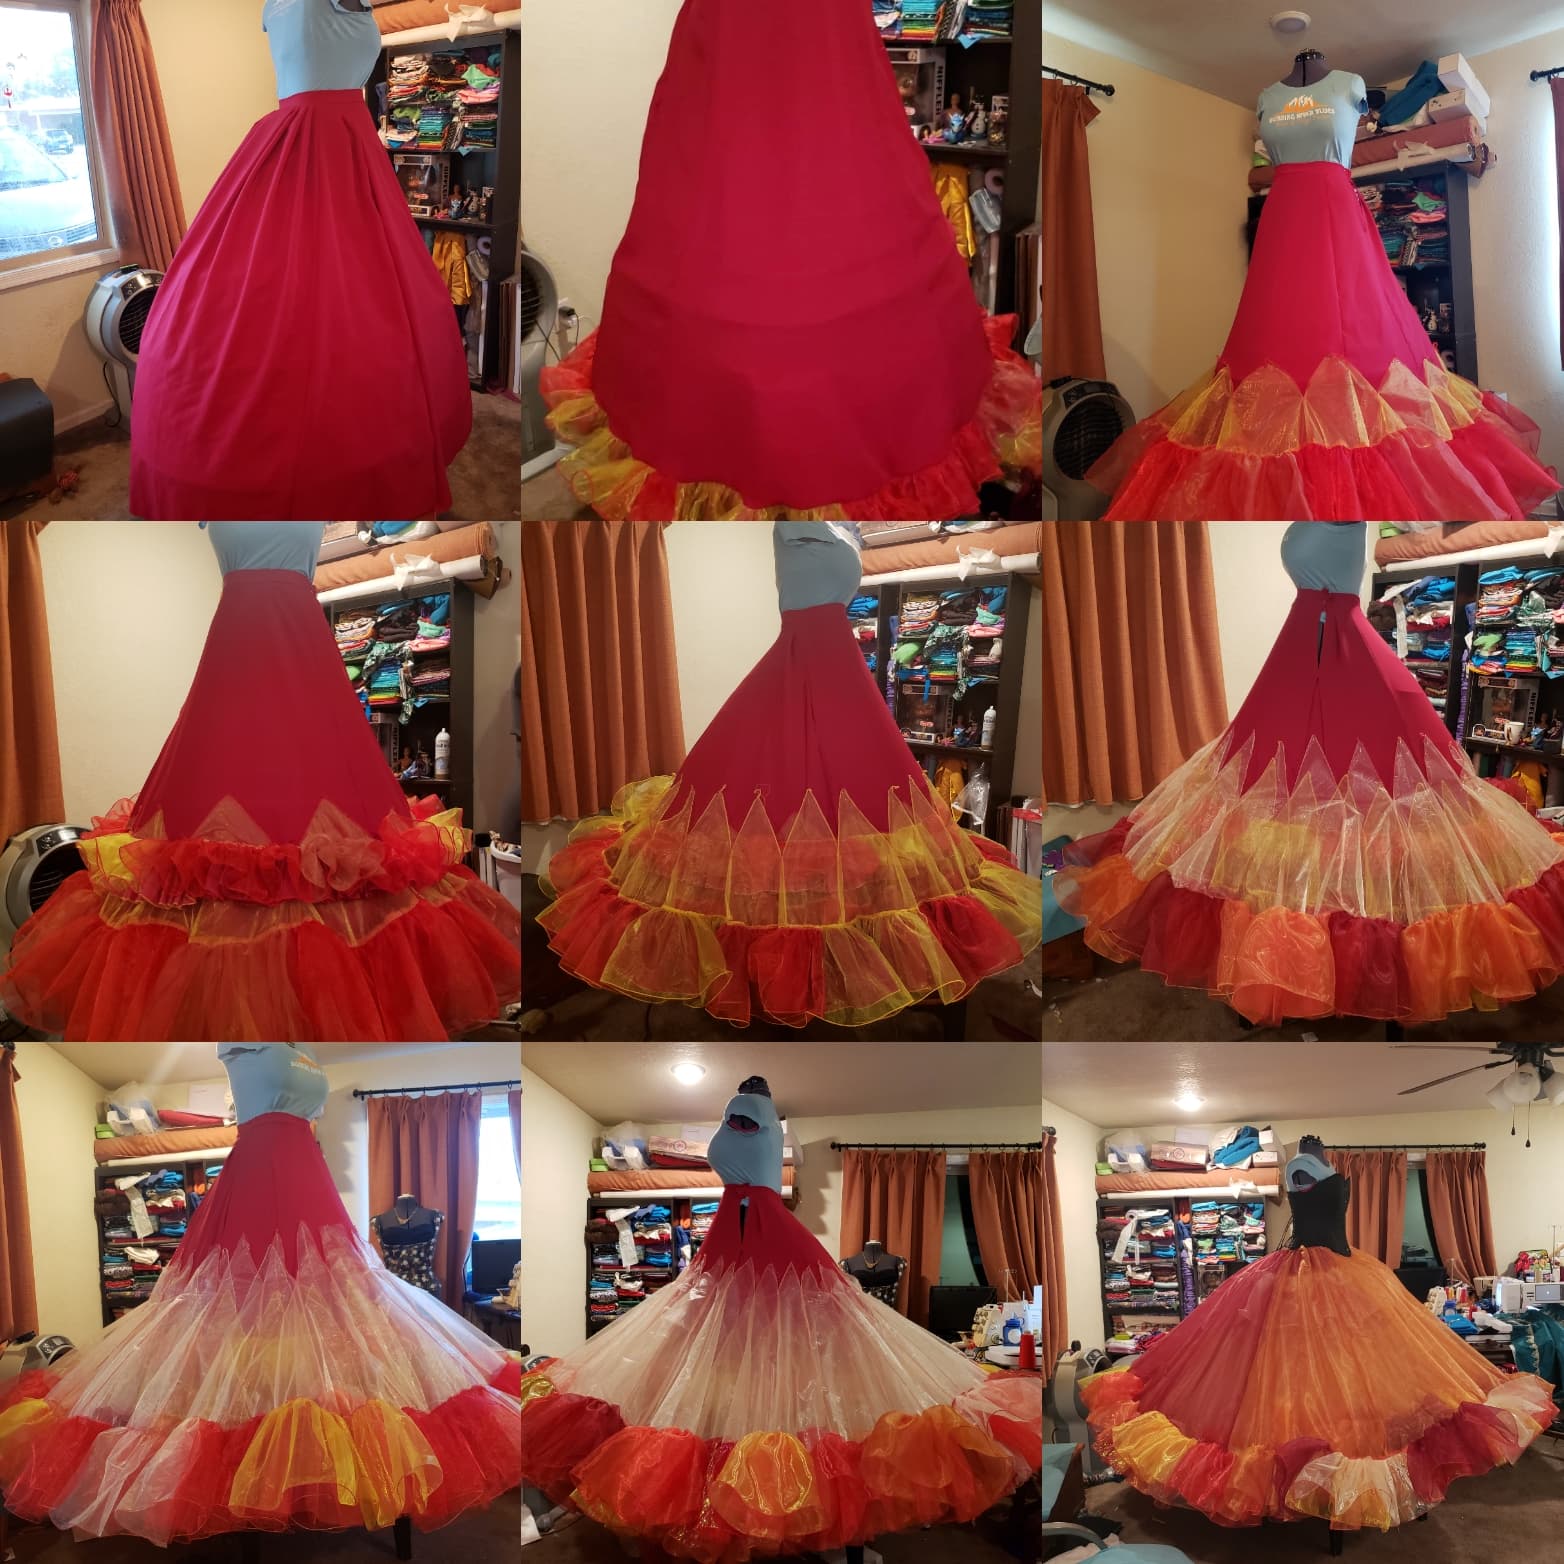
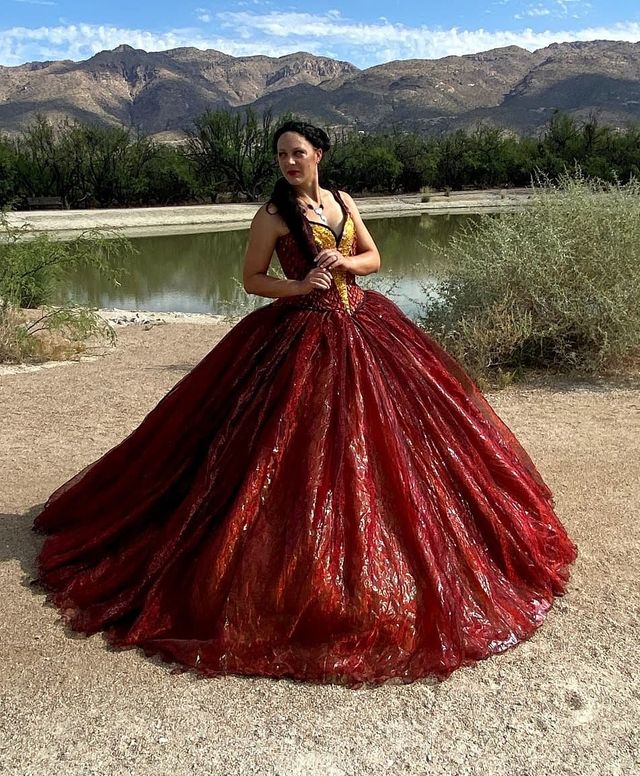
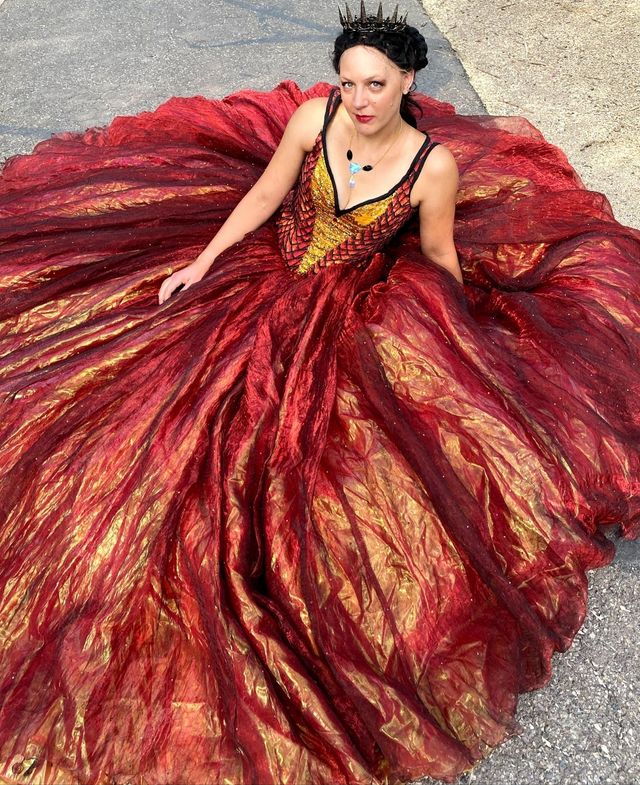
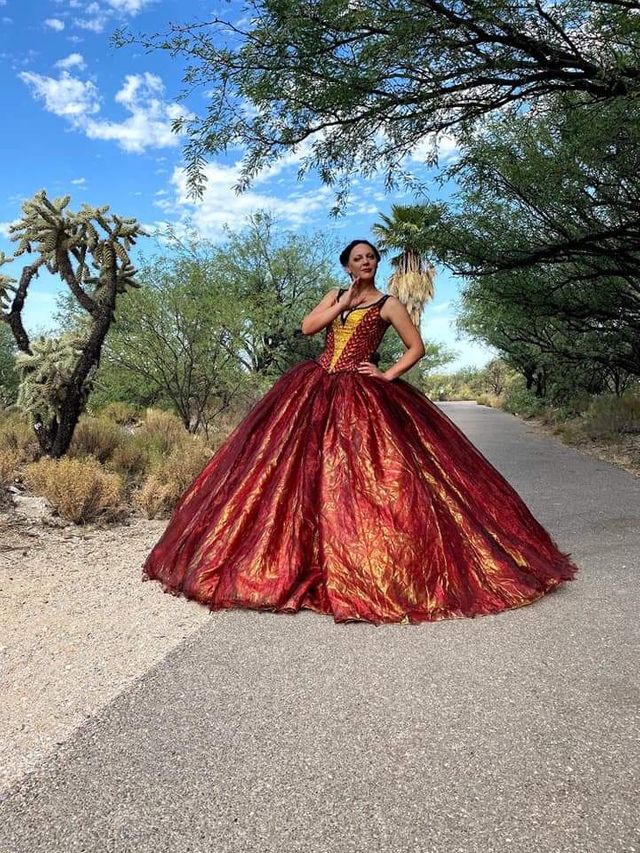
Once the petticoat was done I was able to move onto the overskirts. The overskirts are by far where most of the fabric is in this gown. There are 6 layers of organza, 5 of which are on one waistband, and the top layer is on its own waistband so that I can switch it out for when I make the Lady Gryffindor version of this gown. From bottom to top the layers are a red crystal organza layer, maroon crystal organza, orange organza, sunflower mirror organza, and then the final two layers are what really give it the flame like quality I was aiming for. The final two layers are an iridescent organza that was dyed red (I could not find a red iridescent organza I liked ANYWHERE), and then a crinkle organza that shifts from black to red depending on how the light hits it. All of the layers were sewn together using french seams in order to add extra strength to the seams as well as neatly enclosing all raw edges, and then all the layers except for the top layer were hemmed using a rolled hem. The top layer was honestly one of the most nerve wracking hem that I’ve ever done. I roughly cut the hem using my pinking shears, purposefully making it jagged and uneven, and then I used a lighter to singe and slightly melt the fabric to create a burned hem. From there I covered the top layer of organza with roughly 8k rhinestones that were a mixture of red, dark red, and red/yellow color shifting rhinestones.

From here I moved onto the foundation corset that I would wear underneath everything. I custom made the corset rather than buying one for a couple reasons. I wanted to be able to say that I made the whole thing including the foundation garments, but more importantly I have never found a commercially made corset that actually fits me correctly and this way I know for sure it fits the way I want it to. The corset was made from the Amelie pattern by Corsets by Caroline using a double layered construction method with felled seams so there were no exposed raw edges and the boning channels were contained between the two layers of coutil.
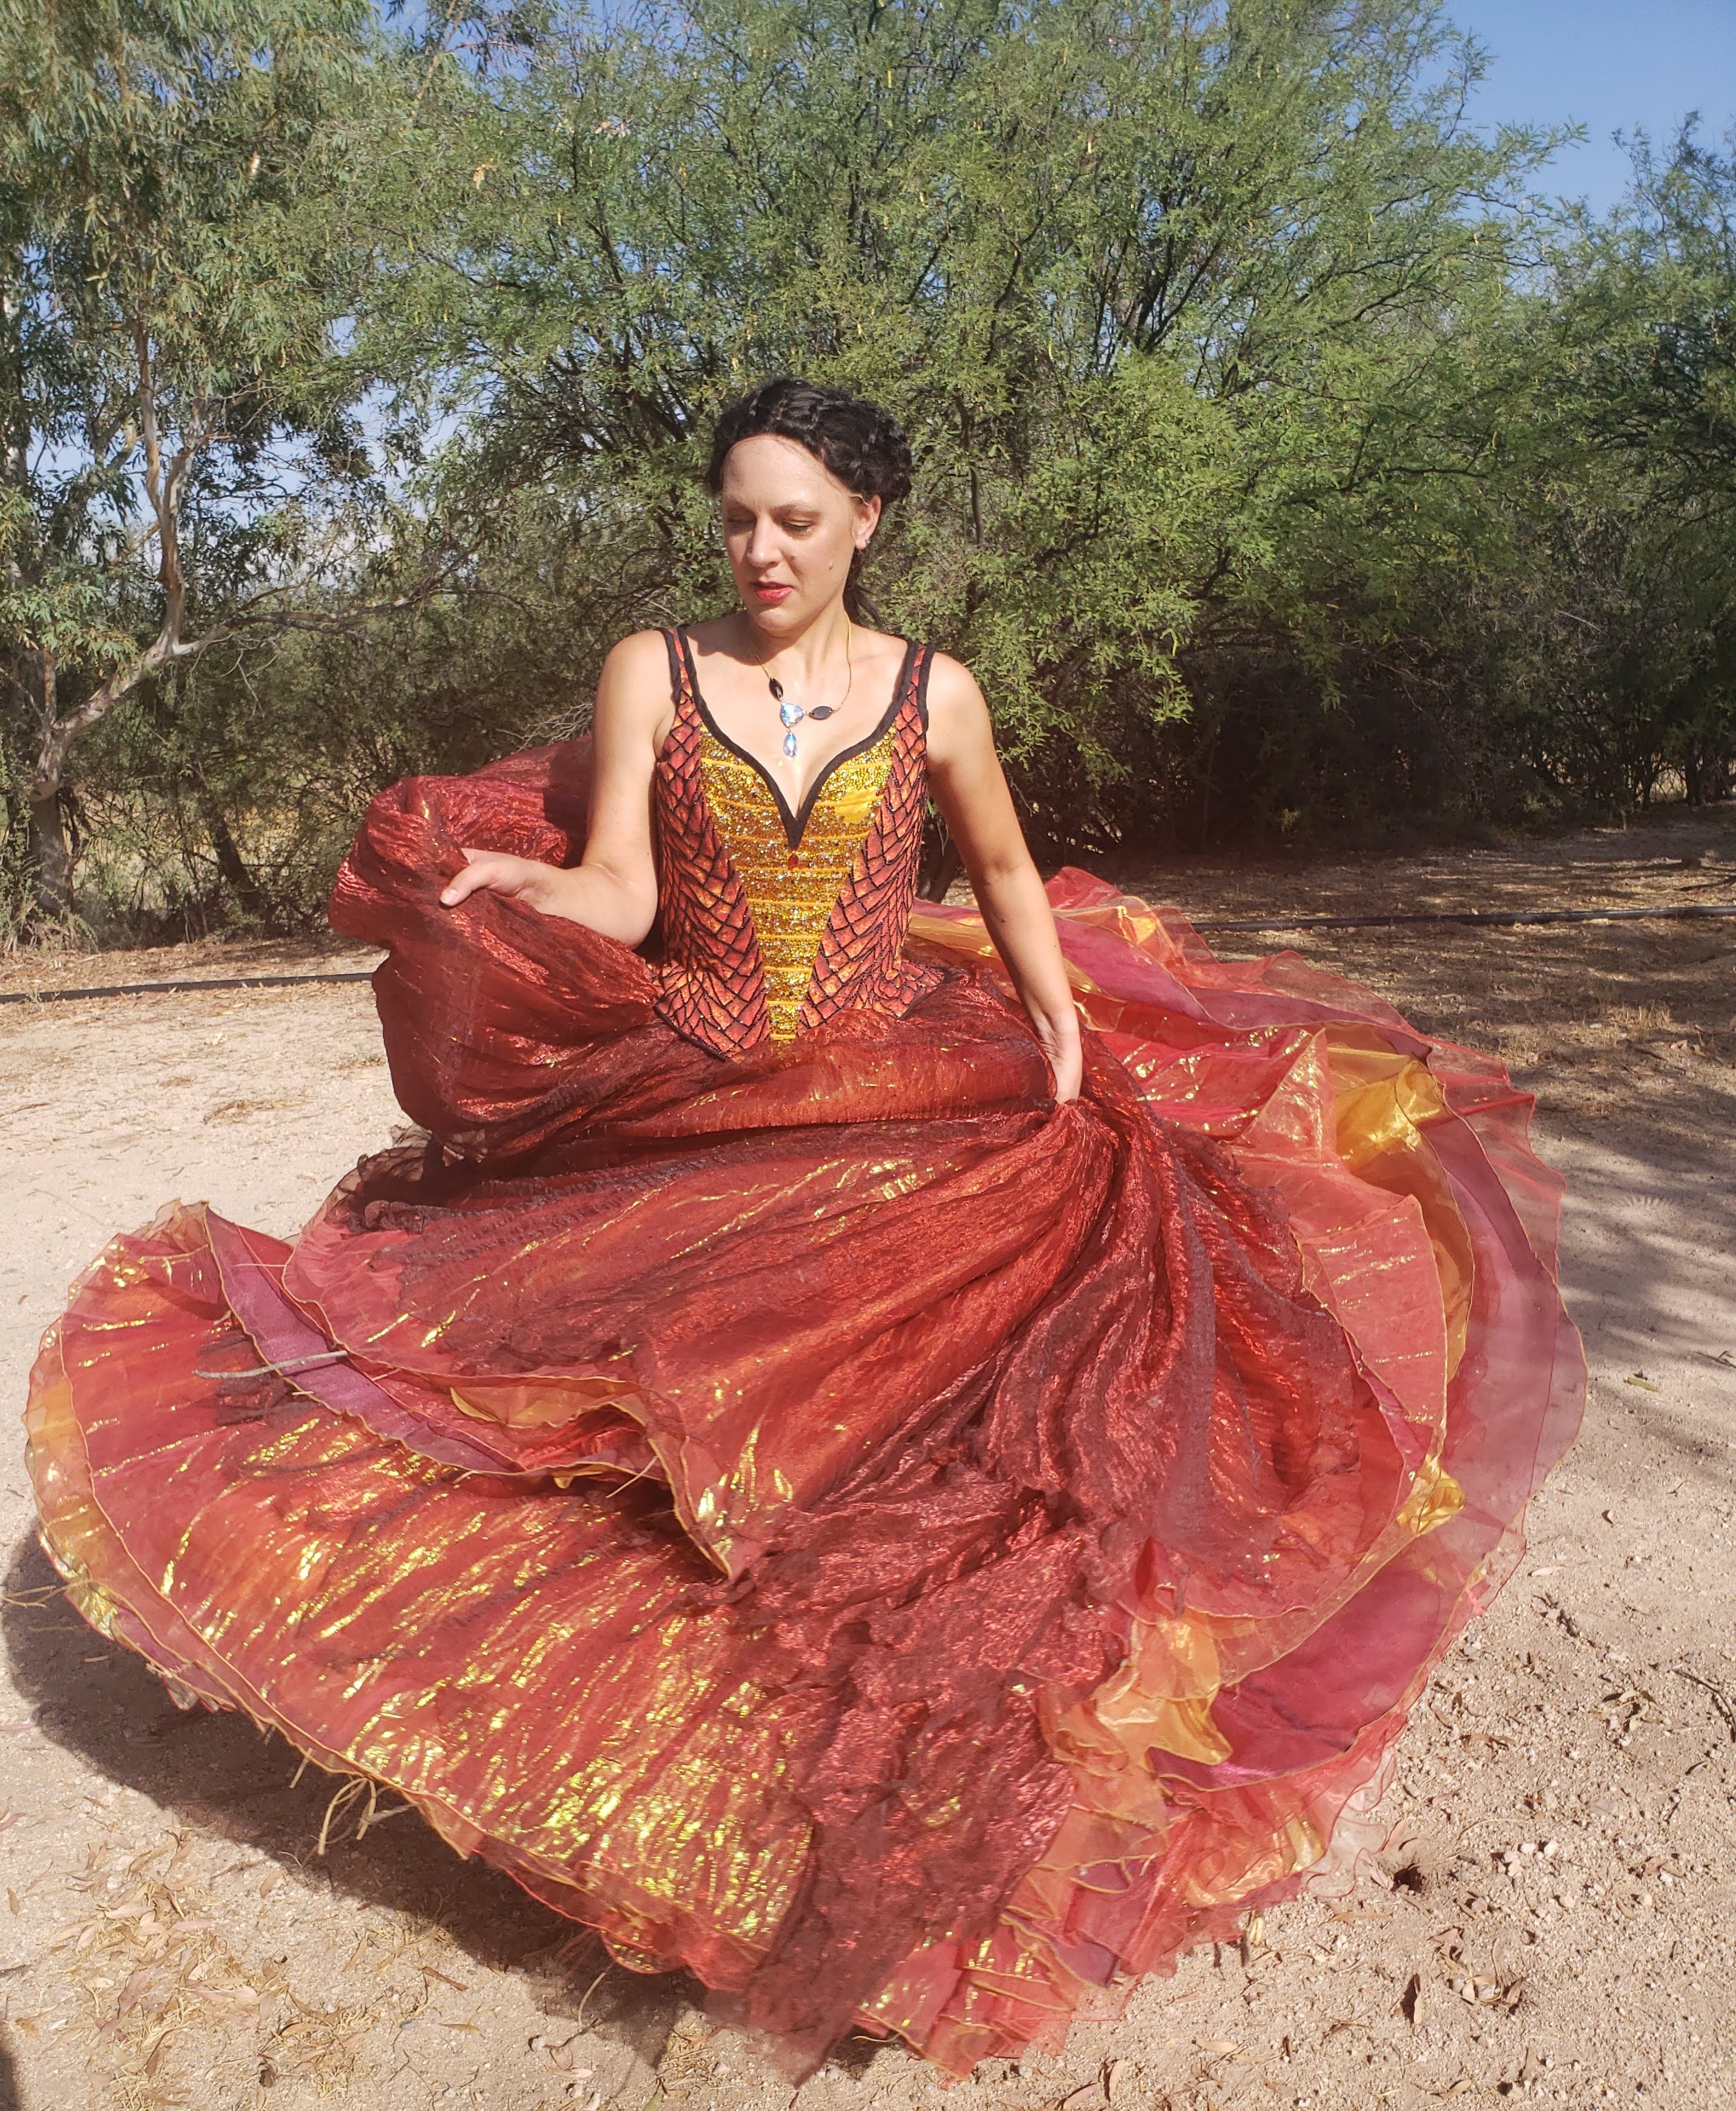
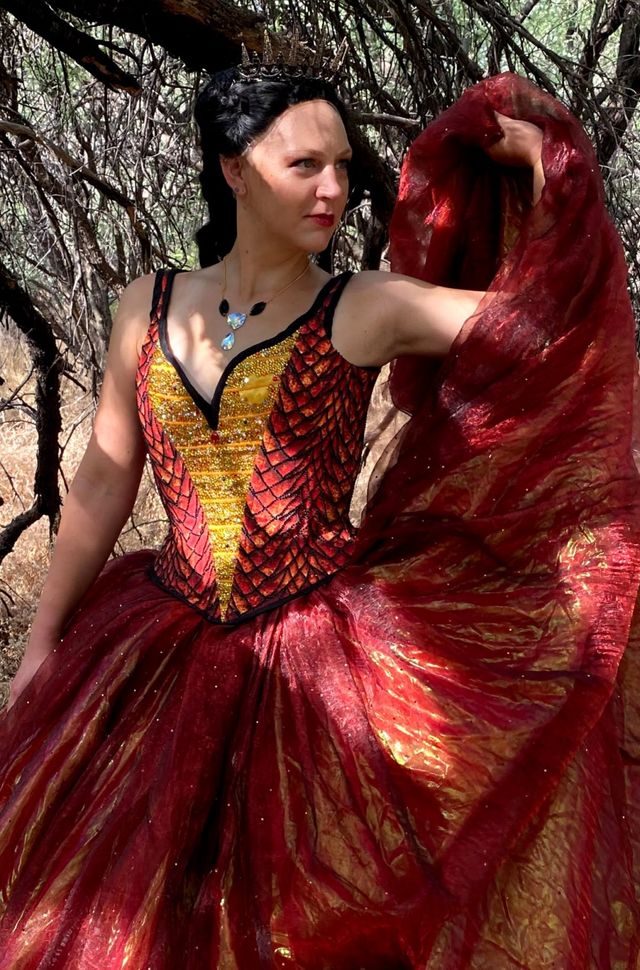
For the bodice I had looked at several different patterns and eventually picked Simplicity 1728 to use as my base pattern. Once I made my initial mock up I drew the neckline I wanted and then with the help of a friend ripped the side seams of the bottom of the bodice to determine the size of the gores I needed to add so that it fit over the skirts properly. I think it ultimately required 3 mockups to get the fit that I was looking for. The bodice itself was actually constructed more like a corset than a traditional bodice because I wanted it as strong as possible for when I eventually add dragon wings to this gown, as the bodice will likely be supporting some of the weight and I need to be able to move quickly as well. The fashion fabric is flat lined with a cotton twill and then lined with a cotton coutil, then also constructed with felled seams for added strength. Both the bodice and corset have a mixture of spiral steel boning and flat steel boning to add structure and support for the garments. For the central panel of the bodice I knew I wanted it to be gold to mimic how Smaug’s belly is in the books, and to get the right color gold I used a layer of yellow quilting cotton with gold glitter organza and the sunflower mirror organza from the petticoat/overskirts as overlays. From there I stitched “scales” using a satin stitch to mimic how scales look on a snake’s belly. Once the bodice was sewn together I finished the top and bottom edges using a black silk dupioni bias binding.
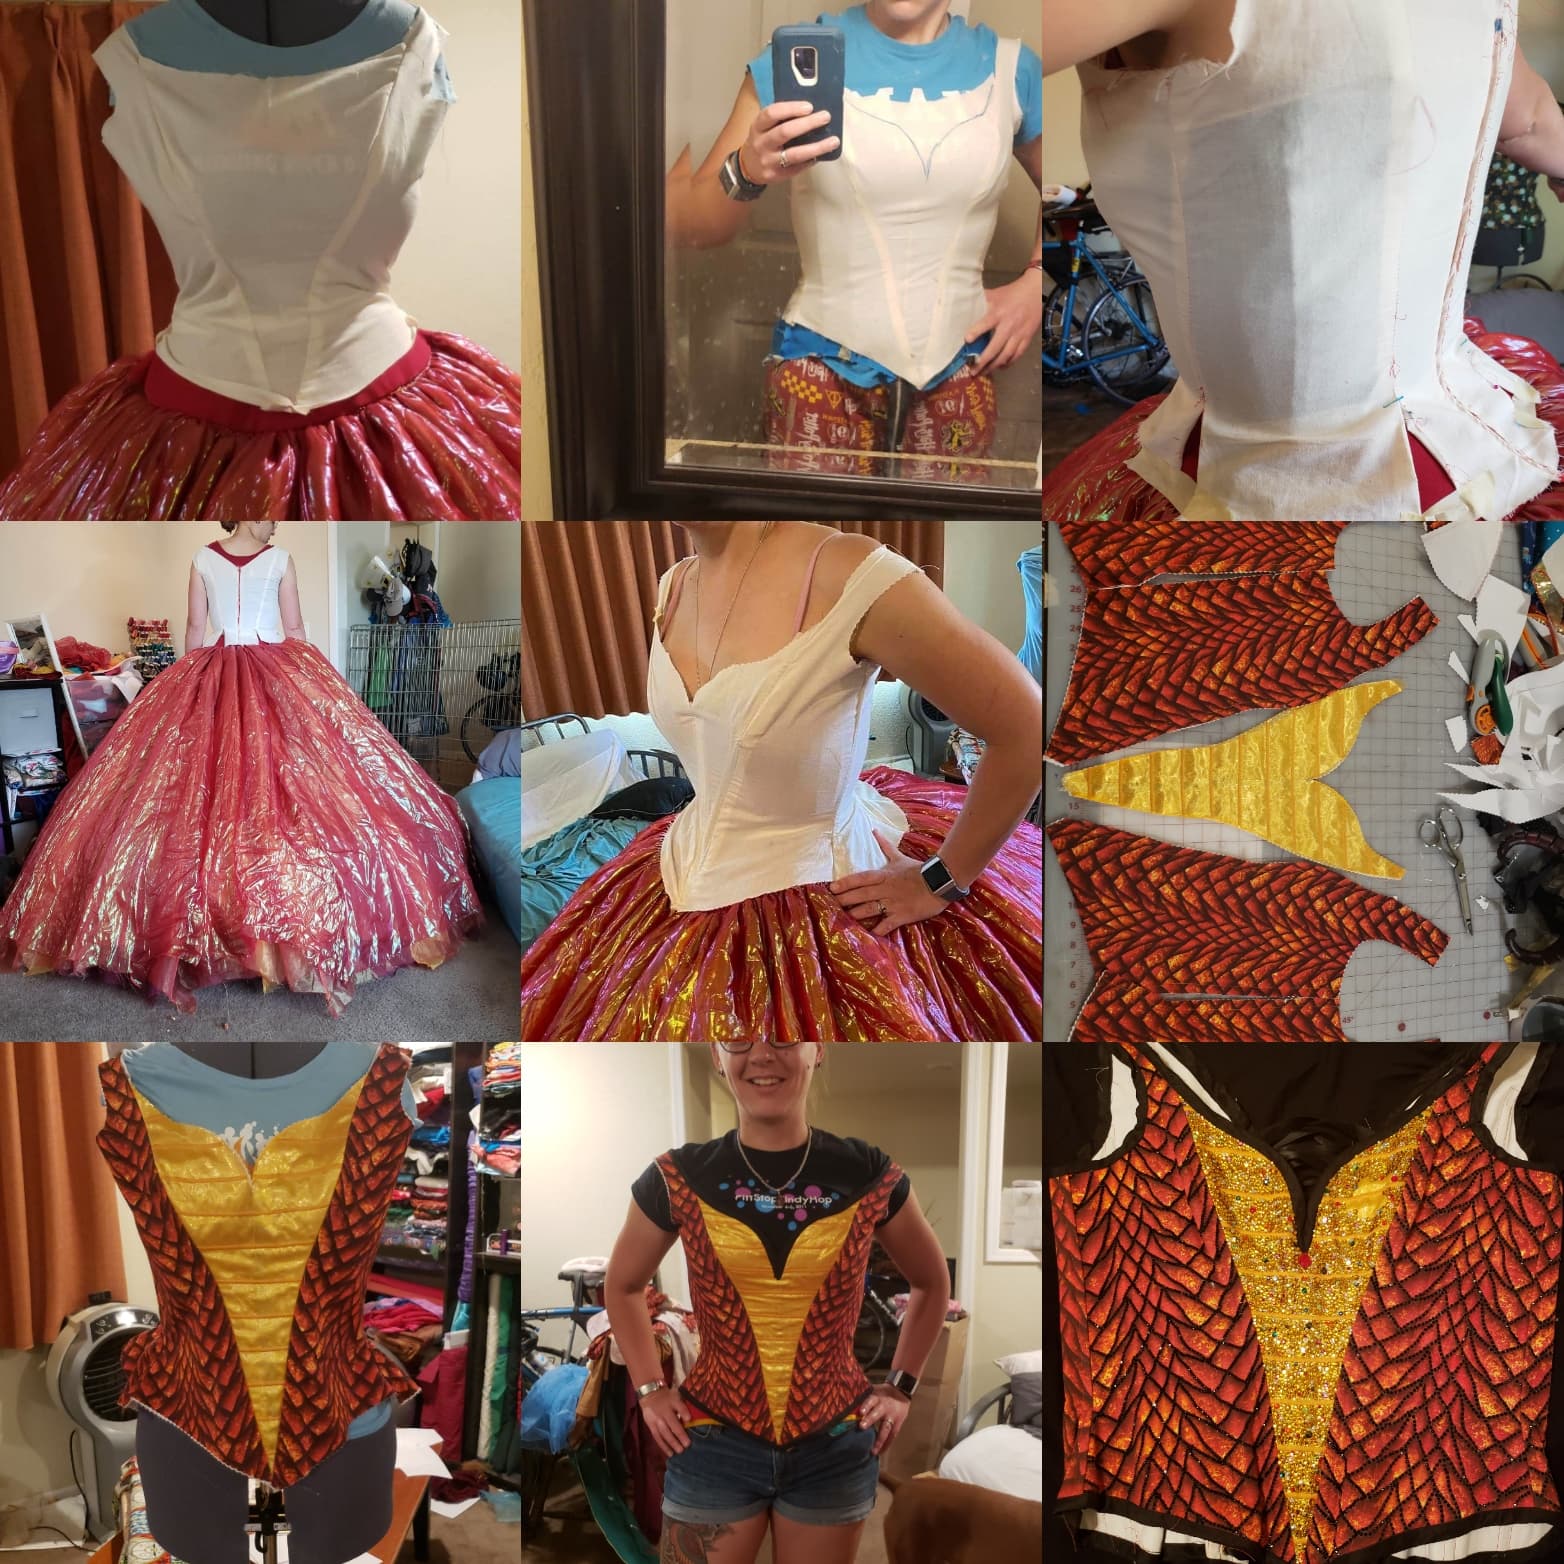
From there I got to work on the embellishments! So in the book Smaug literally has gems embedded in his belly from laying on his hoard of treasure and describes himself as “armoured above and below with iron scales and hard gems. No blade can pierce me” (except that Bilbo notices a small blank patch on the left side of his chest that ultimately leads to Smaug’s downfall as it allows one of the men to shoot him down). In order to mimic the iron scales I decided to outline the scales in thousands of tiny black rhinestones, I believe there’s roughly 8k black rhinestones on the bodice, all placed individually. In order to both mimic the hard gems and highlight the blank patch I left I decided to completely fill in the center panel with rhinestones, except of course, for the patch on the upper left that was purposefully left blank. I wanted the texture to look “pebbly”, similar to a gila monster’s skin, so I used a mixture of different sized gold rhinestones, and then mixed other rhinestones of different colors and sizes in with those to mimic the “hard gems” in the description. I’m honestly not sure how many rhinestones are in the central panel but I wouldn’t be surprised if it’s somewhere around 1000.
From there all that was left were the final touches! I made a necklace from a large aurora borealis rhinestone to mimic the Arkenstone (a large gem that is said to glow from within and is the heart of the mountain, it is a key piece of Smaug’s hoard) and then styling my wig. I took a black wig and sewed red wefts into the wig to add a pop of subtle color, then styled it to look like Daenerys’ braided ponytail from game of thrones. Eventually there will be 10 ft articulating wings but I’m still waiting for those parts to get to me.
From start to finish this project has taken a year of work, and there were times that I wasn’t sure I was going to be able to pull it off but it ended up turning out better than I could have ever imagined.
See more pictures of the finished product by clicking “Launch Gallery” below.
We can’t wait to see the wings, Sarah! We hope you’ll send in photos when they are done. Congratulations on finishing this amazing project, and we look forward to more from you in the future.
You can find more from Sarah on her instagram page, @Serebladecreations and on Facebook at Sereblade Creations.
Submit your recent sewing projects to Threads
Email several photos and the story behind your most recent sewing project to [email protected] for an opportunity to be featured.


Log in or create an account to post a comment.
Sign up Log in