
Serging Technique for Creating Smooth Hem Edges
Serger expert Gail Patrice Yellen shows how to neatly apply lace trim to hem a garment in the round.
A simple way to avoid an uneven hem when serging is to cut a “gate” in your fabric. This ensures the serger blade is set in the right place to trim the cloth from the start.
Any time you serge a circumference (like a hem), there is a slight jog that occurs at the beginning/end of your serging. Unevenness occurs at the spot where you angle the fabric to the right until the knife trims the fabric to the correct depth. This is the same spot where you must angle the fabric to the left to chain off and extract your work from the serger, as you finish serging the hem.
Serger expert Gail Patrice Yellen offers a quick solution to this problem as part of her article “Specialty Serger Feet: Part 1” featured in Threads #194, (Dec./Jan. 2018). The samples shown were made with the lace applicator foot and a hem lace application. In this article, Gail also provides tips for successfully placing the lace to match smoothly.
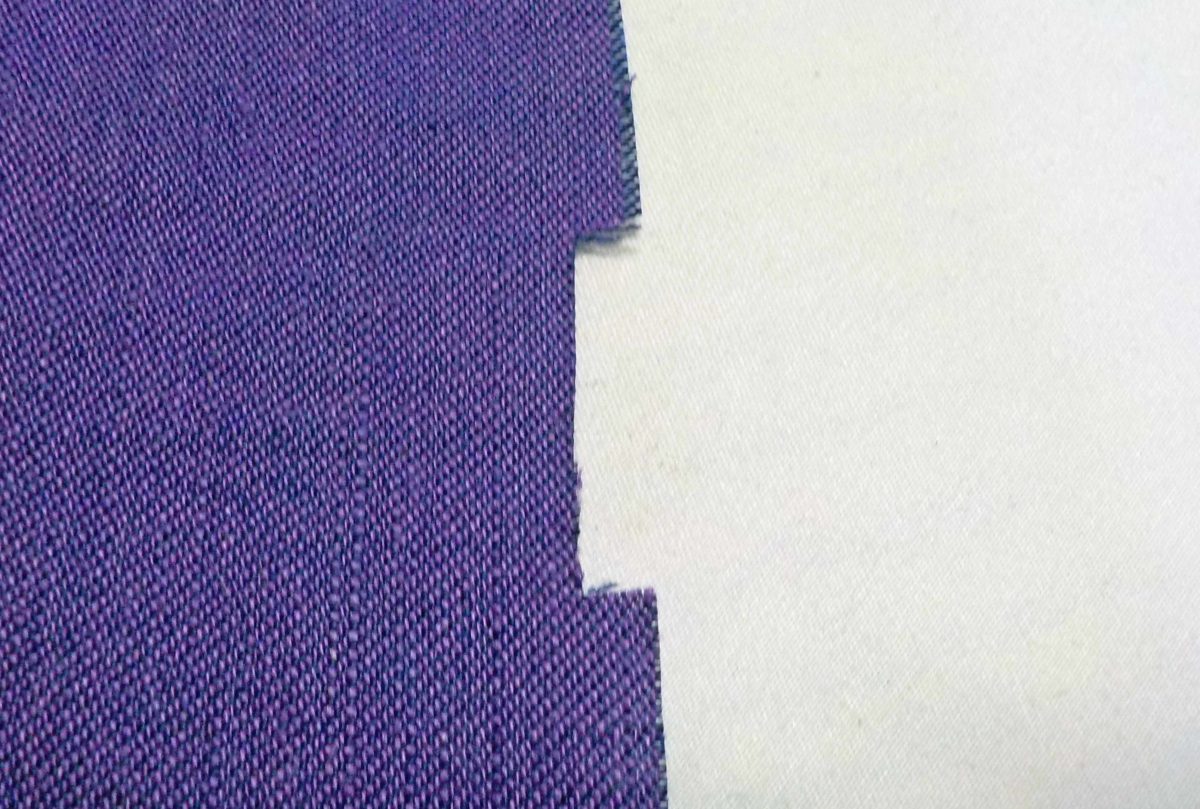
Cut a “gate”
Cut the starting gate in your garment to the same depth as you anticipate trimming off with your serger by about 1 inch long. In this case, the gate was 1/4 inch deep and 1 inch long.
Our example is shown for a lace-application technique, but the same principle works for simply serging around an edge. Don’t cut the lace trim to the exact length; you’ll apply it almost completely before cutting the end carefully for a precise overlap.
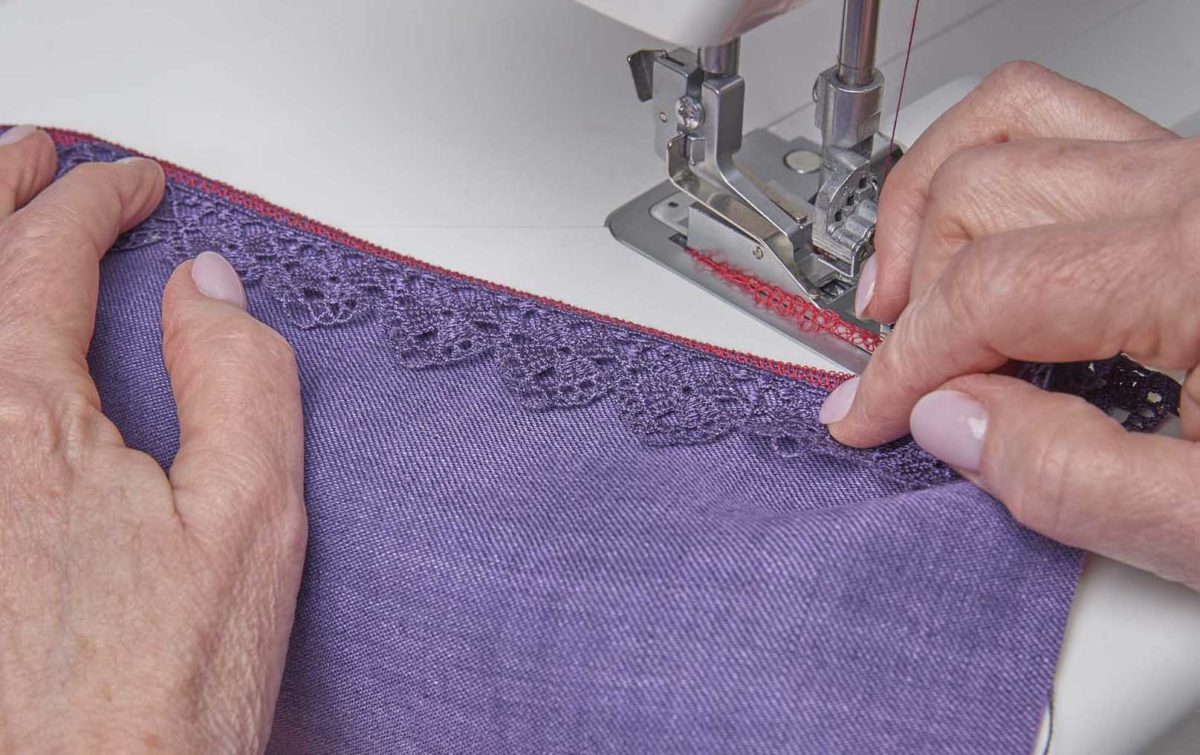
Line it up
Raise the serger presser foot and slide the fabric beneath, aligning the gate right up to the knife.

Ready, Set, Serge
Lower the presser foot and serge, trimming off 1/4 inch or your chosen gate depth.
This technique works with an overlock or rolled-hem stitch—as you finish the hem and approach the gate again, serge a small amount over the starting stitches and then shift the fabric to the left, chaining off.
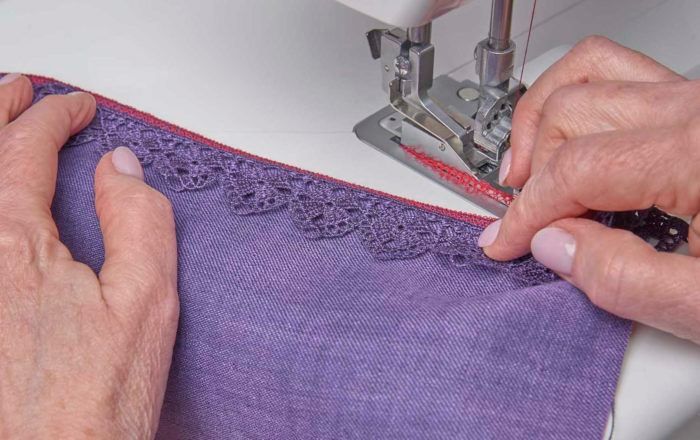
If you are applying lace trim, as shown, pause your serging close to the end, a few inches from the starting point. Gauge the remaining length of unattached lace, and trim it to a slight, 1/8-inch overlap. Adjust this amount if it will help you arrange the lace trim to diminish the join.
Final Touch of Lace
Serge/apply the lace trim until you reach the gate again, and chain off. Trim the thread chains (beginning and end) and use a few hand stitches in matching thread to securely, but invisibly, join the lapped lace trim ends.
Do you have serging tips to share?
You can always send them in to [email protected] to be considered for our Tips department. We pay for every tip, and award a “Best Tip” in each issue. If you love sewing short cuts, you’ll enjoy the more than 800 handy ideas in the book “Sew Smarter, Better & Faster” by the editors, contributors, and readers of Threads (The Taunton Press, 2014).
If serging is your particular interest, check out this content collection: “6 Serger Secrets.”


WOW! This has so many more applications than lace. Thank you! I love it. What a clever trick!
I’ve been teaching this method for years with the addition of a chain-free join. So, serge up to where you almost meet up with the starting point and allow the blade to trim the starting chain. At that point, shy the fabric edge away from the blade and guide the needles over the edge, serging just a few stitches past the meeting point. (The needles are always at least an inch behind the blades so need to catch up!) Now here’s the trick, turn the fly wheel one full turn backwards so that the needles are at their highest points. This will convert the chain back into threads. Raise the presser foot and remove the work, cutting the threads leaving around six inch long tails. Pull away the extra loop that occurs and separate the four remaining threads into pairs. Tie two to the other two into a simple knot, steering it towards the back of the work and trim ends closely. There you have it; a very neat chain-free join!
Janet Moville, founder, Modern Approach Sewing School UK
Really helpful for me...i just love sewing!!!