

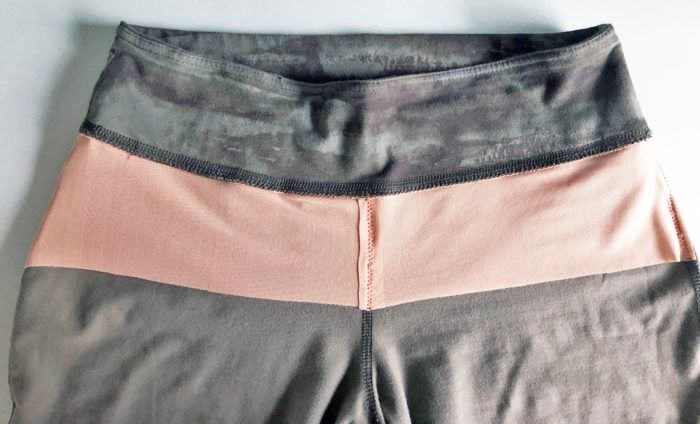
One of my customers brought me some clothes to alter, and I noticed there was a panel sewn onto the pants front below the contoured waistband. It was made of power net, and I thought: “What a cool way to incorporate a slimming element into a garment.”
I took a picture of the original pants and figured out what the manufacturer had done. Many of you may have already seen this in some of your ready-to-wear garments. For those of you who haven’t, take a look. Note that on the leopard-print inspiration pants, the power net panel was attached as the garment was being made.

However, I was able to add it to a pair of yoga-style pants after they were purchased.
If you are adding a panel as you are making the garment, you machine-baste it to the pants or skirt front at the center front, sides, and top before completing construction. The following instructions explain how to add a panel to an existing pair of pants.
Measure, make the pattern, and cut the panel
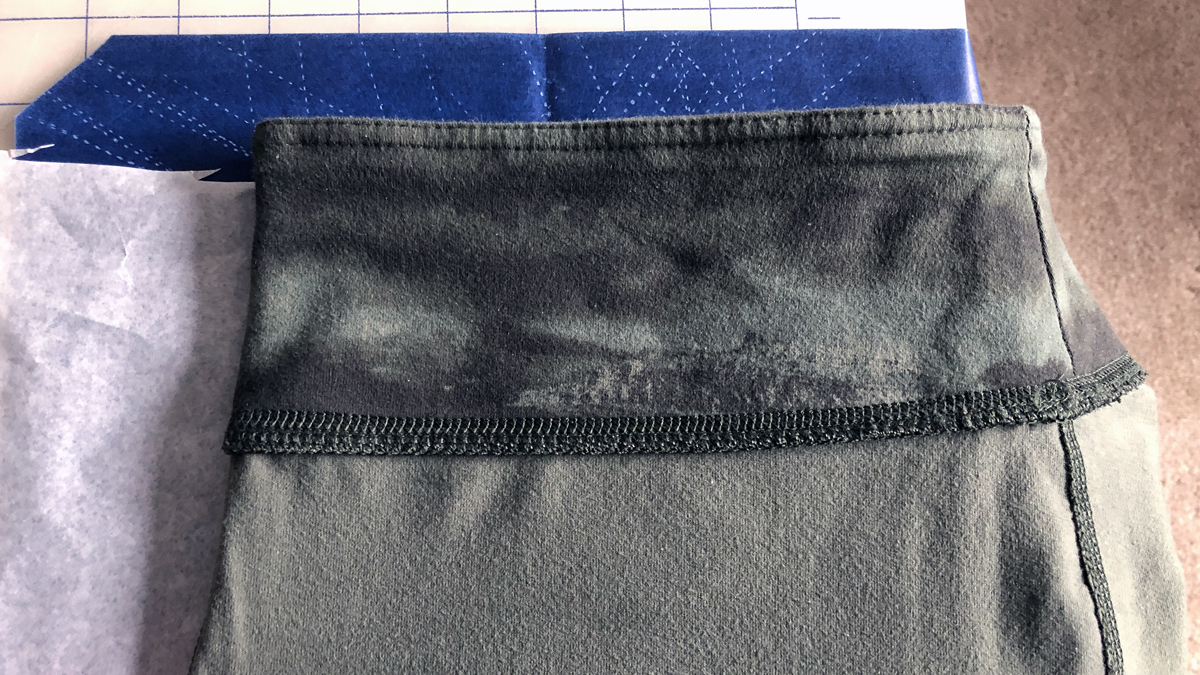
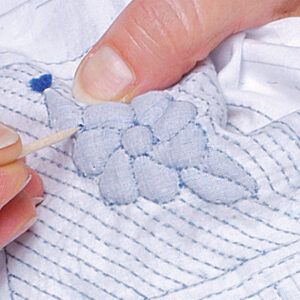
1. Prepare the garment for tracing a pattern. Turn the pants inside out and fold them so one half of the front waistband is flat. Also flatten the top portion of the pants, where the panel will be placed. You will make the panel pattern slightly shorter at the center front than at the sides by gradually lengthening it toward the sides. The dimensions I used were: 2.5 inches at the center front and 3 inches at the sides. You may decide on different dimensions based on your needs, but remember to make the sides slightly longer than the center front. You simply blend the cutting line to get the tapered curve on each side. Chalk-mark the desired panel shape on the pants, from the center-front seam to the one side seam.
2. Place a piece of pattern paper beneath the garment after you’ve positioned it, to measure and mark.
Then carefully slide a piece of tracing, or carbon, paper below it so that you can transfer the markings to create the pattern for your panel. You can use a tracing wheel for marking.
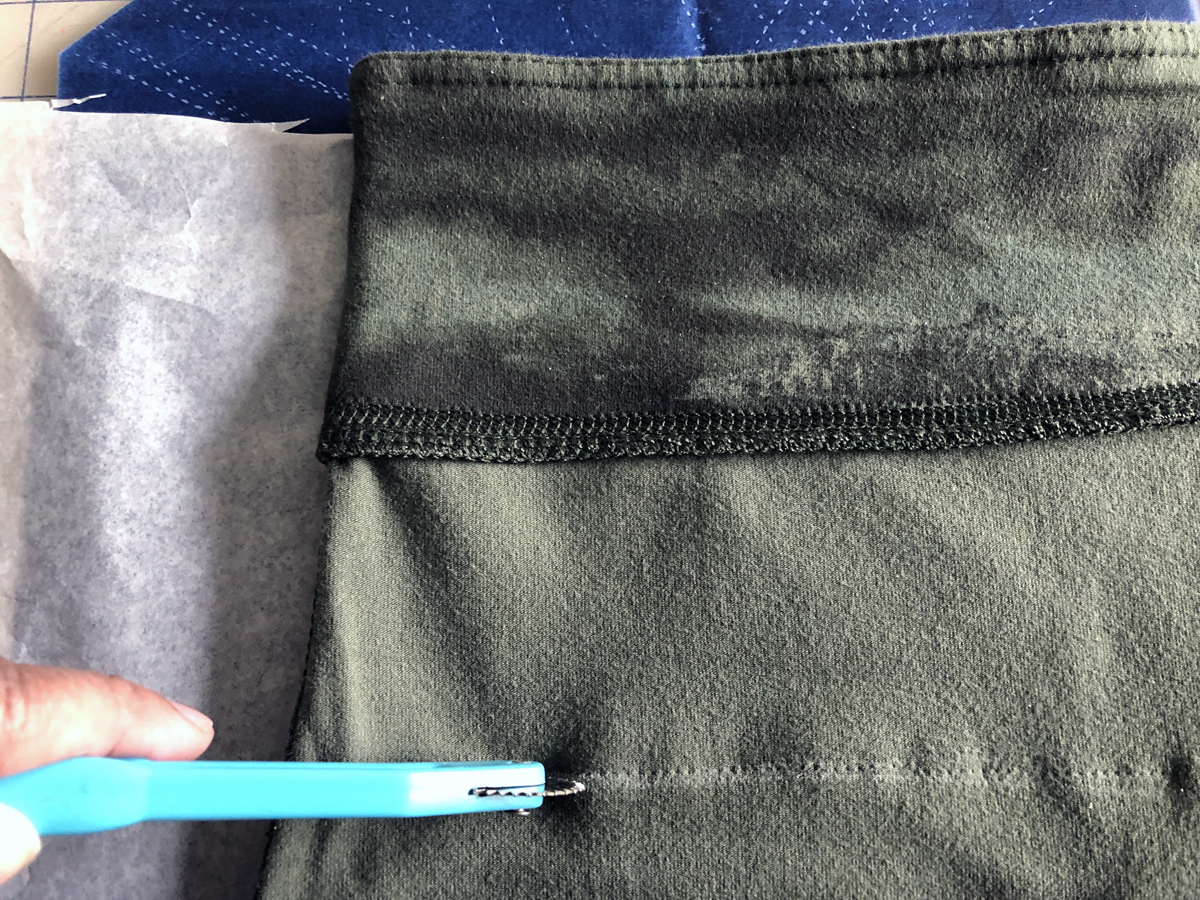

The pants’ front seam was slightly curved, so I was unable to cut the panel as a single piece on the fold. Instead, I cut two panels and stitched them together at center front. I created a pattern with extra seam allowance to do this (see the next step).
3. Add seam allowances to the traced pattern so you can later join the panel pieces at the center front and then attach the panel to the garment. I added 3/8-inch-wide seam allowances to the traced pattern for my already made garment. (Make the seam allowances the same width as those on the garment pattern you’re using, if you are adding the panel to a garment you’re constructing.) Don’t add a seam allowance to the bottom of the traced pattern, as that panel edge will be left raw, since the power net will not fray.

Sew the power net panel
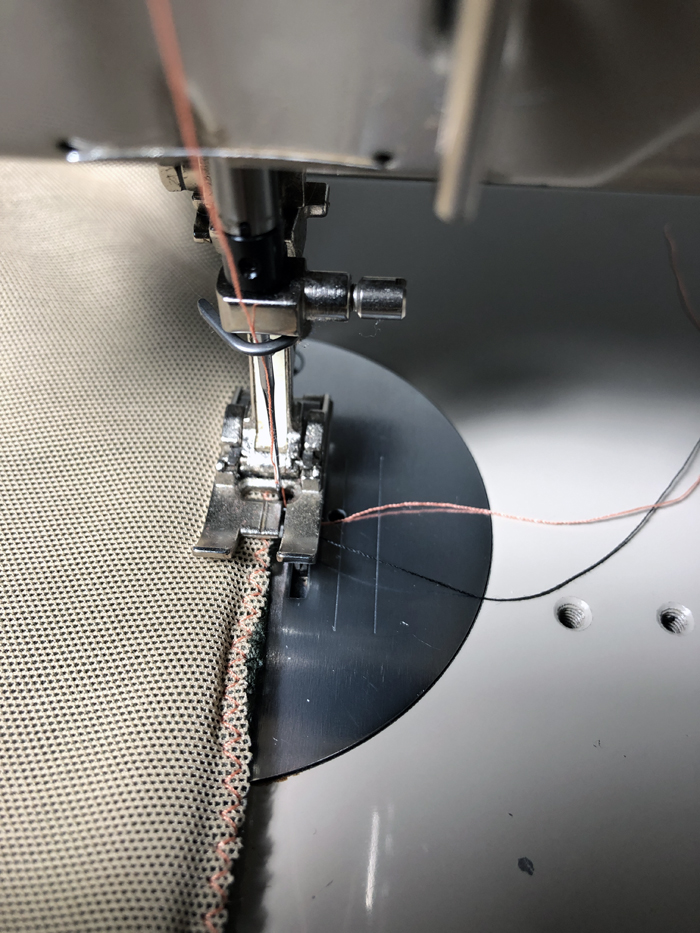
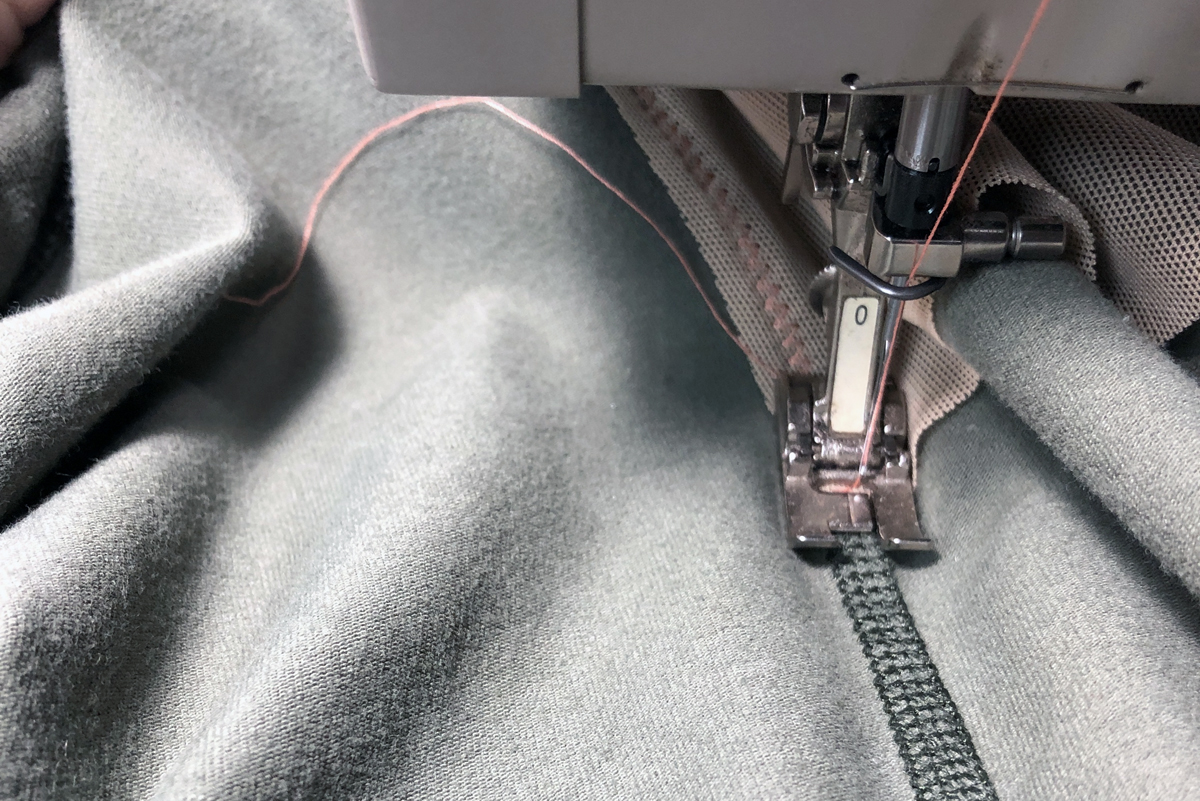
1. Overlap the cut panel pieces at the center front and zigzag them together using a small stitch (about 2.0 mm width and length). This keeps the panel pieces flat and bulk-free.
2. Pin the top edge of the panel to the contoured waistband’s seam allowance, keeping the sewn power net panel as smooth as possible.
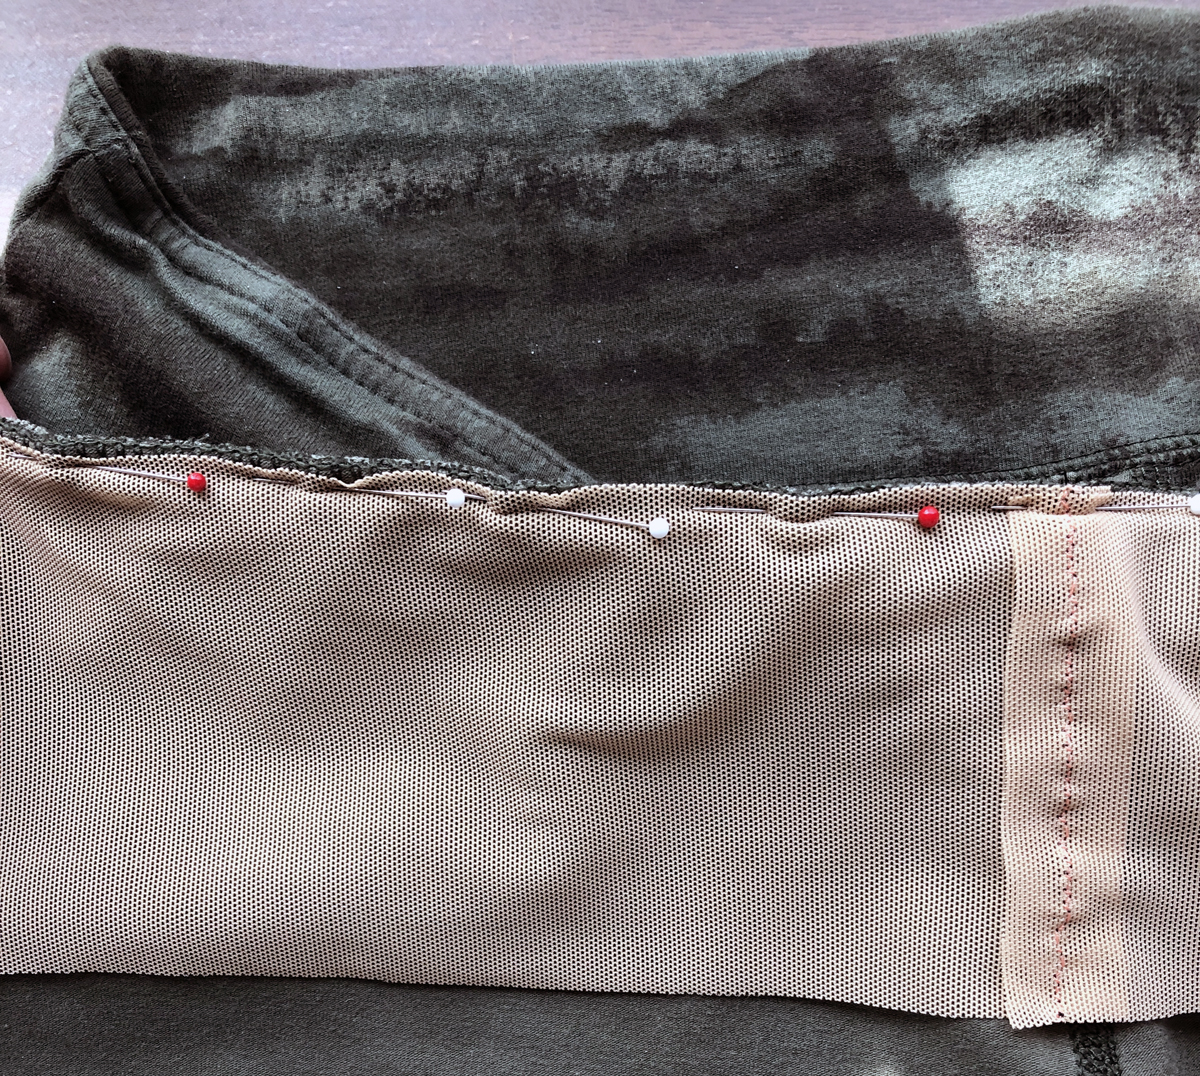
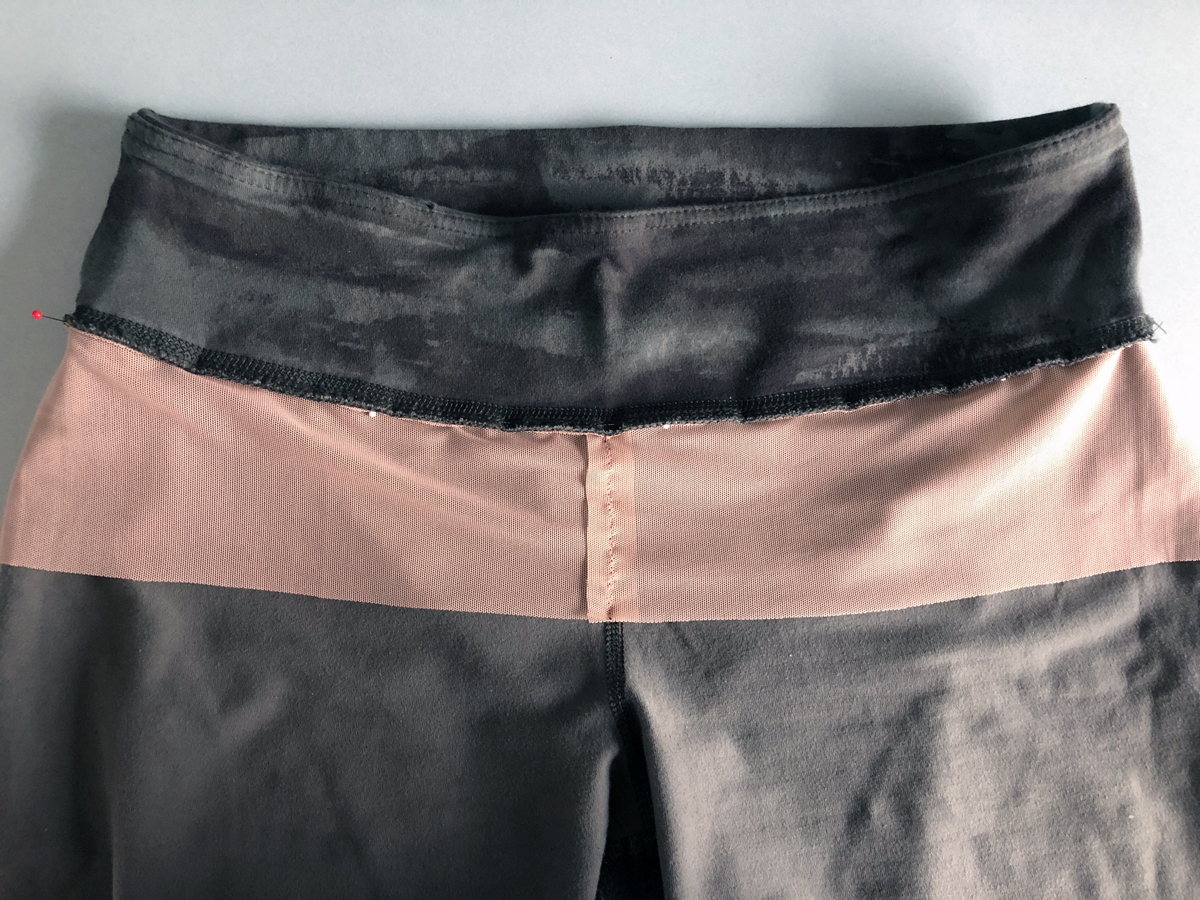
3. Use the same width zigzag stitch to connect the panel to the waist.
4. Smooth the panel at the center front and sides, and pin it to the garment.
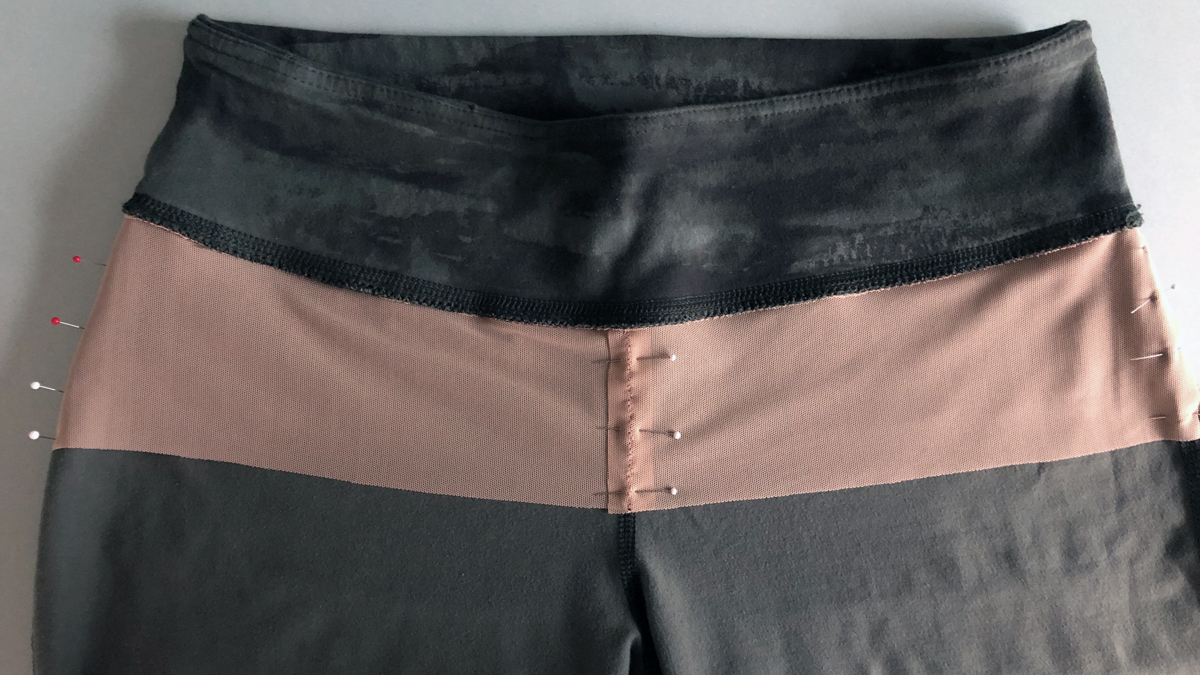
5. Attach at these locations using a wider zigzag—about 3.0-mm width and 2.5-mm length—to hold the center front and sides in place. Along these seams, sew through all layers; the zigzag blends in with the garment’s flatlock-stitched seams.
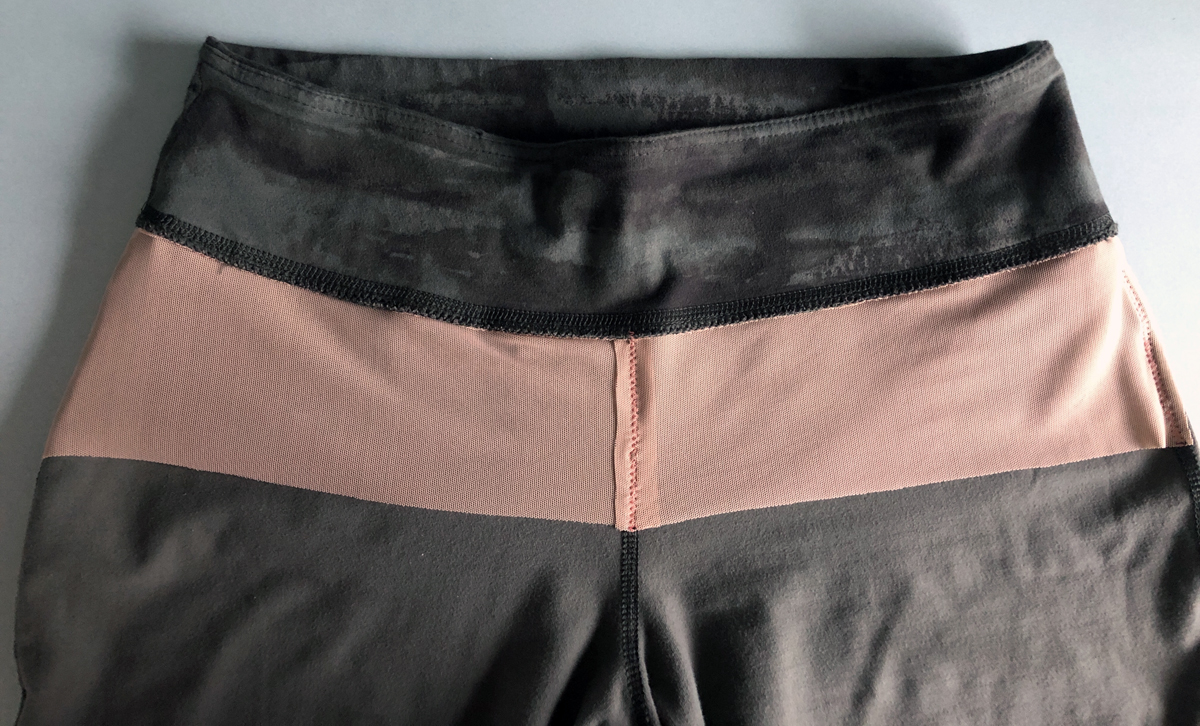
6. Once attached, press lightly at the center front and sides, and you’re done. This simple adjustment adds a light layer of control over the abdomen, for a smoother appearance.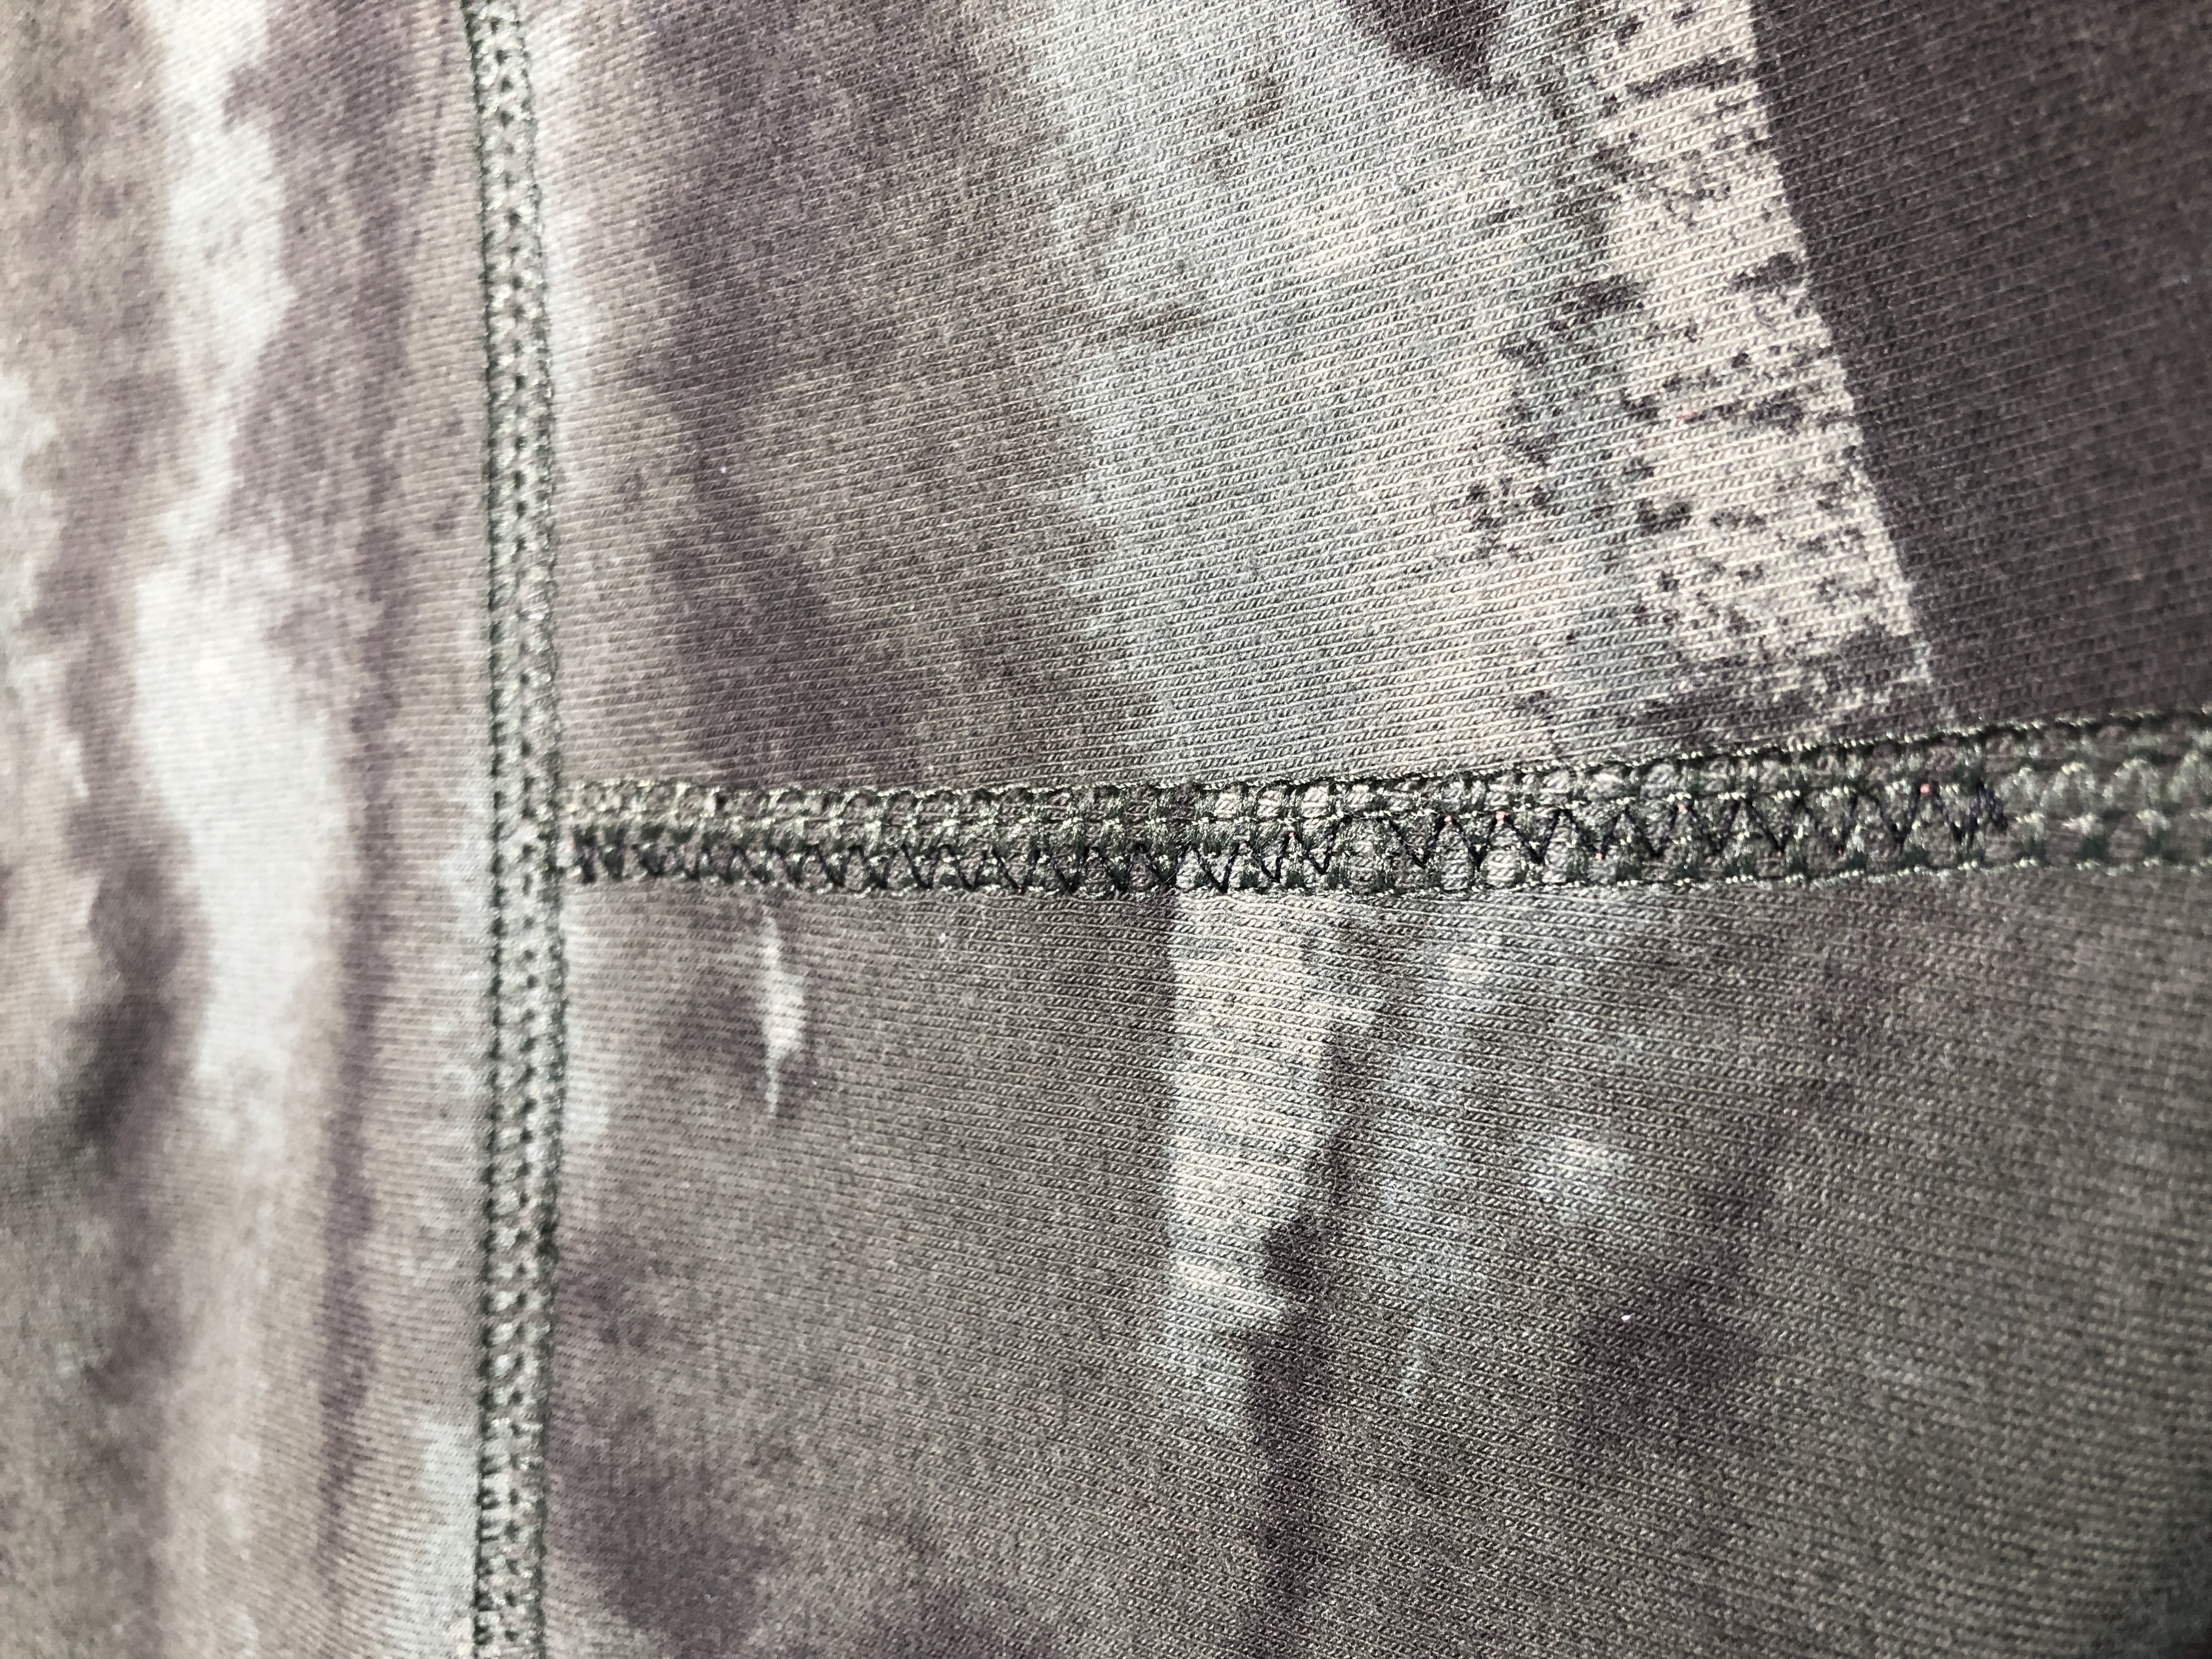

Check out more posts from alterations expert and advanced sewing instructor Pamela Howard.


Great idea- I’m going to try soon!
Thanks!
Take care, Pam
How does this help if the lycra is the same size as the garment? Shouldn't there be some negative ease to help pull in the tummy?
Hi, You don’t want to use more negative ease since the garment itself has negative ease. You can use a compression net fabric for the panel.
Thanks!
Pam
I considered trying negative ease on an older pair that is a bit loose on me. They have a hole near the crotch, so other than cutting the legs off to make head/hair ties, they'd just go in the rag bin anyway - unless patched for home lounging.
Unfortunately the powernet has been used in the wrong direction. It shuld have been turned 90 degrees so that the strong strands go around the body.
We reached out to Pamela, who says she tested her power mesh before cutting it, to determine the direction of least stretch. That direction should placed horizontally on the pattern piece, for the greatest control in the panel. Fabrics have different types of construction and stretch, so there's no rule for which way to cut (on the lengthwise or crosswise grain). You should always test and place the pattern so the least stretch is horizontal on the panel.
Carol Fresia, Threads Senior Technical Editor