
Sew a Designer Jacket Sleeve Placket
Assured clipping is the key to a flawless finish

An outside vent on the sleeve is a make-or-break detail on a designer jacket. Executed beautifully, it’s a wonderful functional detail, as well as a place to show off dazzling trim or exotic buttons. Yet often the highly desirable French-style designer jacket is made in a lofty bouclé or tweed. Such fabrics have lovely texture and depth but are not easily controlled. In that situation, the necessary ingredients for a sharp vent are: a light and stable underlining; judicious basting; a bit of stabilizing, and a cautious but confident hand when it comes to clipping in to corners.
It’s always slightly terrifying to make a deep cut into a seam allowance, but there are times when it’s necessary. What a deep clip does is allow you to manipulate the fabric—and, as you’ll see in your projects, the results are well worth it.
Prepare the layers
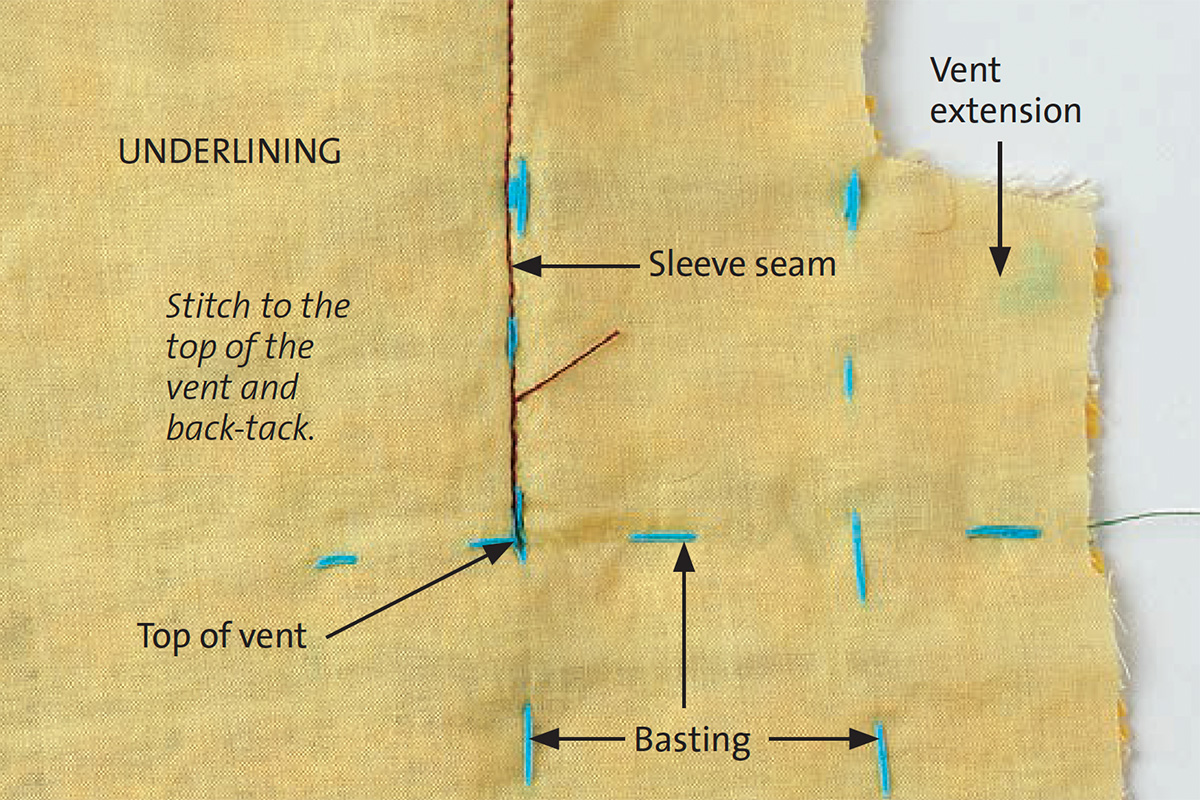
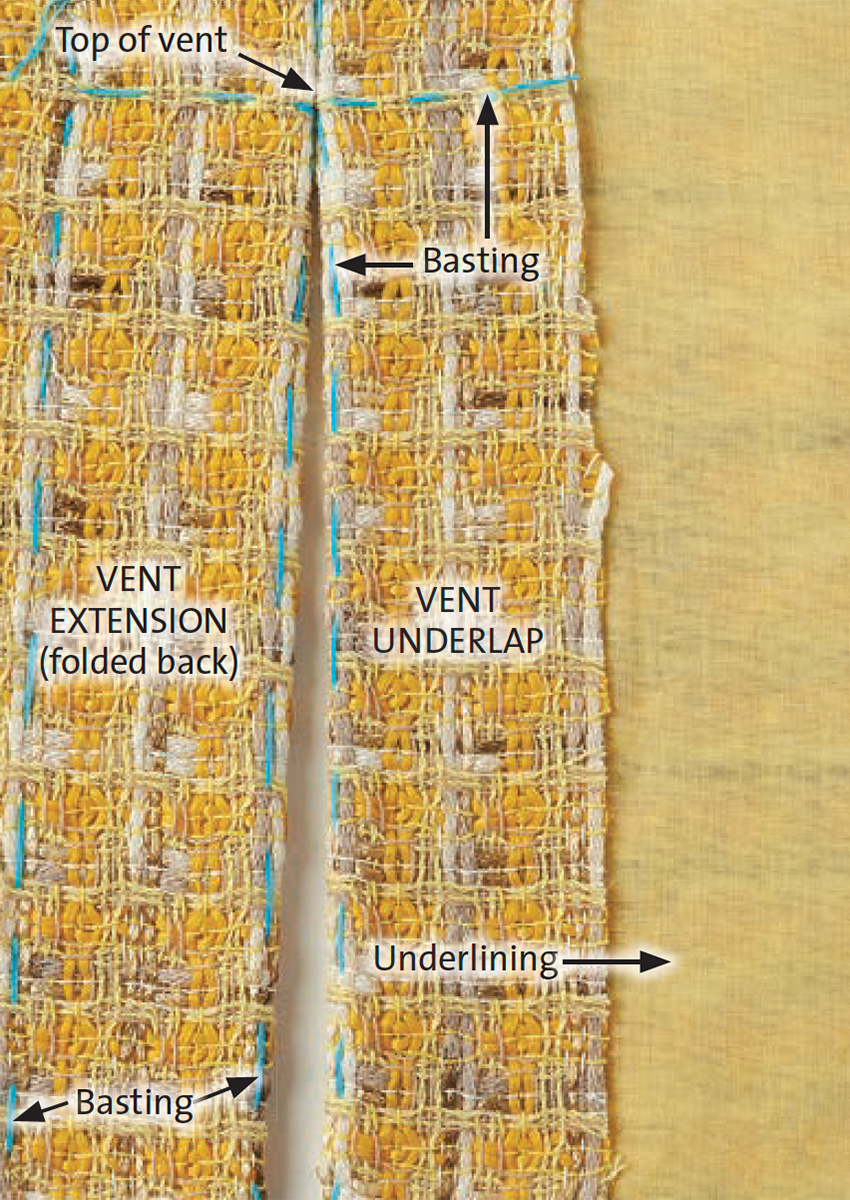
Leave extrawide seam allowances, as shown. Underline the sleeve pieces. Baste the fashion fabric and underlining along the seamlines as well as the outline of the vent extension and the vent underlap’s edge.
1. Sew the sleeve seam to the top of the vent. Back-tack at the end of the seam.
2. Stabilize the fabric in the area to be clipped. A little silk organza square does the job, acting as a facing. Place it on the fabric’s right side, which, before clipping, is on the inside of the garment. Silk organza is the perfect choice, as it’s sturdy and transparent. You can see exactly where to stitch and your stitch placement will be accurate.
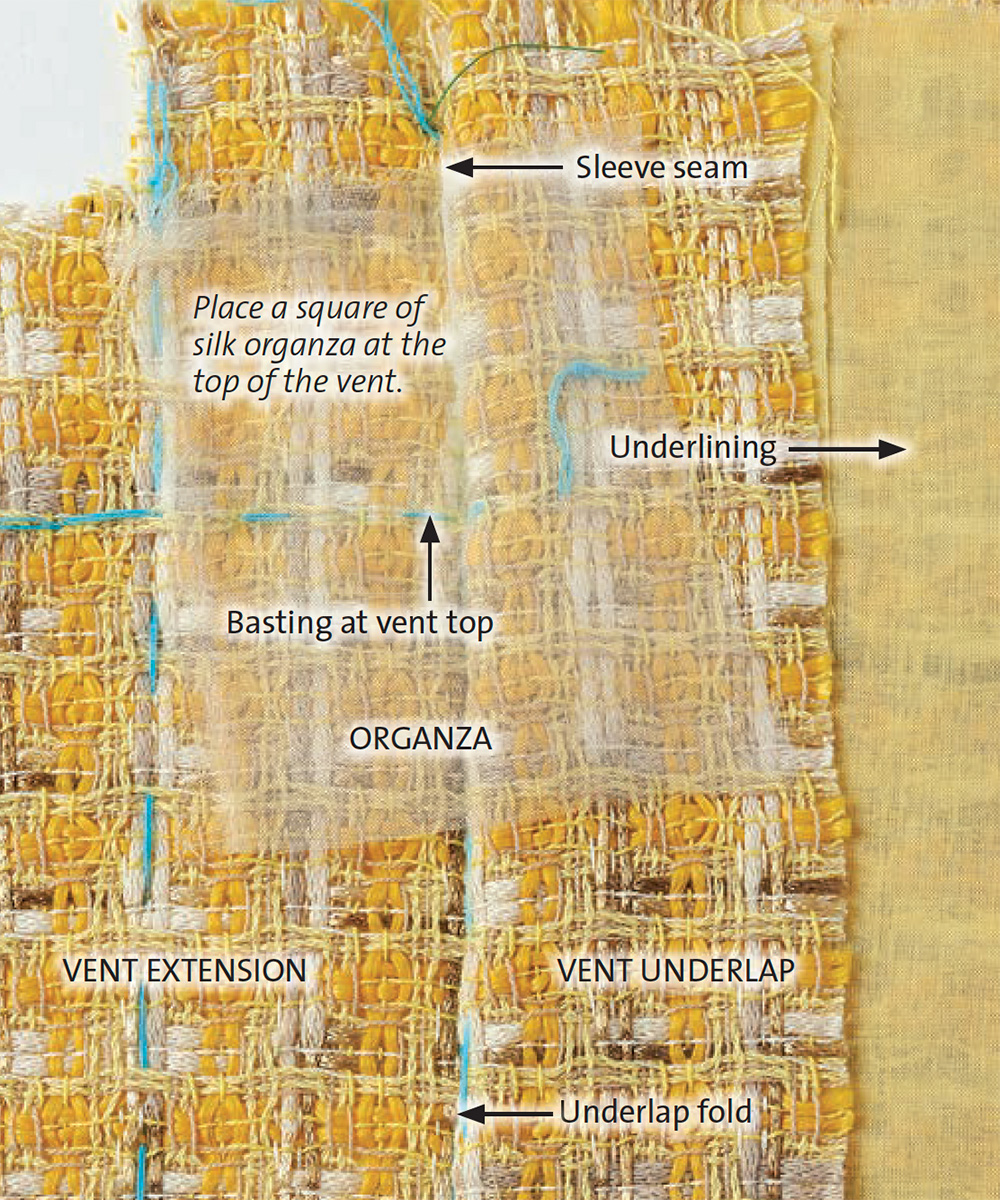
3. Stitch a right angle along the top of the vent. Sew through the vent extension…
Start your 14-day FREE trial to access this story.
Start your FREE trial today and get instant access to this article plus access to all Threads Insider content.
Start Your Free TrialAlready an Insider? Log in


Log in or become a member to post a comment.
Sign up Log in