
Tools and Replacement Parts to Fix Zippers
You can make your own zipper-repair kit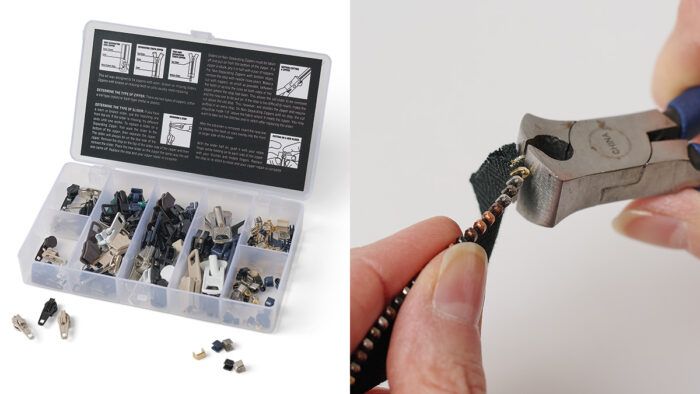
Can you imagine life without zippers? This closure has become such an integral part of modern clothing and accessories that we take it for granted. But when a zipper doesn’t work, it seems daunting to troubleshoot, repair, or replace it. Once you know a few tricks, however, it is easier to repair a zipper than to replace one, and often a small adjustment makes all the difference. A little practice is all it takes to become proficient at zipper repair. A few basic zipper tools and spare parts are well worth the investment to ensure favorite garments have a long, useful life.
Zipper toolkit
Build a versatile kit that contains replacement parts and tools for installing them.
Components
The main parts you can repair or replace in a zipper are the top and bottom stops, the slider, and the pull. The pull is attached to the slider so you can operate the zipper; often, the word “pull” is used to designate the entire slider and pull unit. You can purchase new zipper components and collect them from zippers in discarded clothes and accessories. It is helpful to collect an assortment of zipper sliders in different sizes and colors. Zippers with broken teeth are a good source for sliders to reuse. You can sometimes reuse the top and bottom stops. Just be sure to remove them carefully to avoid damaging them.

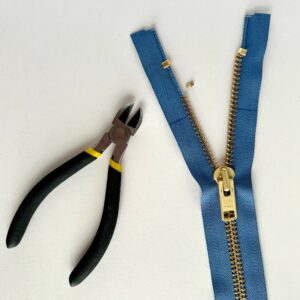
Pliers
There are several types of pliers that are handy to have for zipper repairs. End-cutting pliers are ideal for removing zipper teeth. Flat-nose pliers are excellent for crimping stops and tightening loose sliders. Needle-nose pliers can also be helpful for putting stops in tight spaces. Basic pliers facilitate gripping and squeezing loose sliders into alignment.
Pull teeth
If you need a metal zipper shorter than what you are able to buy, it’s easy to shorten one. Work from the top.
1. Remove the stops
With needle-nose pliers, gently pry off the top stops. Be sure the slider is close to the zipper’s bottom so it doesn’t come off the tape.
2. Remove the teeth
Measure up from the zipper’s bottom and mark the desired length. With the end-cutting pliers, pull off the teeth above this mark. Grip a tooth firmly with the pliers and pull at a slight angle. The tooth should slide off the tape. Repeat to remove all the excess teeth on both sides of the zipper.

3. Replace the stops
Use the original stops if you salvaged them, or apply new ones. Position a stop above the topmost tooth, with its curve snug against the zipper tape. With flat-nose pliers, pinch the stop to close it around the tape. Repeat on the opposite side.

Troubleshoot a failing zipper
The most important step in repairing a zipper is to correctly diagnose the problem.
Unstick a zipper
Extract caught fabric. If a small fold of the item’s fabric is trapped between the slider and the teeth, gently pull it out. Don’t pull too hard as this may damage the slider.
Clean the teeth and slider. If the zipper does not move smoothly, there may be lint or foreign matter stuck in the slider. Clean the slider and teeth with soap and water and a brush.
Lubricate the teeth. Rub them with special zipper lubricant (Zipper Lube, Wawak.com), or home remedies such as a paraffin candle (not beeswax), a pencil (graphite), or petroleum jelly (use sparingly to avoid attracting dirt).

Tighten the slider
The slider’s job is to bring the zipper’s two sides together so the teeth can interlock. If the zipper teeth are not locking properly and the zipper keeps gaping, the slider opening may have become loose. This is a common problem and is easy to repair. With either flat-nose or plain pliers, gently squeeze the slider’s zipper opening on both sides. Test the zipper to see if the technique worked; it may take more than one squeeze. Too hard a squeeze may break the slider or tighten it so much it no longer moves.

Replace the slider
Occasionally, a slider can’t be fixed and must be replaced. Replacement zipper pulls can be purchased in a variety of sizes and colors; you must match the size. To replace a slider, you can start from the the zipper’s top or bottom. Often the waistband or facing at the top is easiest to access. Open the seam just enough to access the top of the zipper tape. With end-cutting or needle-nose pliers pry off the upper stops. If you do this carefully you can usually reuse the stops. Work the old slider off the teeth, and then back the new one into place. Replace the top stops, squeezing them into place with flat nose or needle nose pliers. Re-insert the zipper into the waistband or facing and stitch the opening closed.
Shorten from the bottom
If broken or missing teeth are the problem, usually the zipper needs to be completely replaced. The exception is when the broken or missing teeth are at the very bottom. You can attach a new bottom stop above the faulty teeth. This results in a slightly shortened zipper but it avoids a complete replacement.
Remove any broken teeth with the end-cutting pliers: Also remove the teeth across from the broken or missing tooth or teeth with the pliers. Insert a new bottom stop in the gap, across both zipper tapes, or stitch across the gap with heavy thread to create a thread stop.
Katrina Walker is a designer and teacher based near Spokane, Washington.


Interesting article! I have been replacing the pull tab when the zipper splits open. I did not know I could just tighten that and I will try that instead next time. Thanks!