
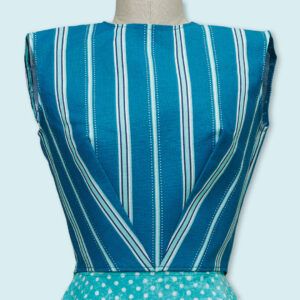
I inserted a back neckling zipper and one side is about 1/4 inch higher than the other at the neckline — VERY unsightly. I followed the pattern directions and put the facing in before the zipper. What can I do in the future to eliminate this problem. How can I fix it now?
Edited 1/14/2004 8:47:26 AM ET by Elaray


Replies
How to fix it now....you CAN cut the excess zipper tape off. Slide the zipper pull down to open the zipper completely. Do a few stitches over the top of the zipper where you want the zipper to stop (to keep the slide from coming off). Then cut off the excess.
For future reference, I like Nancy Zieman's method for putting in zippers with facings. I think it's in the "10-20-Minutes to Sew" Book. Best yet, call the 800 number listed on her website and ask! (http://www.nancysnotions.com)
Shannon
I think the most important thing you have to do here is to figure out WHY this happened. Was the zipper opening an even length on each side before you inserted the zipper? If so, you may have stretched one side as you sewed. This is a common problem and requires care to prevent. There isn't all that much you can do after the fact if the fabric has stretched, except to attempt to have another go at it, easing in the extra fabric. It really depends on the fibre content whether or not this will work. Sometimes this happens as a result of the action of the feed dogs, pushing the fabric ahead in front, especially if you sewed the zipper from the top, pivoted at the bottom, and then sewed the second side in the opposite direction to the first. With some fabrics it is best to sew each side of the zipper from the top to the bottom to prevent any stretch.
Hope this helps.
Sandy
Sandy, that's good advice for sewing in a zipper. Another thing that can help prevent stretching and rippling is to fuse interfacing in the area of the zipper. Use a strip that's about 1 inch wide, and an inch longer than the zipper; fuse it so that the interfacing will be caught in the stitching when you insert the zipper. Test-fuse a scrap first, of course, to make sure the interfacing doesn't show through the fabric or change its hand significantly.
I've recently taken a liking to hand-picked zippers; they're suprisingly easy to insert, much stronger than you'd think, and can provide an opportunity for a decorative touch . Check out Threads No. 89 for instructions and ideas.
Carol
I have to agree about the hand-picked zippers; they really are easy. They look very good when done, too.
However, the original post indicated to me that the problem might be in the bulkiness of the facing area. I have encountered this on numerous occasions; you put the facing in, turn it, and try to put a zipper in over all those seam allowances without distortion. The bulk is the primary reason for the problem, and Nancy Z. addresses this in her method. Basically, she stitches the facing to the zipper seam allowance first, using a small seam allowance. She then turns to attaching the facing at the neck. This is frustrating....wish I had pictures:) Anyway, the seam allowance joining the facing to the zipper seam allowance is off-set, away from the zipper tape, as a result of the method. The only s/a bulk to deal with is the actual point at the top, and that bulk can be easily trimmed. It makes a beautiful finish.
Shannon
The technique you describe is similar to one I learned in design school.....and you're right, it's very difficult to describe without illustrations of some sort. Basically, the facing is cut shorter than the adjoining seam and joined to the zipper placket first. This means that when you attach the facing, the zipper placket is wrapped to the inside....heck, I don't think I'm describing it any better than you, Shannon. But I agree, this one should be in everyone's repertoire. I love it for fly-front pants that have a facing rather than a waistband.
Carol, thanks for the reminder about fusing in the zipper placket area. Its a wonderful way to control unstable fabrics. I love hand-picked zippers too....and they are incredibly strong, which I know first-hand from having to pick one out recently ;-)
Sandy
Dear Sandy,
I think that the method you are describing is covered in the July '95 issue of Thread. With great illustrations of course. It looks very professional.
Nancy
Thanks, Nancy. I checked out the article you mentioned (by Gale Grigg Hazen) and also the technique by Nancy Zieman in "10-20-30 Minutes to Sew". They are both similar to what I learned. The Threads article specifically covers lapped zippers and is a little different in how the author wraps the facing around the placket and sews the facing to the top edge of the garment before inserting the zipper. Zieman sews the zipper to the garment first, sews the facing to the zipper placket and then attaches the facing at the upper edge, folding the zipper to the inside. I do it pretty well the same way Zieman does. But then I haven't clean finished facings at a lapped zipper in recent years!
Sandy
This post is archived.