
Carol I love the cover and the scarf I want more info on how to do the sleeve. Do you create a continuous strip and sew it in a spiral and what happens at the armskye???
Conversational Threads
Threads Insider
Get instant access to hundreds of videos, tutorials, projects, and more.
Start Your Free TrialAlready an Insider? Log in
Conversational Threads
Threads Insider Exclusives
View All-
A Journey to Digital Patternmaking
-
Sew the Ultimate T-shirt
-
Don’t Go It Alone: Collaborate for the Best Design Results
-
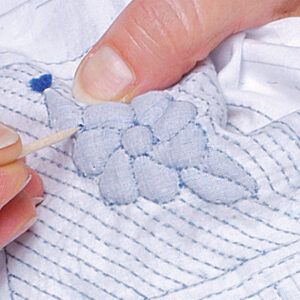
Boutis: Adding Dimension with Corded Quilting
-
Work with Darts to Get a Better Fit
-
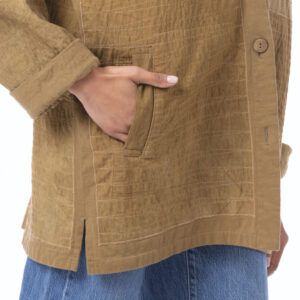
Sew a Low-Profile Welt Pocket
-
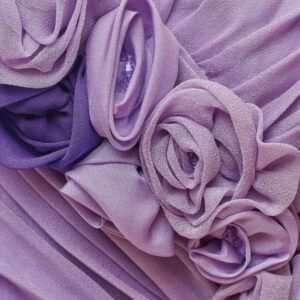
Trending Details You Can Make: Lush Fabric Flowers
-
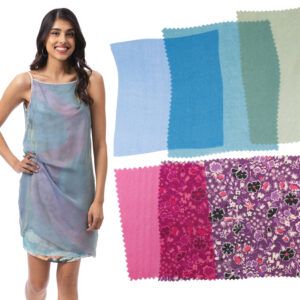
Sewing with Chiffon
-
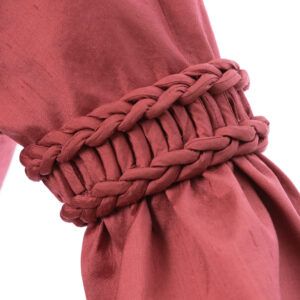
Fashion a Magnificent Braid from Bias Tubes
-
Boutis Provençal: Stitch First, Stuff Later
-
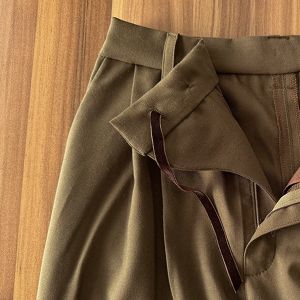
Make Tailored Trousers More Comfortable with a Secret Drawstring Waist
-
Reimagining a Couture Look by Galliano
-
Hand-Sew Collars and Facings for Extra Neat, Sharp Results
-
Make a Statement With Oversized Silk Blossoms
-

Designed for Living, Not for Fashion
-
Pattern Review: Atelier 8 Avril Lapiz Blouse or Dress


Highlights
-
Sign up for the Threads eletter
This site is protected by reCAPTCHA and the Google Privacy Policy and Terms of Service apply.See all newsletters -
 Sponsored Content
Where to Buy
-

-

-

-


Replies
I'll bet they didn't show the whole sleeve because there wasn't one and it wasn't set into any armseye! But I think it's a marvelous idea. I would make up a piece of this fabric and cut out my own generous pattern for playing. I love the idea.
Ok, I have to confess that that sleeve was not a whole sleeve. It's made like the blue spiral scarf shown on p.32, though, with about 6 three-inch-wide strips sewn together and then rolled and sewn into a tube (the ends are not closed off, however--they were roll-hemmed before the spiral was formed.
To make a real sleeve, what I would do is sew the strips together, and baste them into the spiral tube the way you want it to fall at the wrist. Pull the tube over your arm, as if it were a sleeve, and up to the armscye of your garment; pin it provisionally into the armscye. Mark on the spiral where the shoulder seam and sleeve notches fall, along with any other placement spots you feel are necessary. This doesn't have to be absolutely perfect--you don't really need to "drape" a full sleeve at this point (although if you're comfortable doing so, that's an excellent way to proceed).
Remove the sleeve, and mark a few match points along the spiral seam, so that when you take out the basting stitches you'll be able to put the spiral back the way you had it.
Undo the basting, and lay the sleeve flat. Place your sleeve pattern over it, so that the sleeve cap match points meet up with the shoulder mark and the notches you marked on the fabric. You won't be able to get the entire sleeve pattern onto the fabric, of course, but you do need to cut the sleeve cap to fit the armscye. At that point, I'd resew the sleeve into a spiral, and set in the sleeve.
There will undoubtedly be some fudging here and there, probably in the underarm area of the armscye. Because the overall effect is kind of organic, though, you can kind of ease the fabric in and squoosh it around a bit and not create any noticeable goofs.
Let me know how it goes!
Carol
That scarf is wonderful! In all the whining we've been doing about Threads lately - this is a glorious comeback! Fashionable, flexible, a great starting point to new leaps of inspiration!
I hope everyone makes one! I love this scarf, and am dying to adopt the cover sample as my own. For now it hangs gracefully on the wall outside my cubicle, though. It's such a lot of fun to make, and then to play with once it's done.
Here's information about yardage, requested in another discussion, but pertinent here as well:
For the Ripply Scarf shown on page 29 of Threads, No. 119, you’ll need 2 1/4 yards of 45-inch wide-fabric; we used silk organza, but synthetics will work as well. The scarf itself calls for 12 3-inch-wide strips of fabric cut on the true bias, so you will end up with two large scraps of fabric, each one a right triangle that measures 45 inches on each short side and almost 64 inches along the hypotenuse. These leftovers can be used for interfacing, lightweight stay tape, bias trims, etc.
<!----><!----> <!---->
Another way to create this scarf and save on yardage is to use the directions for bias layouts shown in Threads, No. 107, pp.30-34. Start with a 1 1/2 yard length of 45-inch-wide fabric, and sew it into a bias tube. Cut the tube open to make a flat rectangle of fabric; this rectangle will be 64 inches x 38 inches (more or less). Cut strips parallel to the long edges of the rectangle, and stitch as shown in the scarf article. The main difference if you use this approach is that you’ll have some piecing seams along the strips, and the ends of the strips will be cut straight across rather than at a 45-degree angle. (If you cut the tube open on a line that runs at 45 degrees to the edges, rather than straight across, your strips will have slanted ends.)
Carol
Carol,
Yardage requirements were only the first problem. A diagram for how to stitch the 3" pieces together (beyond what is shown in the article) would be a big help. Maybe I will try tomorrow with scrapes to get the organization of this sorted out.
Thanks, Connie
I was so glad to "stumble" across a discussion for this scarf. I desparately want to make it, even ordering silk organza by mail, and followed the direction "to the letter" about cutting the fabric on the bias. However, I cannot seem to make the fabric "ripple" as in the illustrations, even stretching it taut between the back and the front on the sewing machine. HELP!
Hi,connie...just joined this threads discussion after spending a frustrating afternoon trying to make THAT scarf!! Did you ever get any further clarification on the yardage needed? I'd like to use 3 colours but am not into dying anything. I tried 1 /2 yd. of 45" organza but that was a joke!! I found the directions very confusing...even had to get my hubby involved to see if he could decipher them! I'm not an advanced sewer,although I've sewn for many years. Every time I try something difficult, I end up with a garment in the garbage. Anyhow, if you know what yardage I should get, I'd appreciate a note. Thanks, Mickey
Mickey,
Pls see email note from carolfresia to Barb on 5/4/05 regarding this question.
Bottom line she gave another way of cutting the fabric but in either method you need 2-1/4 yards of 45" goods. The alt. method may be easier for your plans to use 3 colors.
Good luck. Connie Bleil
This post is archived.