

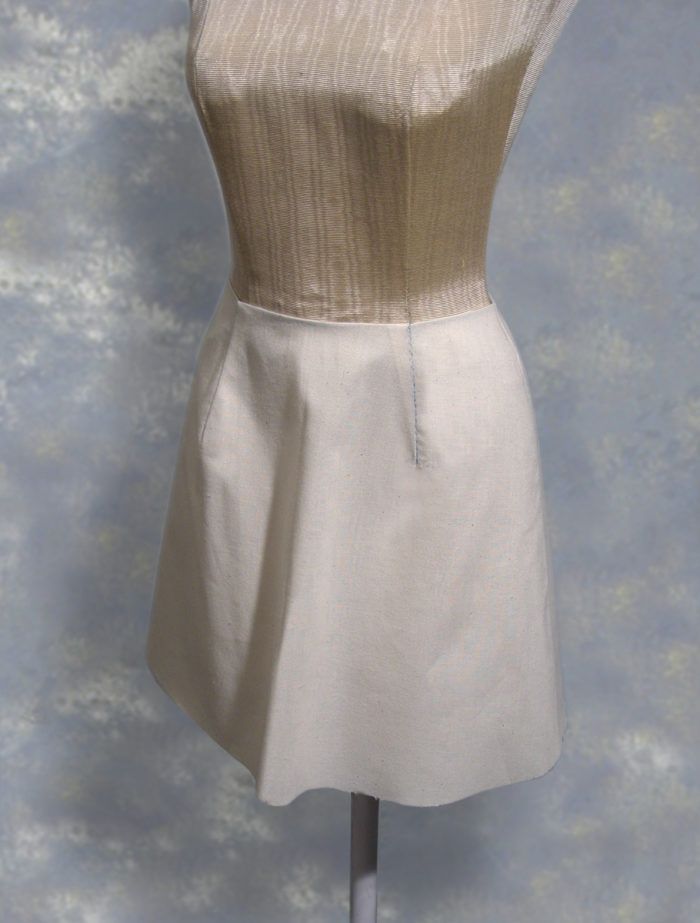
The flare in this skirt folds down the center front in an unattractive way.
The new approach I have developed for fitting evolved from a sentence I used to hear in classes: “The drag line points to the problem.” I’d get frustrated about being told to “adjust” here or there-without knowing how much to adjust. This sentence contained the conceptual framework that underlies the different fitting methods, but I couldn’t find any information that explained the principles that make this work. Since I’m not one for rote learning, but need to know why it works, I made understanding this my Holy Grail.
I began to understand the operative principle through an experience with a former studio-mate who was a fashion designer. When the flare in a jacket skirt didn’t fall where I wanted, I planned to stiffen and weight the hem to get the proper result, until my studio-mate showed me a trick. He folded the ripple out in the muslin, and then told me to fold it out in the pattern. Then, after that, slash the pattern, and insert the exact same amount right where I wanted the ripple.
Now, this seemed like magic to me, but when I did it, it worked. To my thinking, it didn’t make sense, but when I manipulated the pattern, it indeed worked. And yet, to the casual eye, the pattern appeared unchanged.
The connection I made then was, you need to deal with the region of the pattern in question to correct a problem. By doing this, the pattern piece outline is changed to reflect the correct shape for the figure.
I’ll demonstrate this idea by showing flare on a skirt, and how you can move it around. In the muslin above, the ripple is pronounced at the center front. This isn’t a pleasing line. I’ll show you how to move…
Start your 14-day FREE trial to access this story.
Start your FREE trial today and get instant access to this article plus access to all Threads Insider content.
Start Your Free TrialAlready an Insider? Log in


Kenneth,
Thanks, beautifully and easily illustrated. I always understand and follow what you write.
Love your books by the way!
As a PS would love to know where to buy the jewellery findings you used in your book Home Sewing Couture Techniques. I would love to re-create this fabulous look.
Thanks for your inspirational books and articles.
You explained the concepts beautifully. It seems to me that the final affect is that the dart is pointing at a different angle, more to the center. I tried printing your drawings and overlaying them to see if that was the case but I can't get them to print to the same scale. So I'm still wondering if there is any difference between what you did and just changing the angle of the dart.
Well explained both verbally and visually! Maybe you can post illustrations to explain the "Net Gain" concept. I can't seem to visualize why you slash the muslin 90-degrees to the drag line. Thanks.
This is similar to the idea on pg. 52 of Sandra Betzina's book Power Sewing (1985). The topic is GRAINLINES THAT FLATTER. However, her method neccesitates making a CF and CB seamline and this method doesn't. Thanks for the information
This same method can be used to created a "flair" on a pants leg. Simply make a cut in the pattern to the knee area...or as far up as you desire...on both back and front legs...pull open the pattern leg to the width you want the flair to be...then cut on the cut line as usual. When stitched, the pants leg will fall in a "flair" or "boot cut" at the bottom edge. Been using this method for 40 years to make jeans for my daughters!
I have been sewing for many years, but this most useful tip is well appreciated. Thank you so very much.
As a textile proffesor I would like to mention that the reason you can make this change is that you are moving the grainline. Yarns in a woven fabric hang vertical and will try to fall toward the ground (following gravity like a plumb line). When there is a flair the fabric will try to fall along the vertical grainline and create a ripple in the excess. By moving the position of the grainline you can change where the fabric will fold.
This article shows a simple method of moving the fabric around the grainline to create the effect you want. To test this theory: Cut one skirt front from with the grainline down the center front, cut one with the center front on the bias and a third with the straight of grain at the side seam. By manipulating the grainline you will see how to make a flaired skirt appear slimmer or wider by the placement of the ripples.
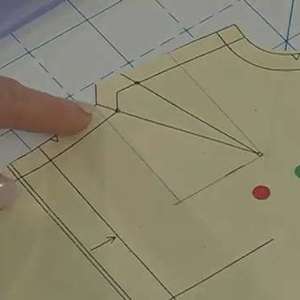
In this pattern manipulation, the dart shoud have been reduced. By slashing from the dart tip to the hemline and rotating until the gap at the hemline is equal to the piece removed, the distance between the dart tips would have been maintained. Doing this makes the skirt fit more flatteringly and poufinees around the dart tip would dissappear.
I agree with flatCAD, I would have added the moved fullness to the dart line.
Otherwise, nicely illustrated and explained. Fitting is the most difficult part of sewing and why most home-sewers get frustrated with their results.
I can't believe that makes such a difference! I love the finished look.
I agree that the darts look slightly different because the dart line would be displaced because the new center front is now angled straight down rather than at a slight angle from the dart section. It's only a slight difference, though.
Just wanted to post for others to see: I've been following your net gain/loss concept for about two years after getting your DVDs on making muslins, pants, etc. What ah-ha moments these were for me. At first I didn't believe it would work, but it really does. I use Wild Ginger's Pattern Master and actually apply your concepts of fitting to that program. Works beautifully. I've also applied the concepts to regular patterns and it works beautifully on them, too. Thanks, Kenneth.
To Smockerlady,
The jewelry findings on the cuff, are vintage old stock. I purchased them probably 15 years ago from a small bead store going out of business. However, if you keep an eye out, in bead stores and places that sell jewelry findings, you can find similar things to create a similar look.
To Denisesews,
The differences in the outlines of the pattern are very subtle--to the casual glance, the pattern really looks the same. The changes that occur, were explained to me by someone I met at a party whose hobby is physics (go figure!). He said,t hat fabric is a grid, and this all had something to do with lines of tension and vectors. Textile Maven expressed that well in her (I think her?) post. So, just changing the angle of the dart won't effect any change here.
To Vquilter,
In the case of net gain, the drag lines indicate a bind, or an insufficient amount of fabric along the line. (Somewhat like the guy with the beer belly, wearing a too-tight shirt, where the belly causes the buttons to pull, making horizontal drag lines. The gaps on that shirt indicate how much extra fabric it wants across the front, so it can relax.
Keeping this (rather unattractive, yet useful) image in mind, imagine the center front of the shirt as the slash line you need to make 90 degrees to the drag line. If you were to unbutton the shirt (sorry), you would get a gap, that would tell you how much to add across the front to make the shirt fit the beer belly.
That's why you need to cut the muslin 90 degrees to the drag line. When the muslin spreads, it "tells" you how much area you need to add to that region of the pattern to adjust. When you add to this region, it by definition will change the outline shape of the pattern piece. Sometimes the pattern will look strange to the eye, but as long as it "reads" properly in the body, it's correct.
Wonderful tip for us here,thank you so much.
Question....How would you take the flare out of a sleeve? I have a jacket pattern that has flare sleeves, no cuff, and I would like it much better if the sleeves were straight. Simplicity 2474.
Thanks
Removing flare from a sleeve works the same way as you would for a skirt. You fold the flare out of the section of the muslin where you want it removed,and then transfer that to the pattern. You'll make the alteration as a wedge shape, all the way to the armhole seam.
Thank you textile_maven. I actually just looked that up in my college sewing text book today. Since I was trying to figure out what would happen to the skirt of a dress, and how it would hang, if one half was cut on the bias and the other side was cut on grain.
I think that it would help if there was a grainline on the pattern images in this posting. That way it would be easier to see where the fabric was moved to.