

Making a Narrow Back Adjustment
Fit a garment with vertical wrinkles along the outer edges of the back shoulders.

A garment may fit everywhere, but if vertical wrinkles form along the outer edges of the back shoulders the garment is just too wide in this section of the pattern. Situations like these call for you to make a narrow back adjustment. This technique narrows the back, particularly at the back of the armscye, but the hem circumference and shoulder seam remain the same.
1. Draw a vertical line parallel to center back from the hem but stop at a point level to the underarm corner. Angle the line from this point to the outer third of the shoulder seam.
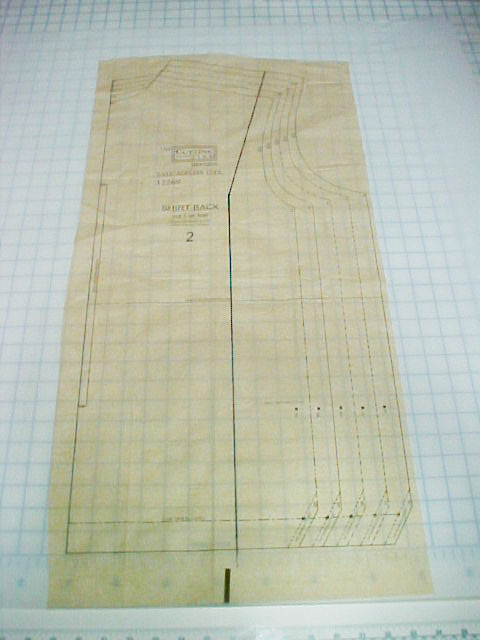
2. Draw a horizontal line from the underarm corner to the angle in the line from step 1.
3. Slash along both lines, leaving 1/8-inch hinges at the shoulder and underarm corner stitching lines. The vertical line is slashed through the hem.
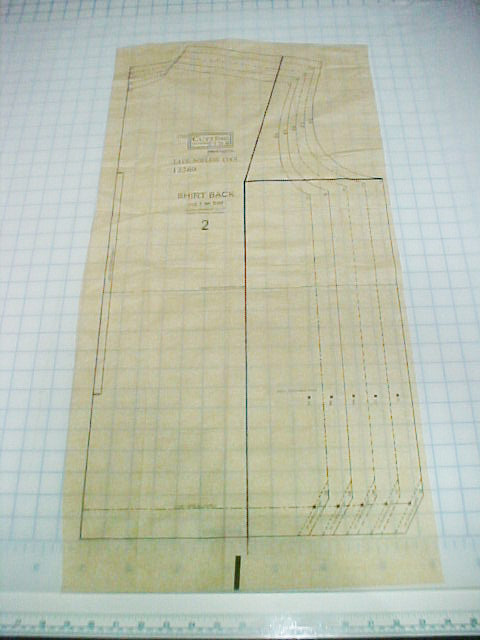
4. Place a piece of tissue paper under the horizontal line. Push the underarm corner toward center back, so the vertical edges from step 1 overlap by the amount needed. The edges from the horizontal slash will open. Tape all slashes into place.
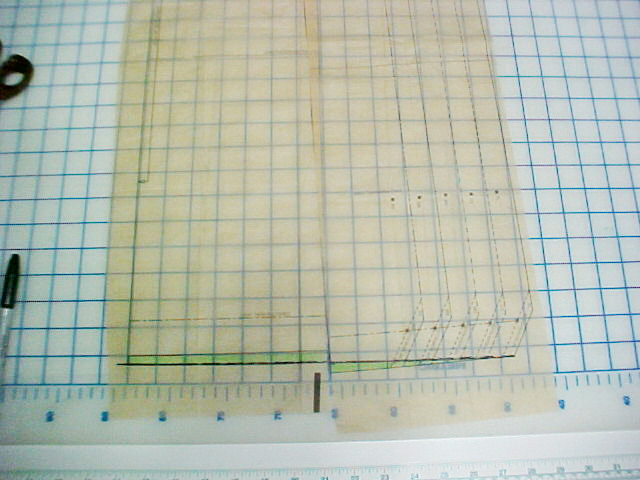
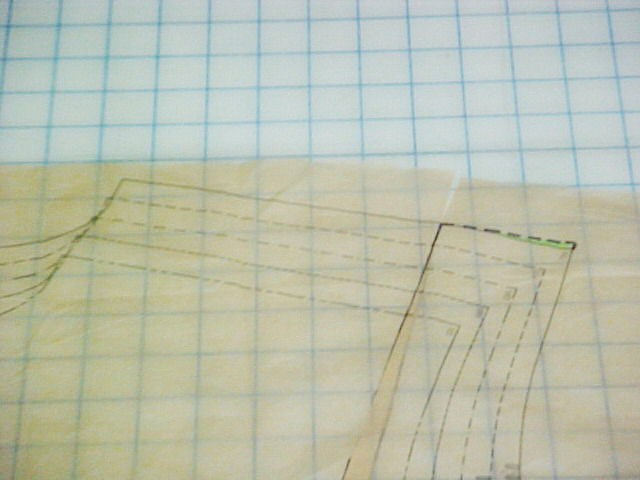
Below is a close view of the horizontal opening slash at the underarm.

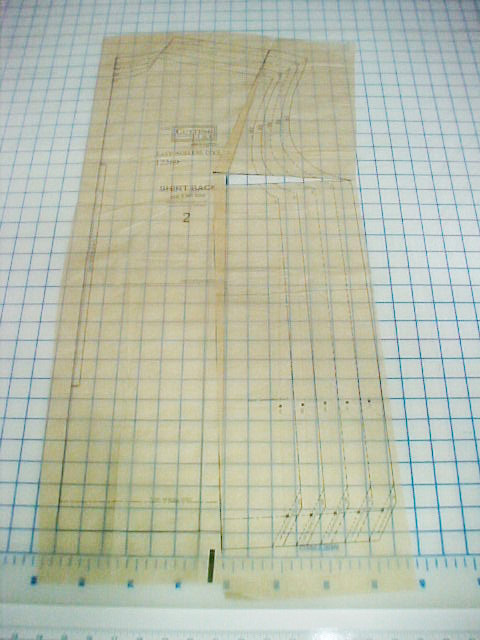
5. True the hemline. Depending on the original pattern design, the center back might need to be 1/4-inch to 3/8-inch longer. Make sure the side seam does not get longer. The front and back of the garment need to match at the side seam.
6. Finally, true the shoulder seam.
The narrow back adjustment is achieved.
Start your 14-day FREE trial to access this story.
Start your FREE trial today and get instant access to this article plus access to all Threads Insider content.
Start Your Free TrialAlready an Insider? Log in


Nice article. Would even be valuable with a picture of the "vertical wrinkles form along the outer edges of the back shoulders".
Hallelujah! I finally know how to fix that now. LOL I have a very vivid picture in my mind of those vertical wrinkles. They've been haunting me on a jacket muslin where no matter what I did to alter the pattern it seemed to just shift the problem around. Thank you!
how do you determine how much to remove?
Great article. I have the opposite problem: a wider than "normal" back. Can this alteration be used in reverse? That is, can I use the same lines & slashes, spreading instead of overlapping the vertical slash, & allowing the horizontal armhole slash to behave correspondingly? Thanks for sharing your expertise.
How would this work for a short back with horizontal wrinkles?
This looks good for a narrow back - which I have, but I also have a narrow shoulder. How do I fix this too - especially on jersey fabrics using a wide front neckline??
I have used my upper bust measurement to accommodate for narrow shoulders but still needed to do further adjustments to the back. Princess seams and back darts have made such alterations easier, but this added technique is very helpful for patterns without those features. Thanks so much.
Louise, once again, you have just blown me away with the absolute genius and simplicity of your technique and instructions!! A full bust adjustment in reverse, for a small shoulder area, that is just brilliant. Most techniques would have ended up altering the entire back width, not good for those with hips to consider, but this technique moves only the shoulder blade fullness!
Is there any wonder you are my favourite technique author!
Jean Morgan
There was a question about how do you know the correct amount that can be removed. You can be more accurate on a set in sleeved garment than a drop shoulder, but still some amount of vertical fulliness may be removed from this style also using the same alteration.
For a garment with a set in sleeve, you need a sewing buddy to help measure you. Stand with your arms hanging straight against your body. The measurement is taken straight across your back from the 'crack' were your arm joins your body to the other 'crack'. In the pattern this is about where the back notch is on the armseye. You need to add an additional 1" to this measurement for movement.
Now you have an idea of the across back width you can now adjust the pattern.
I will try to address the additional questions you had about pattern adjusting in future blogs. They need pictures of tissue patterns and the adjustments.
Louise Cutting
My problem is that garments are usually too large at the upper back and it seems that a neck dart would take in the extra fabric. Or maybe a slight angle at the top of the center back seam. Is your article suggestion the proper or better solution to my problem? Thanks!
Thank you for this! I feel like there are hoards of information on broad backs but narrow backs are ignored. This is incredibly helpful!!!!